
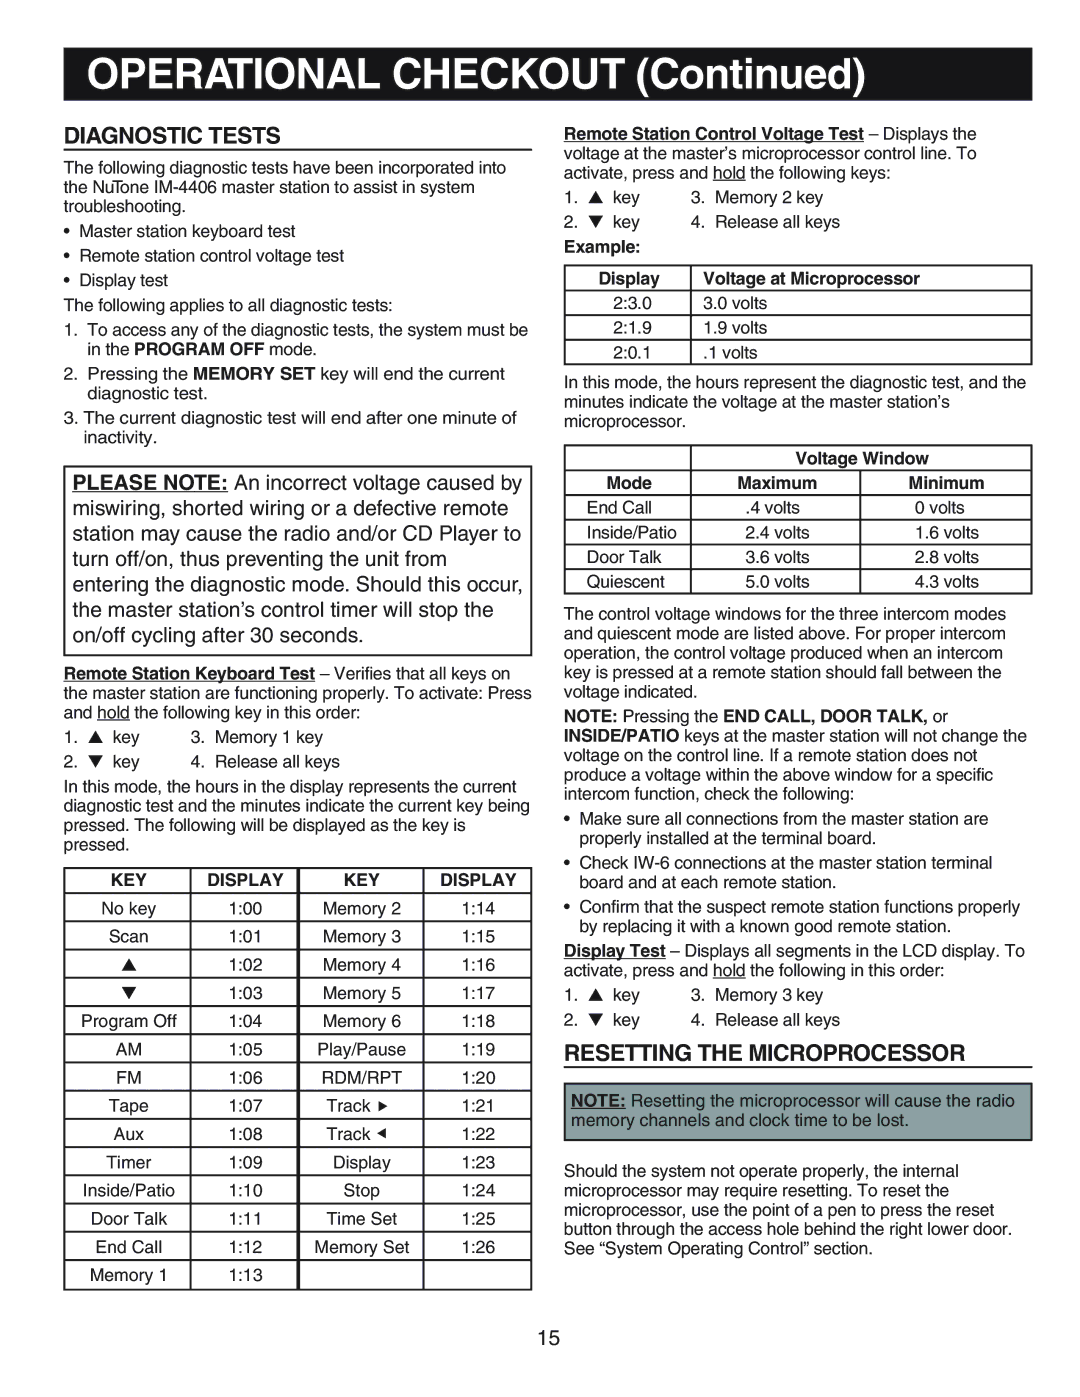
IM-440 Series specifications
The NuTone IM-440 Series is a highly acclaimed intercom system designed to enhance communication and convenience in both residential and commercial environments. Renowned for its utility and efficiency, this system combines advanced technology with user-friendly features, making it a popular choice for those looking to upgrade their intercom systems.One of the standout features of the NuTone IM-440 Series is its versatile communication capabilities. The system supports both intercom communication and radio broadcasting, allowing users to not only communicate with different rooms but also listen to music or news throughout the premises. This dual functionality positions the IM-440 as an all-in-one solution for audio entertainment and inter-room communication.
The IM-440 series employs robust technology to ensure clear audio quality. Utilizing advanced circuitry, the system minimizes interference and enhances sound clarity, making conversations more intelligible and enjoyable. This technology is particularly useful in larger homes or commercial spaces where distance can affect sound quality.
Installation is made easy thanks to the IM-440 series' design, which supports a variety of mounting options and is compatible with numerous room types. The user interface is intuitive, featuring a simple-to-use control panel that allows for straightforward navigation and operation. This focus on user experience is evident in the attention to detail in the design, ensuring that even those who are not tech-savvy can operate the system with ease.
Another significant characteristic of the NuTone IM-440 Series is its scalability. The system can be easily expanded to accommodate additional rooms and features, allowing users to customize their intercom setup according to their specific needs. This makes it a future-proof investment that can adapt to changes in living or working environments.
Durability and reliability are also hallmarks of the IM-440 series. Built to withstand the rigors of daily use, the system features high-quality materials that ensure longevity. Additionally, the system's components are engineered to perform consistently over time, providing users with peace of mind that their communication system will be operational when needed.
In summary, the NuTone IM-440 Series stands out for its combination of advanced audio technology, user-friendly design, and scalability. Whether for communication or entertainment, this intercom system offers a compelling solution for those seeking to enhance their indoor audio experience. With its array of features and reliability, the IM-440 Series remains a top choice in intercom systems.