Setting Time/Date (TIME&DATE)
If you have set the time and date, information as to when an audio file is recorded is stored
1 automatically with that file. The time and date should be set to ease file management tasks. The time and date setting is also needed to perform the alarm playback function (☞ P.81).
Setting Time/Date
The hour indicator will flash automatically when you load batteries before using the recorder for the first time, or after the recorder hasn't been used for a long time. Proceed from step 1.
(TIME&DATE)
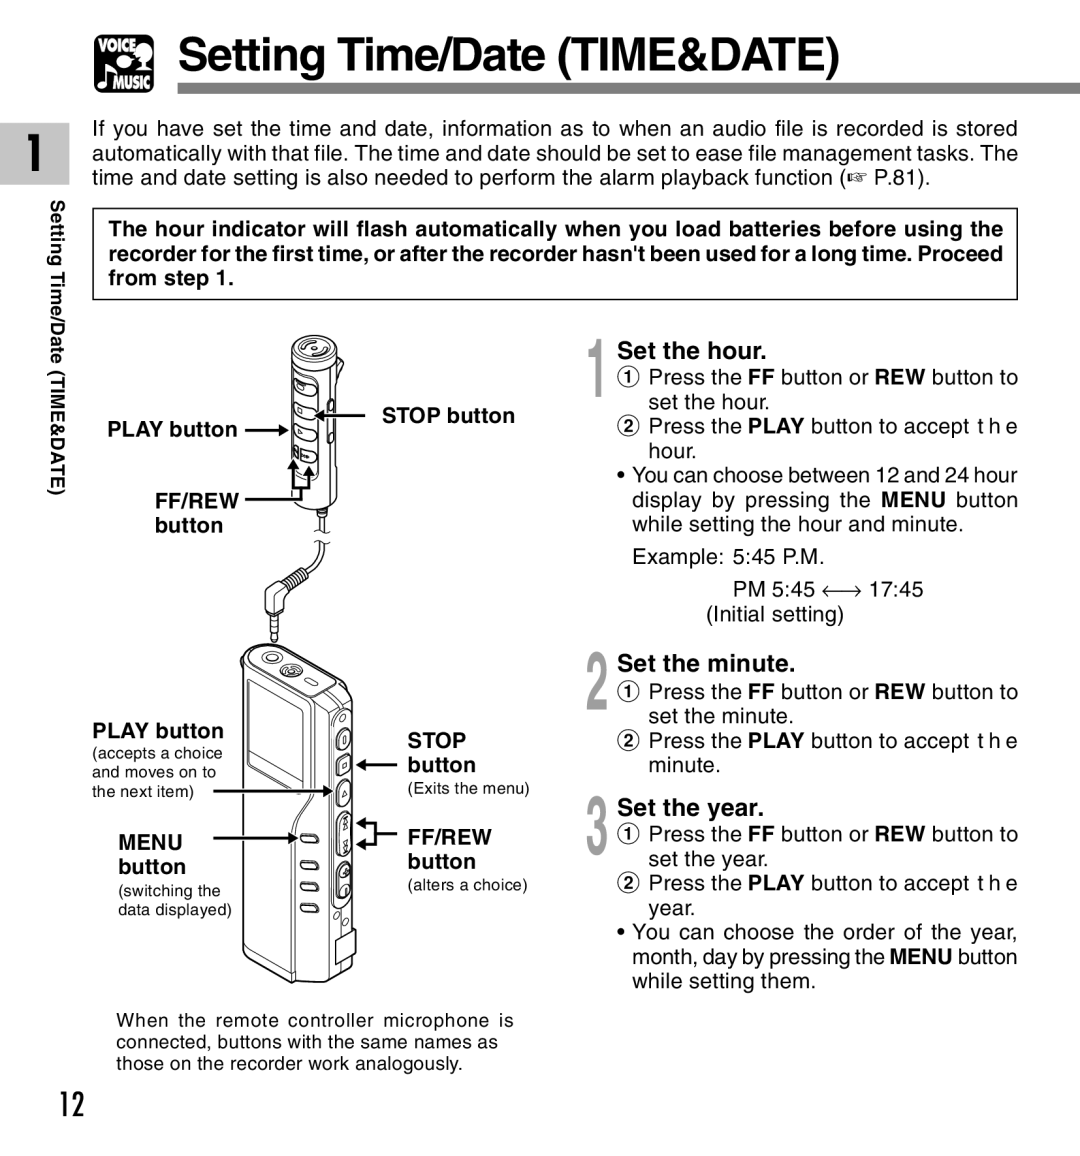
PLAY button 

FF/REW  button
1 Set the hour.
1 Press the FF button or REW button to
set the hour.
STOP button2 Press the PLAY button to accept t h e hour.
•You can choose between 12 and 24 hour display by pressing the MENU button while setting the hour and minute.
Example: 5:45 P.M.
PM 5:45 ←→ 17:45 (Initial setting)
PLAY button | STOP | |
(accepts a choice | ||
button | ||
and moves on to | ||
the next item) | (Exits the menu) | |
MENU | FF/REW | |
button | button | |
(switching the | (alters a choice) | |
| ||
data displayed) |
|
When the remote controller microphone is connected, buttons with the same names as those on the recorder work analogously.
2 Set the minute.
1 Press the FF button or REW button to set the minute.
2 Press the PLAY button to accept t h e minute.
3 Set the year.
1 Press the FF button or REW button to set the year.
2 Press the PLAY button to accept t h e year.
•You can choose the order of the year, month, day by pressing the MENU button while setting them.
12