2.2 Jumper Setting
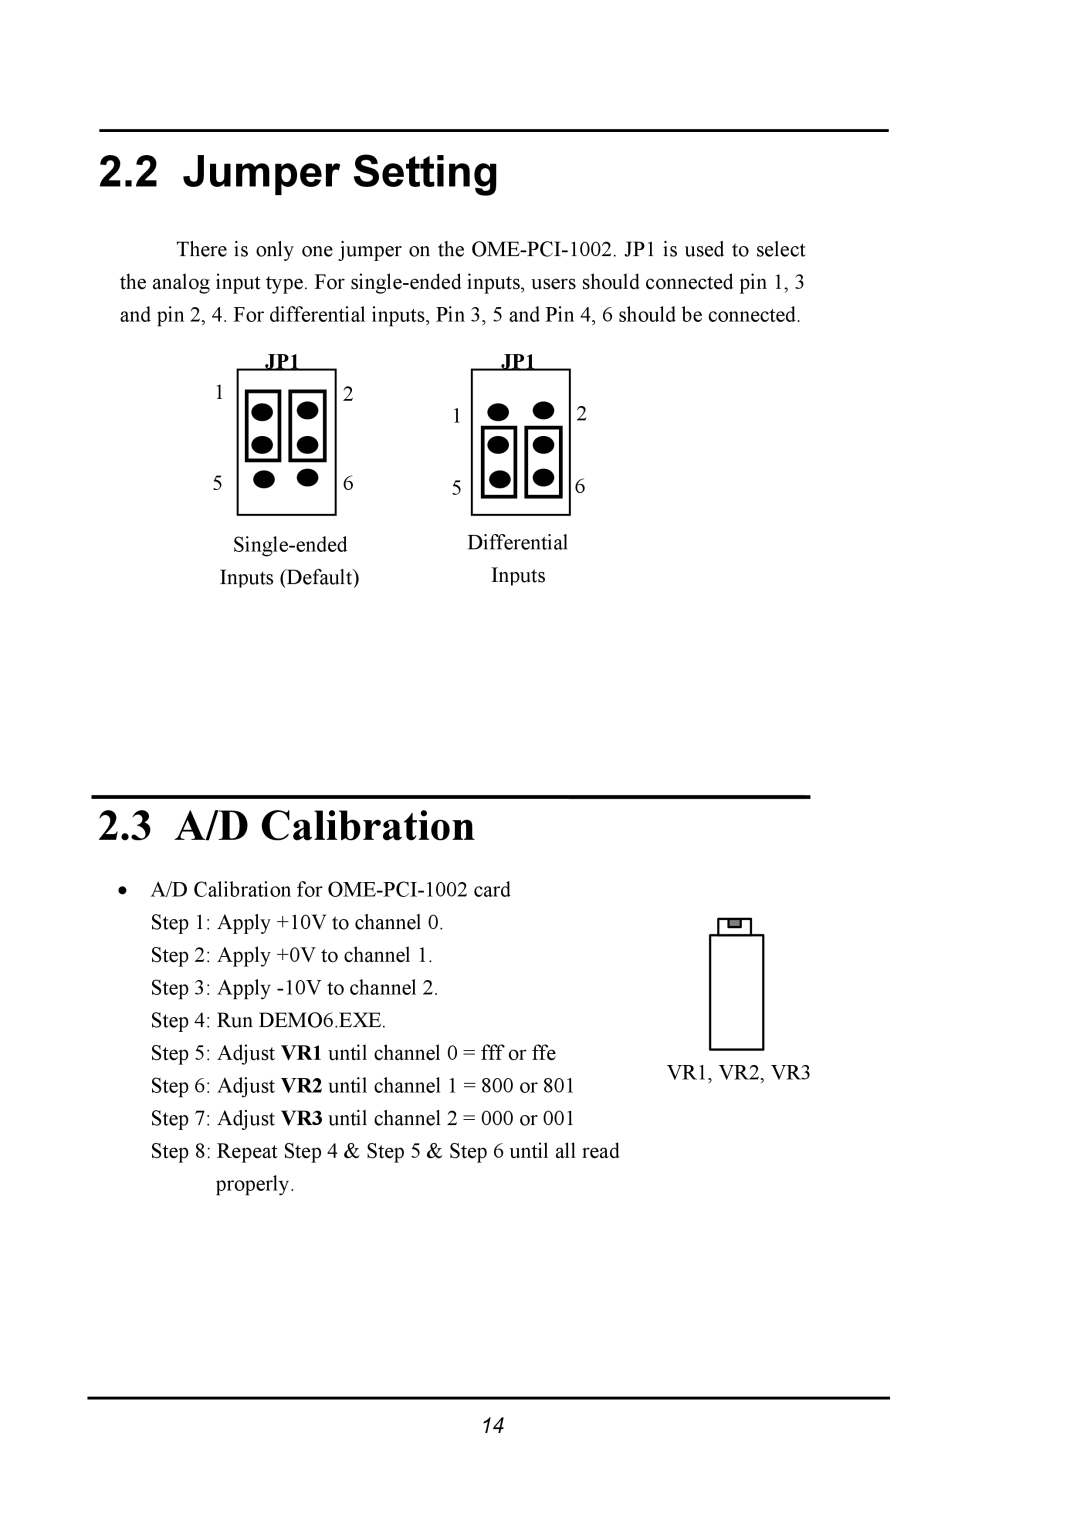
There is only one jumper on the
JP1JP1
1 | 2 | 1 |
|
| |
5 | 6 | 5 |
| Differential | |
Inputs (Default) | Inputs | |
2
6
2.3 A/D Calibration
• A/D Calibration for |
|
|
|
|
|
|
| |
Step 1: Apply +10V to channel 0. |
|
|
|
|
|
|
| |
|
|
|
|
|
|
| ||
|
|
|
|
|
|
| ||
Step 2: Apply +0V to channel 1. |
|
|
|
|
|
|
| |
Step 3: Apply |
|
|
|
|
|
|
| |
Step 4: Run DEMO6.EXE. |
|
|
|
|
|
|
| |
Step 5: Adjust VR1 until channel 0 = fff or ffe |
|
|
|
|
|
|
| |
VR1, VR2, VR3 | ||||||||
Step 6: Adjust VR2 until channel 1 = 800 or 801 | ||||||||
|
|
|
|
|
|
| ||
Step 7: Adjust VR3 until channel 2 = 000 or 001 |
|
|
|
|
|
|
| |
Step 8: Repeat Step 4 & Step 5 & Step 6 until all read |
|
|
|
|
|
|
| |
properly. |
|
|
|
|
|
|
| |
14
