Section 7 - Instrument Care and Maintenance

one channel calibrates all channels. Accept the “Calibration Function OK” popup dialog.

To calibrate another range repeat from step 6.3.1.3. Calibrate all or as many ranges as you need.

7.3.1.4Store Cal

Once all the required ranges are calibrated, select “Store Cal” function and press the “Calibrate” button. Accept the “Calibration Function OK” popup dialog.

7.3.2 Calibrating the RTD Current Source

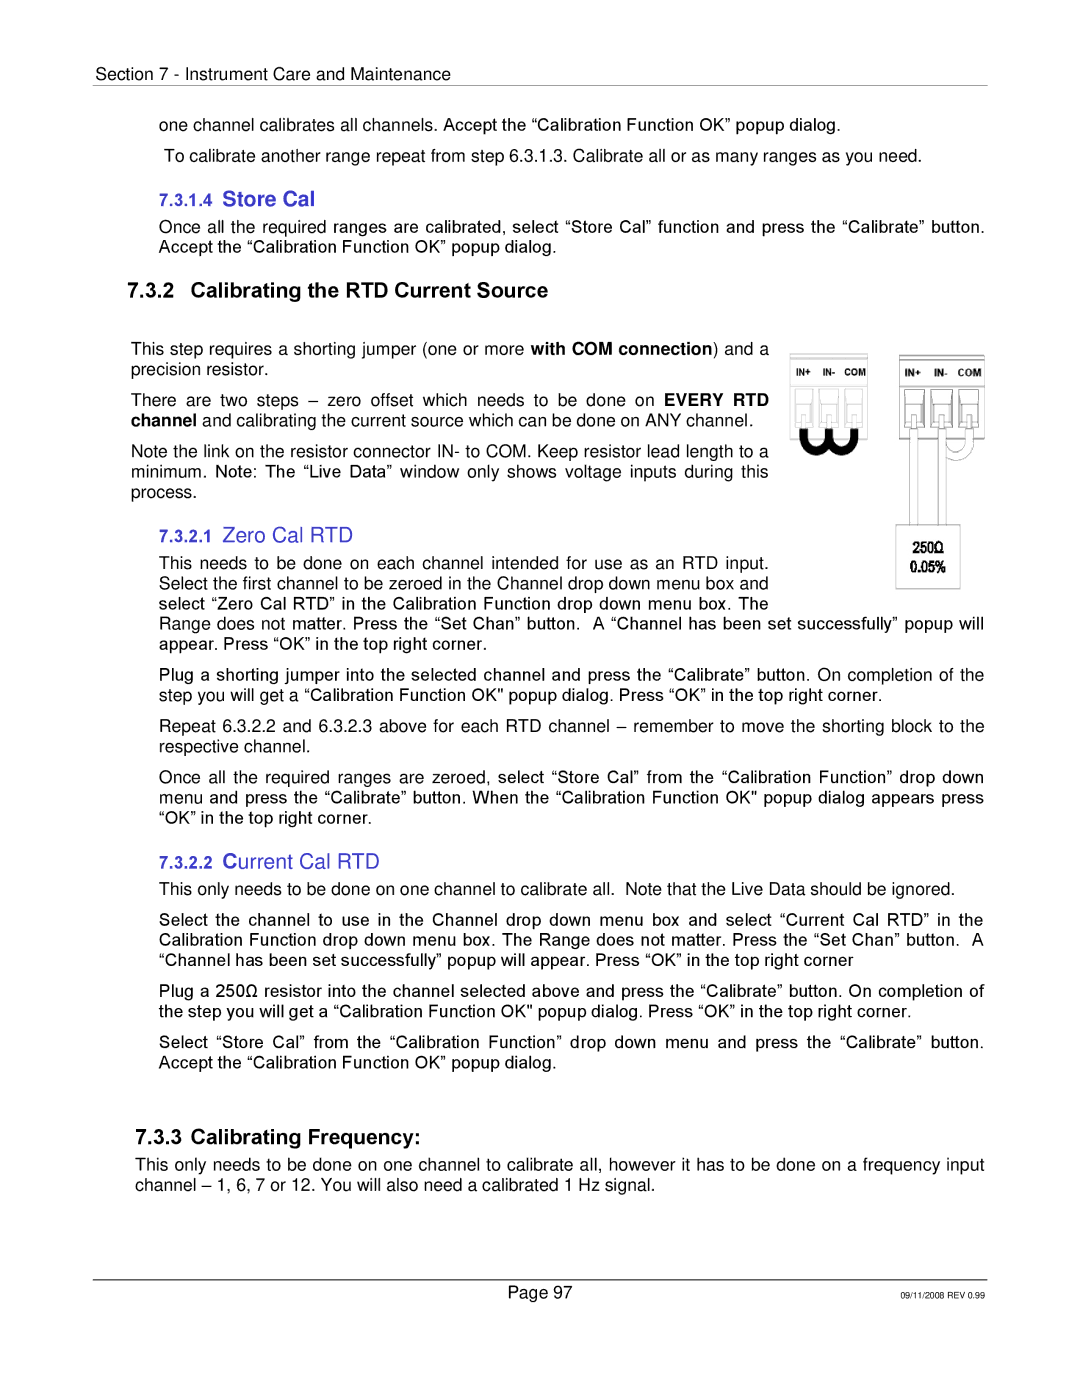
This step requires a shorting jumper (one or more with COM connection) and a precision resistor.

There are two steps – zero offset which needs to be done on EVERY RTD channel and calibrating the current source which can be done on ANY channel.

Note the link on the resistor connector IN- to COM. Keep resistor lead length to a minimum. Note: The “Live Data” window only shows voltage inputs during this process.

7.3.2.1Zero Cal RTD

This needs to be done on each channel intended for use as an RTD input. Select the first channel to be zeroed in the Channel drop down menu box and select “Zero Cal RTD” in the Calibration Function drop down menu box. The

Range does not matter. Press the “Set Chan” button. A “Channel has been set successfully” popup will appear. Press “OK” in the top right corner.

Plug a shorting jumper into the selected channel and press the “Calibrate” button. On completion of the step you will get a “Calibration Function OK" popup dialog. Press “OK” in the top right corner.

Repeat 6.3.2.2 and 6.3.2.3 above for each RTD channel – remember to move the shorting block to the respective channel.

Once all the required ranges are zeroed, select “Store Cal” from the “Calibration Function” drop down menu and press the “Calibrate” button. When the “Calibration Function OK" popup dialog appears press “OK” in the top right corner.

7.3.2.2Current Cal RTD

This only needs to be done on one channel to calibrate all. Note that the Live Data should be ignored.

Select the channel to use in the Channel drop down menu box and select “Current Cal RTD” in the Calibration Function drop down menu box. The Range does not matter. Press the “Set Chan” button. A “Channel has been set successfully” popup will appear. Press “OK” in the top right corner

Plug a 250Ω resistor into the channel selected above and press the “Calibrate” button. On completion of the step you will get a “Calibration Function OK" popup dialog. Press “OK” in the top right corner.

Select “Store Cal” from the “Calibration Function” drop down menu and press the “Calibrate” button. Accept the “Calibration Function OK” popup dialog.

7.3.3 Calibrating Frequency:

This only needs to be done on one channel to calibrate all, however it has to be done on a frequency input channel – 1, 6, 7 or 12. You will also need a calibrated 1 Hz signal.

Page 97

09/11/2008 REV 0.99

Page 106
Image 106
Omega Speaker Systems RD8300 manual Store Cal, Calibrating the RTD Current Source, Calibrating Frequency

RD8300 specifications

The Omega Speaker Systems RD8300 is a remarkable entry in the audio equipment market, designed for audiophiles and casual listeners alike who seek high-quality sound reproduction. This speaker system combines cutting-edge technologies with user-friendly features to deliver an immersive listening experience.

One of the standout characteristics of the RD8300 is its advanced driver configuration. Featuring a dual 8-inch woofers, a precision-tuned midrange driver, and a high-frequency tweeter, the RD8300 is engineered to provide a full range of frequencies with unparalleled clarity. This configuration ensures that bass notes are deep and powerful, while mid-range and treble sounds are crisp and detailed, making it suitable for a wide variety of music genres and audio formats.

Another integral technology in the RD8300 is its sophisticated crossover network. By intelligently directing frequencies to the appropriate drivers, the crossover helps to minimize distortion and enhance the overall sonic coherence of the speaker. This ensures every note is delivered with precision, allowing listeners to appreciate the nuances in their favorite tracks.

The RD8300 also boasts an impressive power handling capability, allowing it to deliver loud and dynamic sound without compromising audio quality. Its robust construction ensures minimal resonance, further enhancing sound clarity. The speaker's enclosure is crafted from high-density fiberboard, designed to reduce unwanted vibrations while maximizing audio performance.

In terms of connectivity, the RD8300 is versatile. It comes equipped with standard binding post inputs, making it compatible with a wide range of audio equipment. Additionally, it features both wired and wireless connectivity options, catering to modern listening preferences.

User convenience is another focus of the RD8300's design, with features such as adjustable feet and a user-friendly interface that allows for easy setup and adjustment. The sleek visual design of the speaker adds an aesthetic touch, making it an attractive addition to any room.

In summary, the Omega Speaker Systems RD8300 stands out as an exceptional speaker choice. With its advanced driver design, sophisticated crossover technology, impressive power handling, versatile connectivity options, and user-friendly features, it caters to those seeking a superior audio experience, making it a must-have for audio enthusiasts.