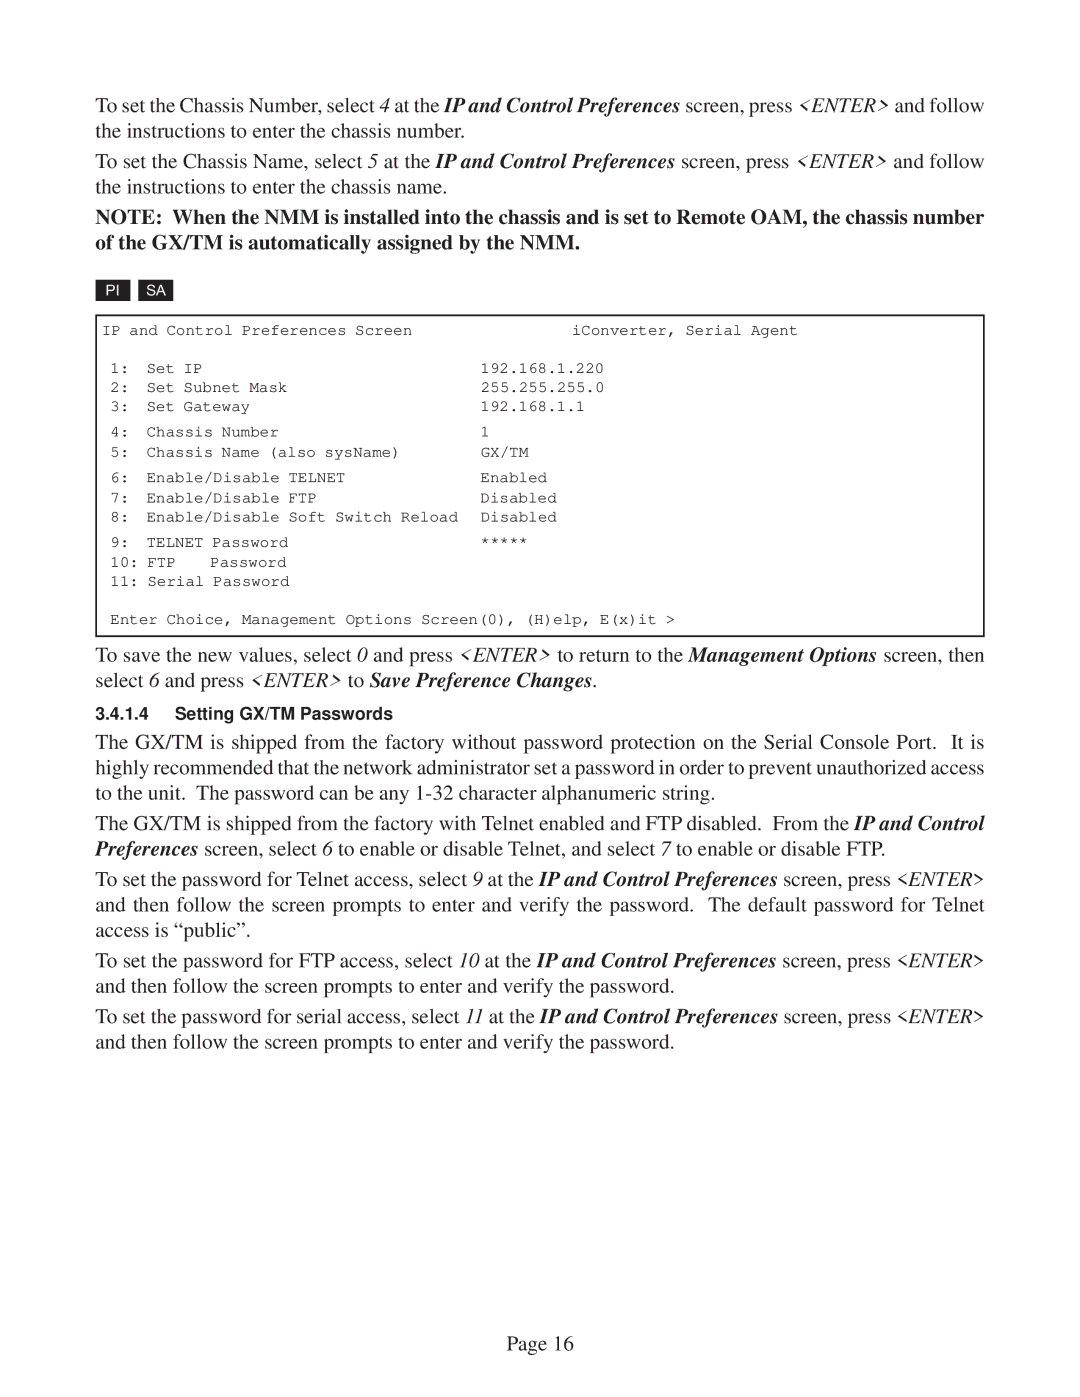
To set the Chassis Number, select 4 at the IP and Control Preferences screen, press <ENTER> and follow the instructions to enter the chassis number.
To set the Chassis Name, select 5 at the IP and Control Preferences screen, press <ENTER> and follow the instructions to enter the chassis name.
NOTE: When the NMM is installed into the chassis and is set to Remote OAM, the chassis number of the GX/TM is automatically assigned by the NMM.
PI
SA
IP and Control Preferences Screen | iConverter, Serial Agent | ||
1: | Set IP |
| 192.168.1.220 |
2: | Set Subnet Mask | 255.255.255.0 | |
3: | Set Gateway | 192.168.1.1 | |
4: | Chassis Number | 1 | |
5: | Chassis Name (also sysName) | GX/TM | |
6: | Enable/Disable TELNET | Enabled | |
7: | Enable/Disable FTP | Disabled | |
8: | Enable/Disable Soft Switch Reload | Disabled | |
9: | TELNET Password | ***** | |
10: FTP | Password |
| |
11: Serial Password |
| ||
Enter Choice, Management Options Screen(0), (H)elp, E(x)it >
To save the new values, select 0 and press <ENTER> to return to the Management Options screen, then select 6 and press <ENTER> to Save Preference Changes.
3.4.1.4Setting GX/TM Passwords
The GX/TM is shipped from the factory without password protection on the Serial Console Port. It is highly recommended that the network administrator set a password in order to prevent unauthorized access to the unit. The password can be any
The GX/TM is shipped from the factory with Telnet enabled and FTP disabled. From the IP and Control Preferences screen, select 6 to enable or disable Telnet, and select 7 to enable or disable FTP.
To set the password for Telnet access, select 9 at the IP and Control Preferences screen, press <ENTER> and then follow the screen prompts to enter and verify the password. The default password for Telnet access is “public”.
To set the password for FTP access, select 10 at the IP and Control Preferences screen, press <ENTER> and then follow the screen prompts to enter and verify the password.
To set the password for serial access, select 11 at the IP and Control Preferences screen, press <ENTER> and then follow the screen prompts to enter and verify the password.
Page 16