2-2 Connecting the additional battery unit (BUM100S/150S/300S)
You can add only one additional battery unit.
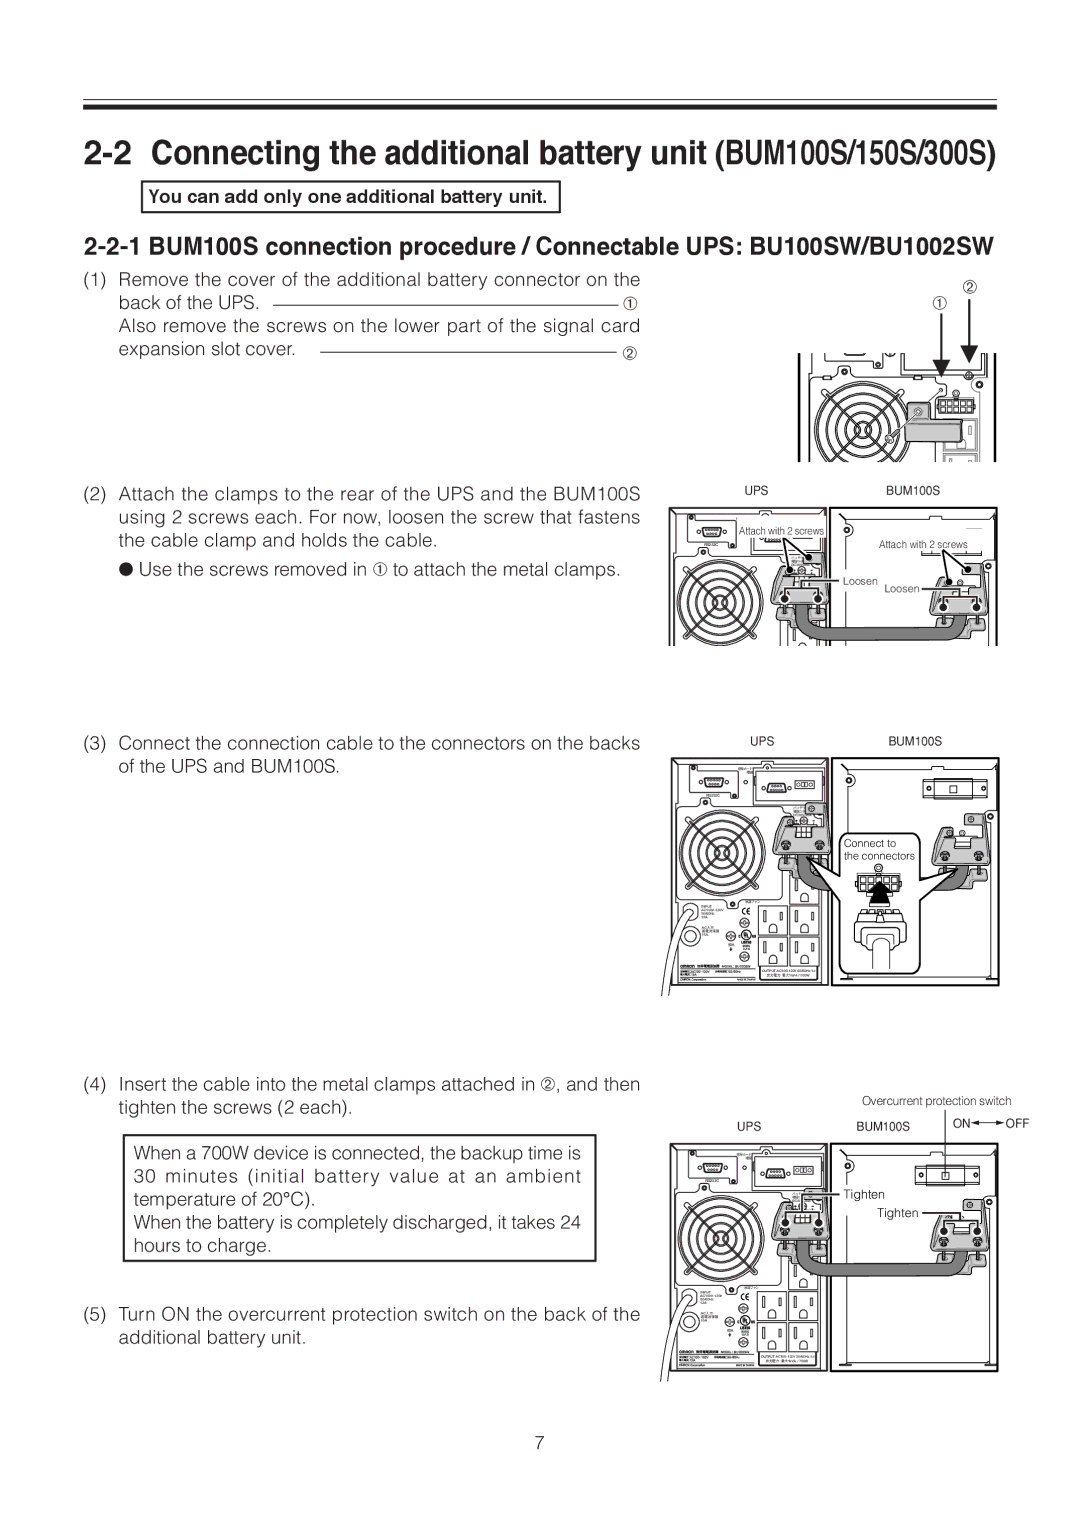
(1) Remove the cover of the additional battery connector on the
back of the UPS.➀ Also remove the screws on the lower part of the signal card
expansion slot cover. |
| ➁ |
|
(2)Attach the clamps to the rear of the UPS and the BUM100S using 2 screws each. For now, loosen the screw that fastens the cable clamp and holds the cable.
● Use the screws removed in ➀ to attach the metal clamps.
(3)Connect the connection cable to the connectors on the backs of the UPS and BUM100S.
| ➁ |
| ➀ |
UPS | BUM100S |
Attach with 2 screws |
|
RS232C | Attach with 2 screws |
| |
バッテリ |
|
増設コネクタ |
|
DC36V/20A |
|
Loosen | Loosen |
UPS | BUM100S |
信号カード |
|
増設 |
|
RS232C |
|
バッテリ |
|
増設コネクタ |
|
DC36V/20A |
|
Connect to the connectors
冷却ファン
INPUT
AC入力
過電流保護
15A
接地
OUTPUT
出力電力 最大1kVA / 700W
(4)Insert the cable into the metal clamps attached in ➁, and then tighten the screws (2 each).
When a 700W device is connected, the backup time is 30 minutes (initial battery value at an ambient temperature of 20°C).
When the battery is completely discharged, it takes 24 hours to charge.
(5)Turn ON the overcurrent protection switch on the back of the additional battery unit.
UPS
信号カード 増設
RS232C
バッテリ |
増設コネクタ |
DC36V/20A |
冷却ファン
INPUT
AC入力
過電流保護
15A
接地
OUTPUT
出力電力 最大1kVA / 700W
Overcurrent protection switch
BUM100S | ON |
|
| OFF | |||
| |||||||
|
|
|
|
|
|
|
|
|
|
|
|
|
|
|
|
|
|
|
|
|
|
|
|
|
|
|
|
|
|
|
|
Tighten
Tighten |
7
