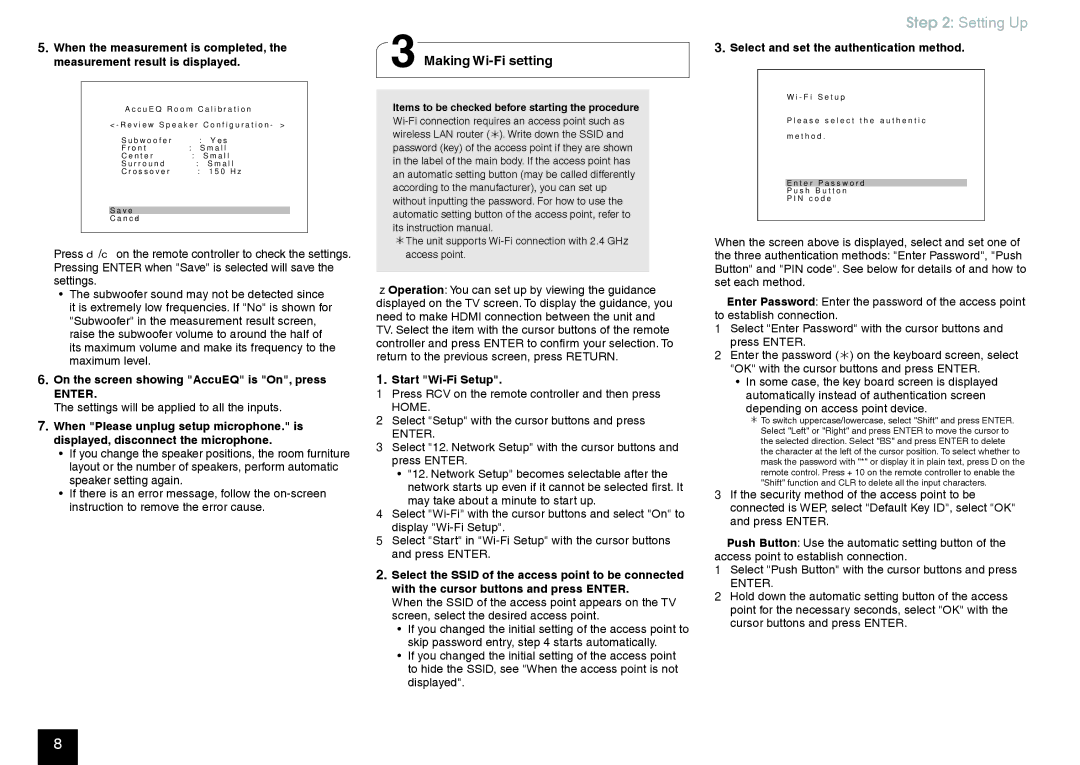
5.When the measurement is completed, the measurement result is displayed.
A c c u E Q R o o m C a l i b r a t i o n
< - R e v i e w S p e a k e r C o n f i g u r a t i o n - >
S u b w o o f e r | : | Y e s |
|
F r o n t | : | S m a l l | |
C e n t e r | : | S m a l l | |
S u r r o u n d | : | S m a l l | |
C r o s s o v e r | : | 1 5 0 | H z |
S a v e
C a n c e l
Press d/c on the remote controller to check the settings. Pressing ENTER when "Save" is selected will save the settings.
•The subwoofer sound may not be detected since it is extremely low frequencies. If "No" is shown for "Subwoofer" in the measurement result screen, raise the subwoofer volume to around the half of its maximum volume and make its frequency to the maximum level.
6.On the screen showing "AccuEQ" is "On", press
ENTER.
The settings will be applied to all the inputs.
7.When "Please unplug setup microphone." is displayed, disconnect the microphone.
•If you change the speaker positions, the room furniture layout or the number of speakers, perform automatic speaker setting again.
•If there is an error message, follow the
3 Making Wi-Fi setting
Items to be checked before starting the procedure
¼¼The unit supports
Operation: You can set up by viewing the guidance displayed on the TV screen. To display the guidance, you need to make HDMI connection between the unit and TV. Select the item with the cursor buttons of the remote controller and press ENTER to confirm your selection. To return to the previous screen, press RETURN.
1.Start "Wi-Fi Setup".
1 Press RCV on the remote controller and then press HOME.
2 Select "Setup" with the cursor buttons and press
ENTER.
3 Select "12. Network Setup" with the cursor buttons and press ENTER.
•"12. Network Setup" becomes selectable after the network starts up even if it cannot be selected first. It may take about a minute to start up.
4 Select
5 Select "Start" in
2.Select the SSID of the access point to be connected with the cursor buttons and press ENTER.
When the SSID of the access point appears on the TV screen, select the desired access point.
•If you changed the initial setting of the access point to skip password entry, step 4 starts automatically.
•If you changed the initial setting of the access point to hide the SSID, see "When the access point is not displayed".
Step 2: Setting Up
3.Select and set the authentication method.
W i - F i S e t u p
P l e a s e s e l e c t t h e a u t h e n t i c
m e t h o d .
E n t e r P a s s w o r d
P u s h B u t t o n
P I N c o d e
When the screen above is displayed, select and set one of the three authentication methods: "Enter Password", "Push Button" and "PIN code". See below for details of and how to set each method.
Enter Password: Enter the password of the access point to establish connection.
1 Select "Enter Password" with the cursor buttons and press ENTER.
2 Enter the password () on the keyboard screen, select "OK" with the cursor buttons and press ENTER.
•In some case, the key board screen is displayed automatically instead of authentication screen
depending on access point device.
¼¼To switch uppercase/lowercase, select "Shift" and press ENTER. Select "Left" or "Right" and press ENTER to move the cursor to the selected direction. Select "BS" and press ENTER to delete the character at the left of the cursor position. To select whether to mask the password with "*" or display it in plain text, press D on the remote control. Press + 10 on the remote controller to enable the "Shift" function and CLR to delete all the input characters.
3 If the security method of the access point to be connected is WEP, select "Default Key ID", select "OK" and press ENTER.
Push Button: Use the automatic setting button of the access point to establish connection.
1 Select "Push Button" with the cursor buttons and press
ENTER.
2 Hold down the automatic setting button of the access point for the necessary seconds, select "OK" with the cursor buttons and press ENTER.
8