TX-SR502 TX-SR502E TX-SR8250
Important Safety Instructions
Avis
Power
Precautions
If in any doubt, consult a qualified electrician
Precautions
Supplied Accessories
FCC Information for User
Features
Table of Contents
Front & Rear Panels
Front Panel
Display
Front & Rear Panels
Video 3 Input
AC Outlet
Rear Panel
Front Speakers B
Subwoofer PRE OUT
Installing the Batteries
Before Using the AV Receiver
Using the Remote Controller
AMP/TUNER Mode
Remote Controller
How to Use the Remote Controller
AMP Tuner
Remote Controller
DVD Mode
DVD
CD Mode
Tape
MD Mode & CDR Mode
CDR
TV Input
Tape Mode
TV Control Buttons
TV CH
Enjoying Home Theater
Connecting Your Speakers
Speaker Configuration
Connecting the Speaker Cables
Connecting Your Speakers
Connecting Your Speakers
Attaching the Speaker Labels
Connecting the Indoor FM Antenna
Connecting Antenna
Connecting Antenna
Connecting the AM Loop Antenna
Connecting an Outdoor FM Antenna
Connecting Antenna
Connecting an Outdoor AM Antenna
AV Cables & Sockets
Connecting the AV Receiver
Before Making Any Connections
Optical Digital Inputs
Which Connections Should I Use?
Connecting the AV Receiver
Connection Guide
Video Connection Formats
Connecting Your TV or Projector
Monitor Out Audio Connections
Your TV must also be connected via component video
Connecting a DVD player
Video Connections
DVD player
DVD Multichannel Connection
Connecting a VCR for Playback
VCR
Use an optical digital audio cable to connect the AV
Connecting a D-VHS VCR for Playback
Connecting a VCR for Recording
Output on your D-VHS VCR, as shown
Satellite, cable, set-top box LD player, etc
Games console, etc Other
Connecting a Camcorder, Games Console, etc
Camcorder
Camcorder, games console, etc
CD player
Connecting a CD Player Connecting a Cassette Recorder
Cassette recorder
CD player DAT, CD, or MiniDisc recorder
Turntable without a Built-in Phono Preamp
Connecting a Turntable
Using a Coaxial or Optical Connection playback only
Turntable with an MC Moving Coil Cartridge
Connecting the Power Cords of Other Components
Connecting Onkyo Components
Connecting the Power Cord
Turning On First Time Setup
First Time Setup
Speaker Configuration
Button so that Tape appears
Changing the TAPE/MD/CDR Display
Press the Tape input selector
On the display
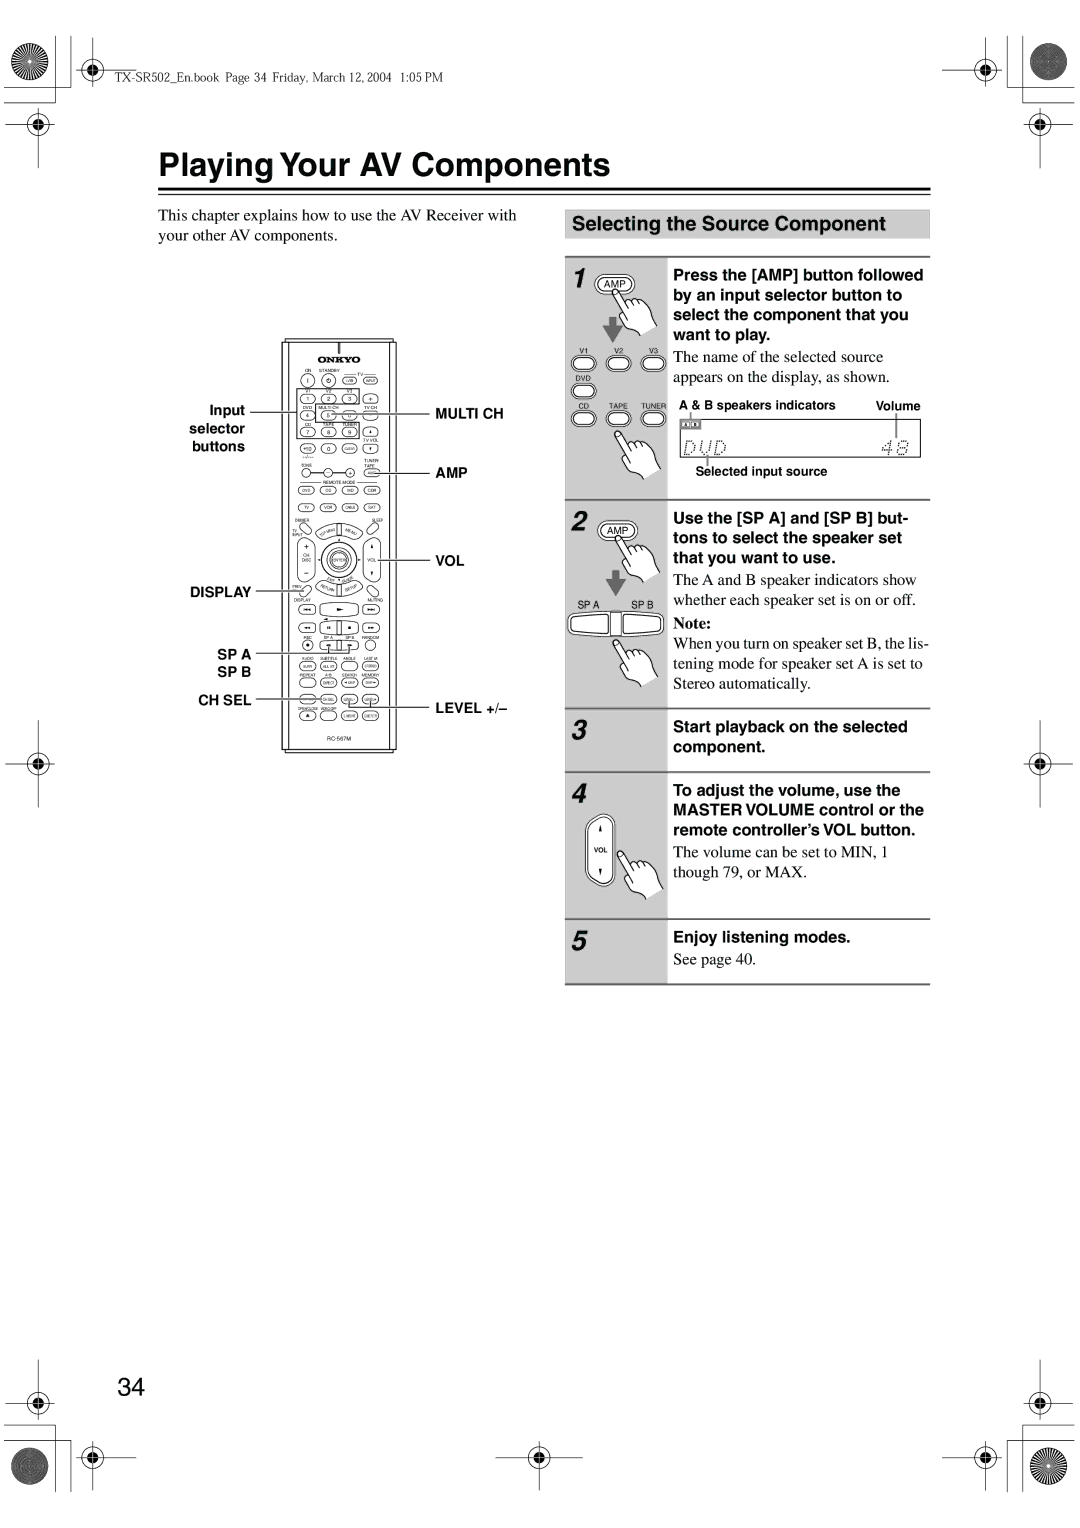
Playing Your AV Components
Selecting the Source Component
Displaying Source Information
Using the Multichannel Input
Playing Your AV Components
By the Multi CH button so that
Setting the AM Tuning Interval Worldwide model only
Using the Tuner
Tuning into Radio Stations
Listening to the Radio
Selecting Preset Stations
Using the Tuner
Presetting Radio Stations
Deleting Presets
Adjusting the Bass & Treble
Setting the Display Brightness
Common Functions
Using Headphones
Using the Sleep Timer
Adjusting Speaker Levels Temporarily
Common Functions
Using the Listening Modes
DTS-ES
Selecting Listening Modes
Using the Listening Modes
Selecting with the Remote Controller
Selecting on the AV Receiver
Basic Modes
Use this mode with video games that feature stereo sound
About the Listing Modes
Surround Modes
Onkyo Original DSP Modes
Listening mode indicators
DTS-ES
Dolby Digital/DTS setting 5.1 or 6.1-channel playback
Recording the Input Source
Recording
Recording from Different AV Sources
Adjusting the DTS Neo6 Music Mode
Using the Audio Adjust Functions
Advanced Function
Adjusting the PL II or PL IIx Music Mode
Digital Input Signal Formats
Advanced Function
Crossover Frequency
Advanced Setup
Speaker Distance
Advanced Setup
Speaker Levels
Resetting the Remote Controller
Entering Remote Control Codes
Resetting the DVD, CD, MD or CDR Mode Button
Controlling Other Components
DVD DVD player
Remote Control Codes
Controlling Other Components
SAT satellite receiver
CBL cable receiver
ABC
TX-SR502En.book Page 53 Friday, March 12, 2004 105 PM
TX-SR502En.book Page 54 Friday, March 12, 2004 105 PM
Controlling a VCR
Controlling a TV
Controlling a Cable Receiver
Controlling a Satellite Receiver
Troubleshooting
Troubleshooting
TV?
Signals?
Tuner Recording Others Symptom Possible cause Remedy
REO indicator flashes?
Tuner presets no
General
Specifications
Amplifier Section
Video Section
Onkyo Europe Electronics GmbH
Onkyo U.S.A. Corporation
Onkyo China Limited