Preparing Your Receiver
Using One Remote Control for More than One Unit
Note: When you plug the cable into a
component’sjack, that com- ponent’s remote sensor does not func- tion.
CONTROL
CONTROL
IN
OUT IN
OUT
Receiver | Other Component |
| with OSR Mark |
Remote | To the CONTROL IN Jack |
of Another Component | |
Control | Having the OSR Mark |
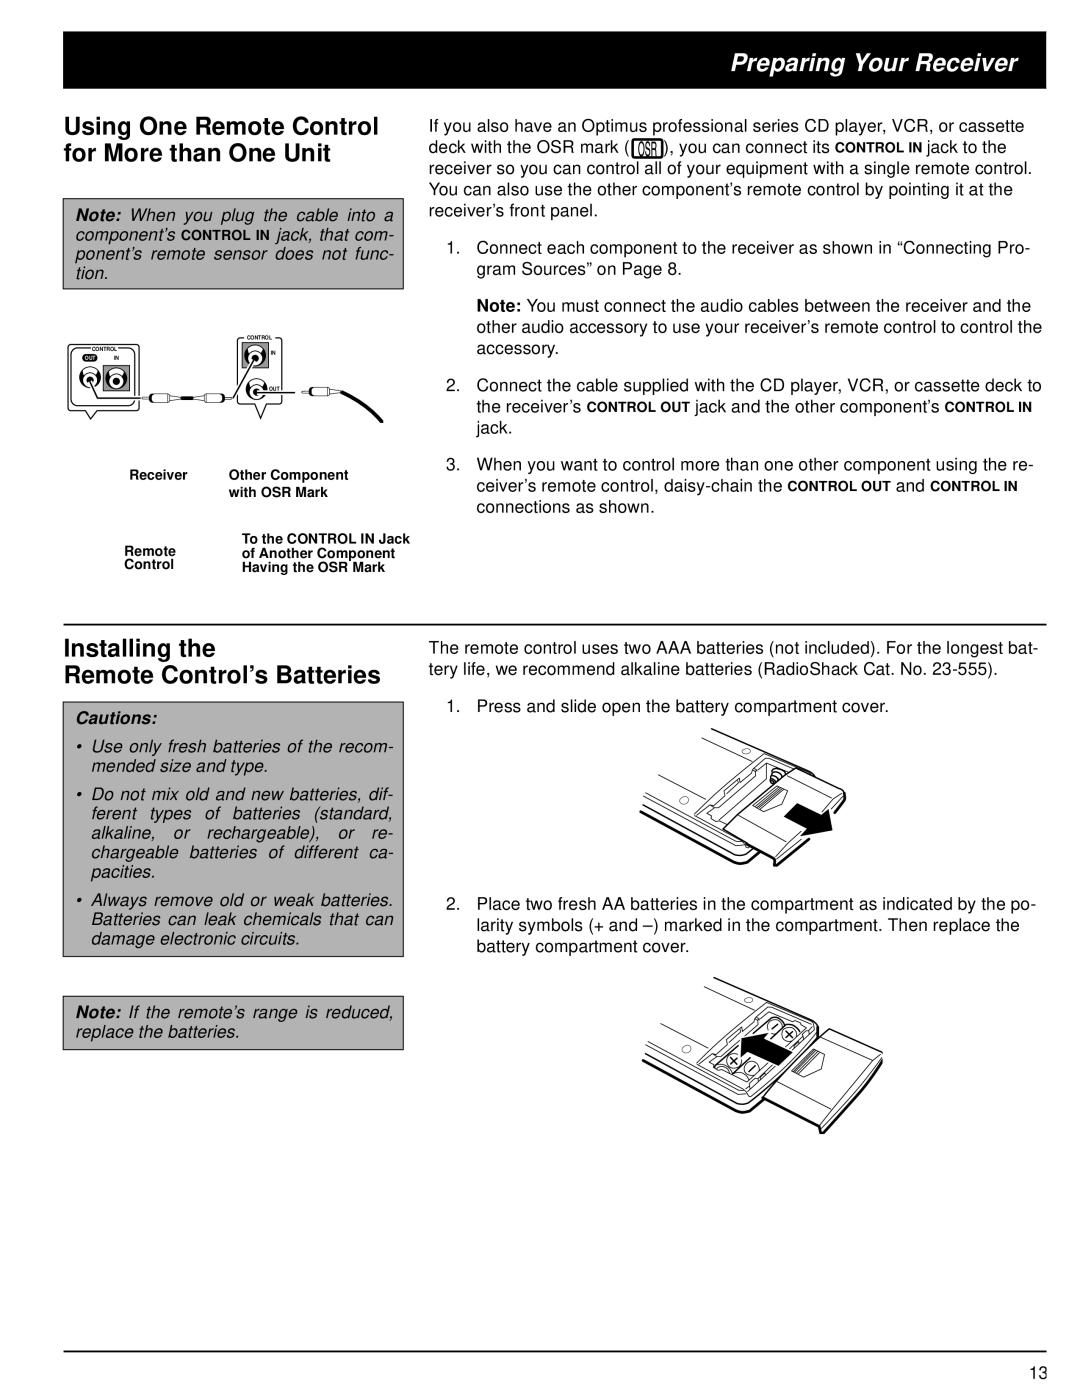
If you also have an Optimus professional series CD player, VCR, or cassette
deck with the OSR mark ( ![]()
![]() ), you can connect its CONTROL IN jack to the receiver so you can control all of your equipment with a single remote control. You can also use the other component’s remote control by pointing it at the receiver’s front panel.
), you can connect its CONTROL IN jack to the receiver so you can control all of your equipment with a single remote control. You can also use the other component’s remote control by pointing it at the receiver’s front panel.
1.Connect each component to the receiver as shown in “Connecting Pro- gram Sources” on Page 8.
Note: You must connect the audio cables between the receiver and the other audio accessory to use your receiver’s remote control to control the accessory.
2.Connect the cable supplied with the CD player, VCR, or cassette deck to the receiver’s CONTROL OUT jack and the other component’s CONTROL IN jack.
3.When you want to control more than one other component using the re- ceiver’s remote control,
Installing the
Remote Control’s Batteries
Cautions:
•Use only fresh batteries of the recom- mended size and type.
•Do not mix old and new batteries, dif- ferent types of batteries (standard, alkaline, or rechargeable), or re- chargeable batteries of different ca- pacities.
•Always remove old or weak batteries. Batteries can leak chemicals that can damage electronic circuits.
Note: If the remote’s range is reduced, replace the batteries.
The remote control uses two AAA batteries (not included). For the longest bat- tery life, we recommend alkaline batteries (RadioShack Cat. No.
1. Press and slide open the battery compartment cover.
2.Place two fresh AA batteries in the compartment as indicated by the po- larity symbols (+ and
13
