Appendices
Ceiling Mount Installation
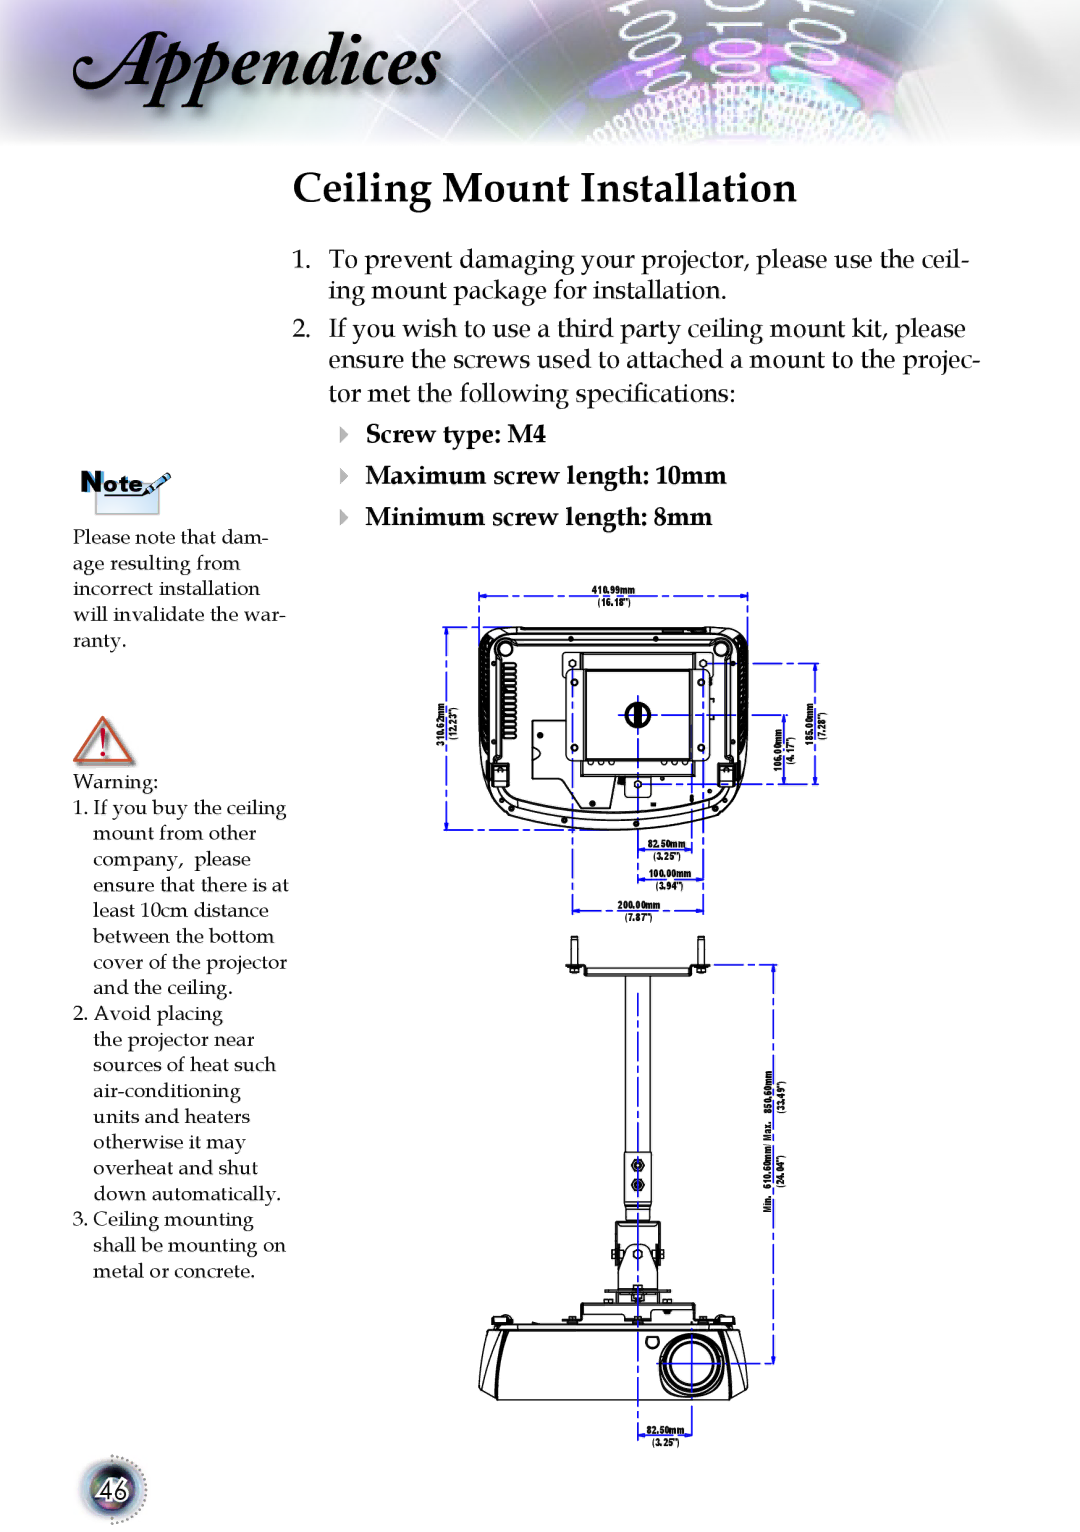
1.To prevent damaging your projector, please use the ceil- ing mount package for installation.
2.If you wish to use a third party ceiling mount kit, please ensure the screws used to attached a mount to the projec- tor met the following specifications:
Note![]()
![]()
Please note that dam- age resulting from incorrect installation will invalidate the war- ranty.
Screw type: M4
Maximum screw length: 10mm
Minimum screw length: 8mm
410.99mm
(16.18")
310.62mm (12.23")
Warning:
1.If you buy the ceiling mount from other company, please ensure that there is at least 10cm distance between the bottom cover of the projector and the ceiling.
2.Avoid placing the projector near sources of heat such
3.Ceiling mounting shall be mounting on metal or concrete.
106.00mm (4.17") | 185.00mm (7.28") |
82.50mm
(3.25")
100.00mm
(3.94")
200.00mm
(7.87")
Min. 610.60mm/ Max. 850.60mm (24.04") (33.49")
82.50mm ![]() (3.25")
(3.25") ![]()
46