6.DIMMER: select display brightness
7.COLOUR (OFF·PROGRAM·LOOP): activate / deactivate
8.: set clock
9.ZZ: activate sleep timer; adjust timer settings (120, 90,
60, 30, 15, 0)
10.VOL+ /
11.RESET: reset unit to default settings
12.SEARCH: initiate sensor search
13.PAUSE: select a specific color lighting; restart color- changing effect
14.Socket for audio
BOTTOM VIEW
1
2
1.Adapter socket
2.Battery compartment
EN
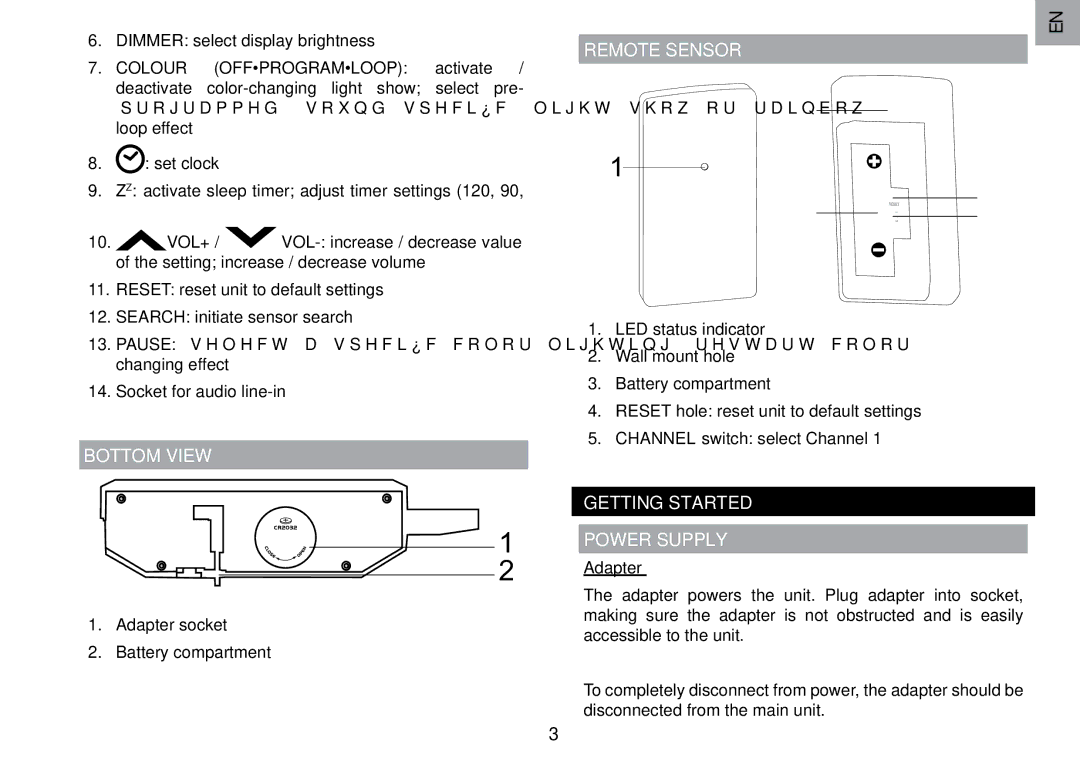
REMOTE SENSOR
2
1
4
3![]()
![]() 5
5
1.LED status indicator
2.Wall mount hole
3.Battery compartment
4.RESET hole: reset unit to default settings
5.CHANNEL switch: select Channel 1
GETTING STARTED
POWER SUPPLY
Adapter
The adapter powers the unit. Plug adapter into socket, making sure the adapter is not obstructed and is easily accessible to the unit.
To completely disconnect from power, the adapter should be disconnected from the main unit.
3