The Collimating Cap and Primary
Mirror Center Mark
Your StarBlast 4.5 EQ comes with a collimating cap. This is a simple cap that fits on the focuser drawtube like a dust cap, but has a hole in the center and a silver bottom. This helps center your eye so collimating is easy to perform. Figures 9b through 9e assume you have the collimating cap in place.
In addition to the collimating cap, you’ll notice a small ring label on the exact center of the primary mirror. This “center mark” allows you to achieve a very precise alignment of the primary mirror; you don’t have to guess where the center of the mirror is. You simply adjust the primary mirror position (described below) until the reflection of the hole in the collimating cap is centered inside the ring.
Note: The center ring sticker need not ever be removed from the primary mirror. Because it lies directly in the shadow of the secondary mirror, its presence in no way adversely affects the optical performance of the telescope or the image quality. That might seem
Aligning the Secondary Mirror
It helps to adjust the secondary mirror in a brightly lit room with the telescope pointed toward a bright surface, such as white paper or wall. Placing a piece of white paper in the telescope tube opposite the focuser (i.e. behind the secondary mirror) will also be helpful in collimating the secondary mirror.
With the collimating cap in place, look through the hole in the cap at the secondary (diagonal) mirror. Ignore the reflections for the time being. The secondary mirror itself should be centered in the focuser drawtube,. If it isn’t, as in Figure 9b, it must be adjusted. Typically, this adjustment will rarely, if ever, need to be done.
Note: When make adjustments to the secondary mirror position, be careful not to stress the spider vanes, or they may bend.
To adjust the secondary mirror
Figure 10.
To center the s e c o n d a r y mirror under the focuser, hold the secondary mirror holder in place with your fingers while adjusting the center screw with the Phillips head screwdriver. Do not touch the mirror’s surface.
secondary mirror is centered
To adjust the secondary mirror
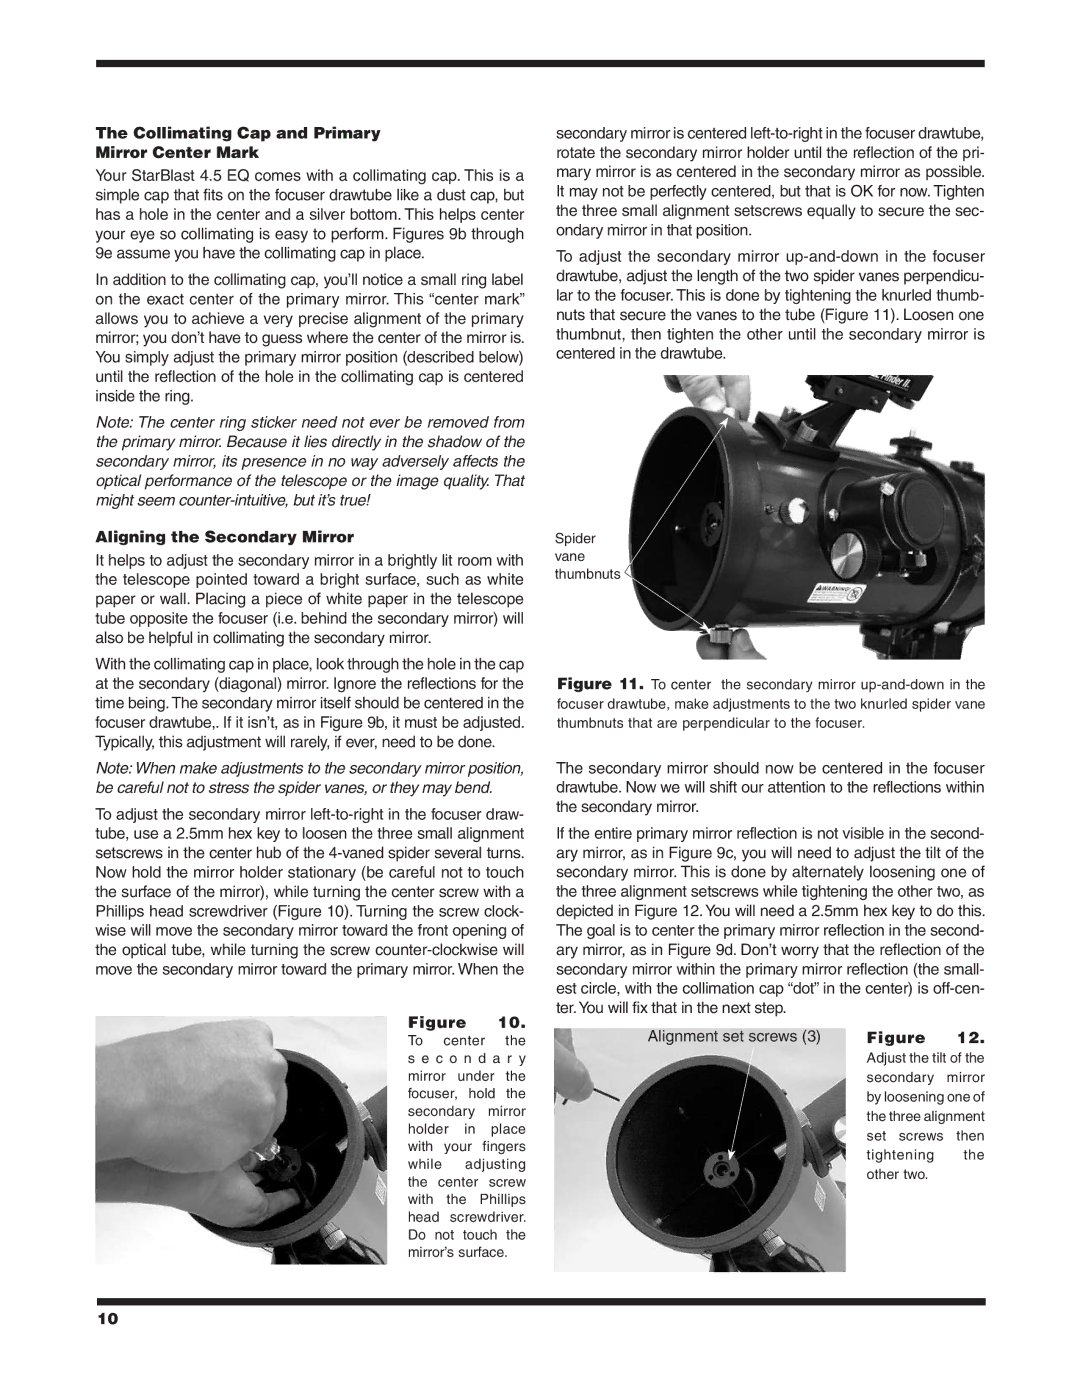
Spider vane thumbnuts
Figure 11. To center the secondary mirror up-and-down in the focuser drawtube, make adjustments to the two knurled spider vane thumbnuts that are perpendicular to the focuser.
The secondary mirror should now be centered in the focuser drawtube. Now we will shift our attention to the reflections within the secondary mirror.
If the entire primary mirror reflection is not visible in the second- ary mirror, as in Figure 9c, you will need to adjust the tilt of the secondary mirror. This is done by alternately loosening one of the three alignment setscrews while tightening the other two, as depicted in Figure 12. You will need a 2.5mm hex key to do this. The goal is to center the primary mirror reflection in the second- ary mirror, as in Figure 9d. Don’t worry that the reflection of the secondary mirror within the primary mirror reflection (the small- est circle, with the collimation cap “dot” in the center) is
Alignment set screws (3) | Figure | 12. |
| Adjust the tilt of the | |
| secondary | mirror |
| by loosening one of | |
| the three alignment | |
| set screws | then |
| tightening | the |
| other two. |
|
10