Figure 11.
The back end of the optical tube (bottom of the primary mirror cell). The three pairs of collimation screws adjust the tilt of the primary mirror.
to see if the “dot” of the collimation cap is moving closer or further away from being centered in the “ring” of the primary mirror. When you have the dot centered as much as pos- sible in the ring, your primary mirror is collimated. The view through the collimation cap should resemble Figure 8e.
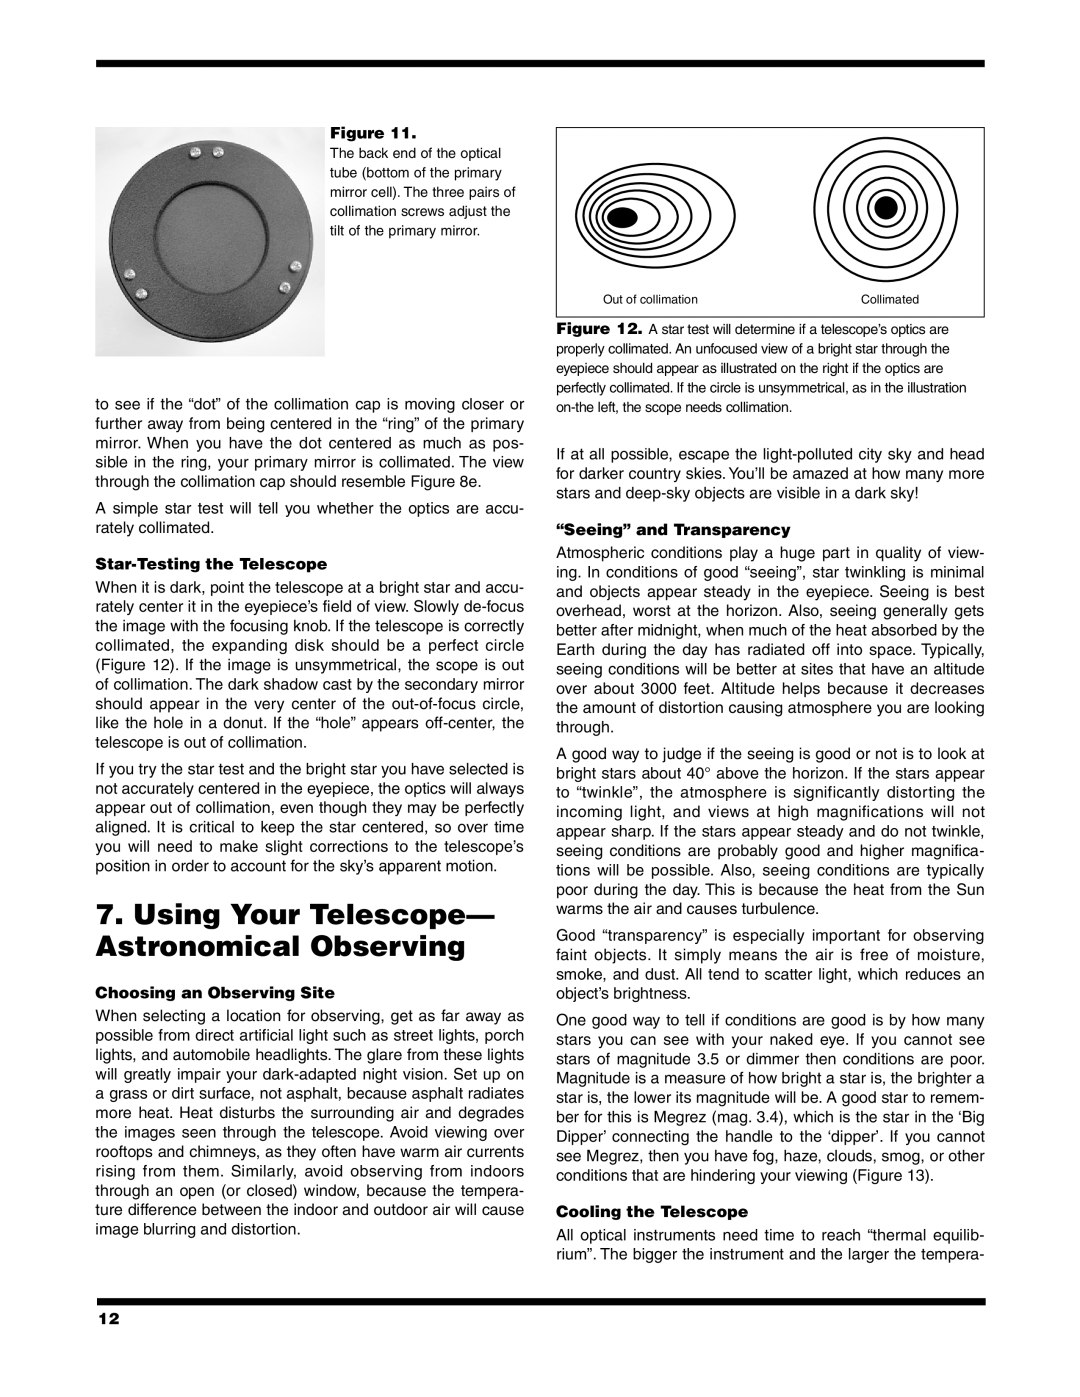
A simple star test will tell you whether the optics are accu- rately collimated.
Star-Testing the Telescope
When it is dark, point the telescope at a bright star and accu- rately center it in the eyepiece’s field of view. Slowly
If you try the star test and the bright star you have selected is not accurately centered in the eyepiece, the optics will always appear out of collimation, even though they may be perfectly aligned. It is critical to keep the star centered, so over time you will need to make slight corrections to the telescope’s position in order to account for the sky’s apparent motion.
7.Using Your Telescope— Astronomical Observing
Choosing an Observing Site
When selecting a location for observing, get as far away as possible from direct artificial light such as street lights, porch lights, and automobile headlights. The glare from these lights will greatly impair your
Out of collimation | Collimated |
Figure 12. A star test will determine if a telescope’s optics are properly collimated. An unfocused view of a bright star through the eyepiece should appear as illustrated on the right if the optics are perfectly collimated. If the circle is unsymmetrical, as in the illustration on‑the left, the scope needs collimation.
If at all possible, escape the
“Seeing” and Transparency
Atmospheric conditions play a huge part in quality of view- ing. In conditions of good “seeing”, star twinkling is minimal and objects appear steady in the eyepiece. Seeing is best overhead, worst at the horizon. Also, seeing generally gets better after midnight, when much of the heat absorbed by the Earth during the day has radiated off into space. Typically, seeing conditions will be better at sites that have an altitude over about 3000 feet. Altitude helps because it decreases the amount of distortion causing atmosphere you are looking through.
A good way to judge if the seeing is good or not is to look at bright stars about 40° above the horizon. If the stars appear to “twinkle”, the atmosphere is significantly distorting the incoming light, and views at high magnifications will not appear sharp. If the stars appear steady and do not twinkle, seeing conditions are probably good and higher magnifica- tions will be possible. Also, seeing conditions are typically poor during the day. This is because the heat from the Sun warms the air and causes turbulence.
Good “transparency” is especially important for observing faint objects. It simply means the air is free of moisture, smoke, and dust. All tend to scatter light, which reduces an object’s brightness.
One good way to tell if conditions are good is by how many stars you can see with your naked eye. If you cannot see stars of magnitude 3.5 or dimmer then conditions are poor. Magnitude is a measure of how bright a star is, the brighter a star is, the lower its magnitude will be. A good star to remem- ber for this is Megrez (mag. 3.4), which is the star in the ‘Big Dipper’ connecting the handle to the ‘dipper’. If you cannot see Megrez, then you have fog, haze, clouds, smog, or other conditions that are hindering your viewing (Figure 13).
Cooling the Telescope
All optical instruments need time to reach “thermal equilib- rium”. The bigger the instrument and the larger the tempera-
12