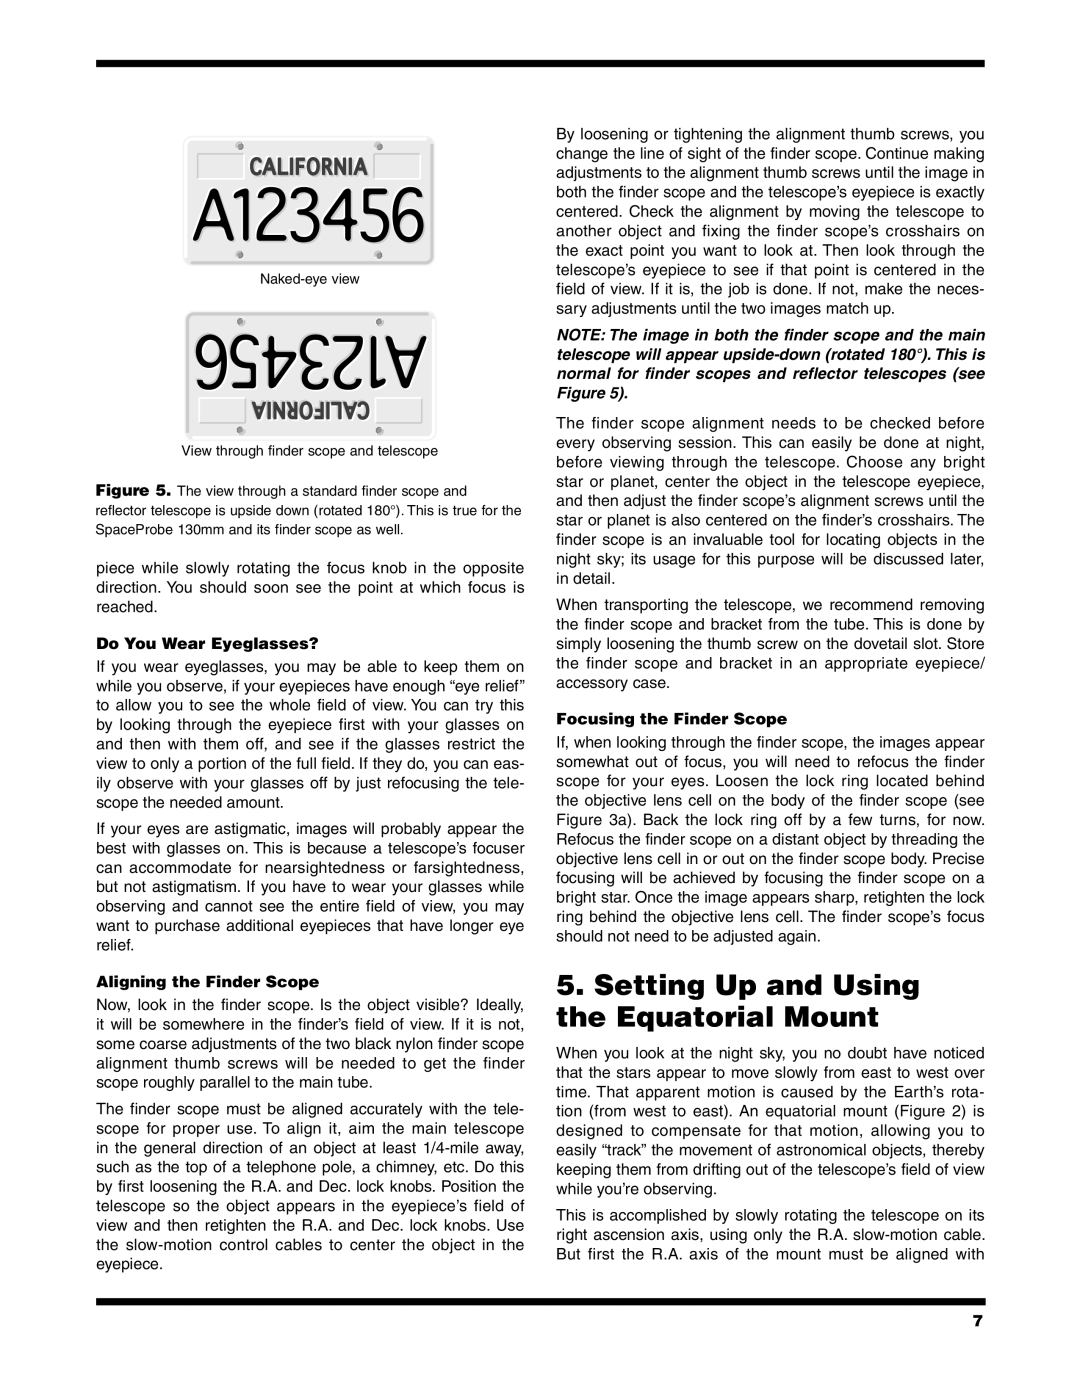
View through finder scope and telescope
Figure 5. The view through a standard finder scope and reflector telescope is upside down (rotated 180°). This is true for the SpaceProbe 130mm and its finder scope as well.
piece while slowly rotating the focus knob in the opposite direction. You should soon see the point at which focus is reached.
Do You Wear Eyeglasses?
If you wear eyeglasses, you may be able to keep them on while you observe, if your eyepieces have enough “eye relief” to allow you to see the whole field of view. You can try this by looking through the eyepiece first with your glasses on and then with them off, and see if the glasses restrict the view to only a portion of the full field. If they do, you can eas- ily observe with your glasses off by just refocusing the tele- scope the needed amount.
If your eyes are astigmatic, images will probably appear the best with glasses on. This is because a telescope’s focuser can accommodate for nearsightedness or farsightedness, but not astigmatism. If you have to wear your glasses while observing and cannot see the entire field of view, you may want to purchase additional eyepieces that have longer eye relief.
Aligning the Finder Scope
Now, look in the finder scope. Is the object visible? Ideally, it will be somewhere in the finder’s field of view. If it is not, some coarse adjustments of the two black nylon finder scope alignment thumb screws will be needed to get the finder scope roughly parallel to the main tube.
The finder scope must be aligned accurately with the tele- scope for proper use. To align it, aim the main telescope in the general direction of an object at least
By loosening or tightening the alignment thumb screws, you change the line of sight of the finder scope. Continue making adjustments to the alignment thumb screws until the image in both the finder scope and the telescope’s eyepiece is exactly centered. Check the alignment by moving the telescope to another object and fixing the finder scope’s crosshairs on the exact point you want to look at. Then look through the telescope’s eyepiece to see if that point is centered in the field of view. If it is, the job is done. If not, make the neces- sary adjustments until the two images match up.
NOTE: The image in both the finder scope and the main telescope will appear
The finder scope alignment needs to be checked before every observing session. This can easily be done at night, before viewing through the telescope. Choose any bright star or planet, center the object in the telescope eyepiece, and then adjust the finder scope’s alignment screws until the star or planet is also centered on the finder’s crosshairs. The finder scope is an invaluable tool for locating objects in the night sky; its usage for this purpose will be discussed later, in detail.
When transporting the telescope, we recommend removing the finder scope and bracket from the tube. This is done by simply loosening the thumb screw on the dovetail slot. Store the finder scope and bracket in an appropriate eyepiece/ accessory case.
Focusing the Finder Scope
If, when looking through the finder scope, the images appear somewhat out of focus, you will need to refocus the finder scope for your eyes. Loosen the lock ring located behind the objective lens cell on the body of the finder scope (see Figure 3a). Back the lock ring off by a few turns, for now. Refocus the finder scope on a distant object by threading the objective lens cell in or out on the finder scope body. Precise focusing will be achieved by focusing the finder scope on a bright star. Once the image appears sharp, retighten the lock ring behind the objective lens cell. The finder scope’s focus should not need to be adjusted again.
5.Setting Up and Using the Equatorial Mount
When you look at the night sky, you no doubt have noticed that the stars appear to move slowly from east to west over time. That apparent motion is caused by the Earth’s rota- tion (from west to east). An equatorial mount (Figure 2) is designed to compensate for that motion, allowing you to easily “track” the movement of astronomical objects, thereby keeping them from drifting out of the telescope’s field of view while you’re observing.
This is accomplished by slowly rotating the telescope on its right ascension axis, using only the R.A.
7