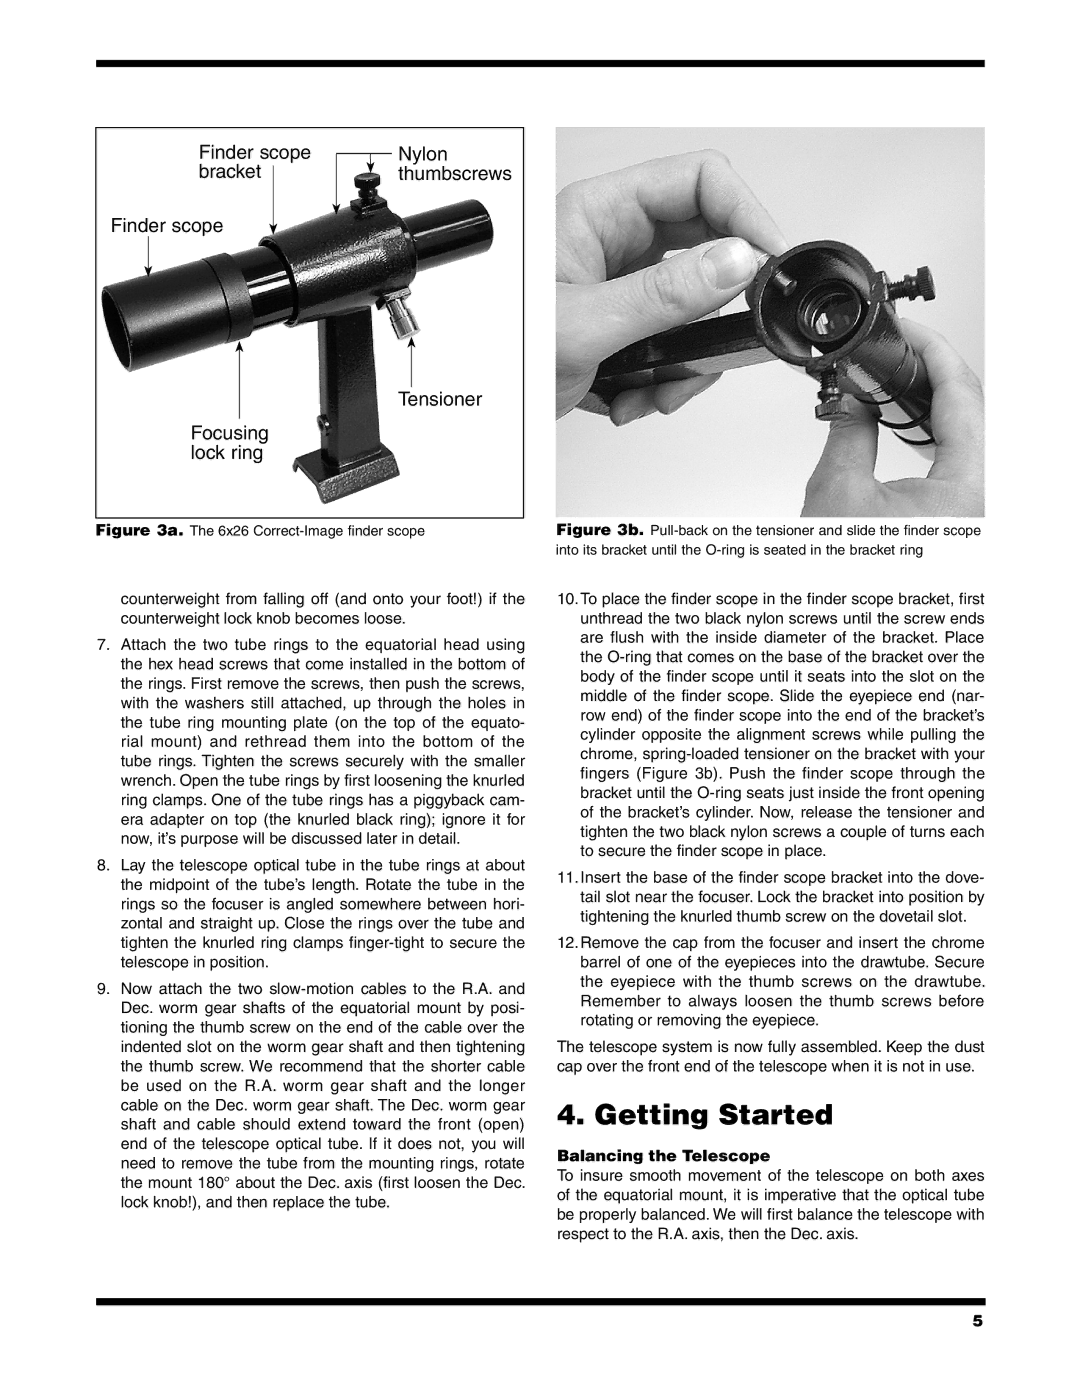
Finder scope bracket
Finder scope
Focusing lock ring
Nylon thumbscrews
Tensioner
Figure 3a. The 6x26 Correct-Image finder scope
counterweight from falling off (and onto your foot!) if the counterweight lock knob becomes loose.
7.Attach the two tube rings to the equatorial head using the hex head screws that come installed in the bottom of the rings. First remove the screws, then push the screws, with the washers still attached, up through the holes in the tube ring mounting plate (on the top of the equato- rial mount) and rethread them into the bottom of the tube rings. Tighten the screws securely with the smaller wrench. Open the tube rings by first loosening the knurled ring clamps. One of the tube rings has a piggyback cam- era adapter on top (the knurled black ring); ignore it for now, it’s purpose will be discussed later in detail.
8.Lay the telescope optical tube in the tube rings at about the midpoint of the tube’s length. Rotate the tube in the rings so the focuser is angled somewhere between hori- zontal and straight up. Close the rings over the tube and tighten the knurled ring clamps
9.Now attach the two
Figure 3b. Pull‑back on the tensioner and slide the finder scope into its bracket until the O-ring is seated in the bracket ring
10.To place the finder scope in the finder scope bracket, first unthread the two black nylon screws until the screw ends are flush with the inside diameter of the bracket. Place the O-ring that comes on the base of the bracket over the body of the finder scope until it seats into the slot on the middle of the finder scope. Slide the eyepiece end (nar- row end) of the finder scope into the end of the bracket’s cylinder opposite the alignment screws while pulling the chrome, spring-loaded tensioner on the bracket with your fingers (Figure 3b). Push the finder scope through the bracket until the O-ring seats just inside the front opening of the bracket’s cylinder. Now, release the tensioner and tighten the two black nylon screws a couple of turns each to secure the finder scope in place.
11.Insert the base of the finder scope bracket into the dove- tail slot near the focuser. Lock the bracket into position by tightening the knurled thumb screw on the dovetail slot.
12.Remove the cap from the focuser and insert the chrome barrel of one of the eyepieces into the drawtube. Secure the eyepiece with the thumb screws on the drawtube. Remember to always loosen the thumb screws before rotating or removing the eyepiece.
The telescope system is now fully assembled. Keep the dust cap over the front end of the telescope when it is not in use.
4. Getting Started
Balancing the Telescope
To insure smooth movement of the telescope on both axes of the equatorial mount, it is imperative that the optical tube be properly balanced. We will first balance the telescope with respect to the R.A. axis, then the Dec. axis.
5