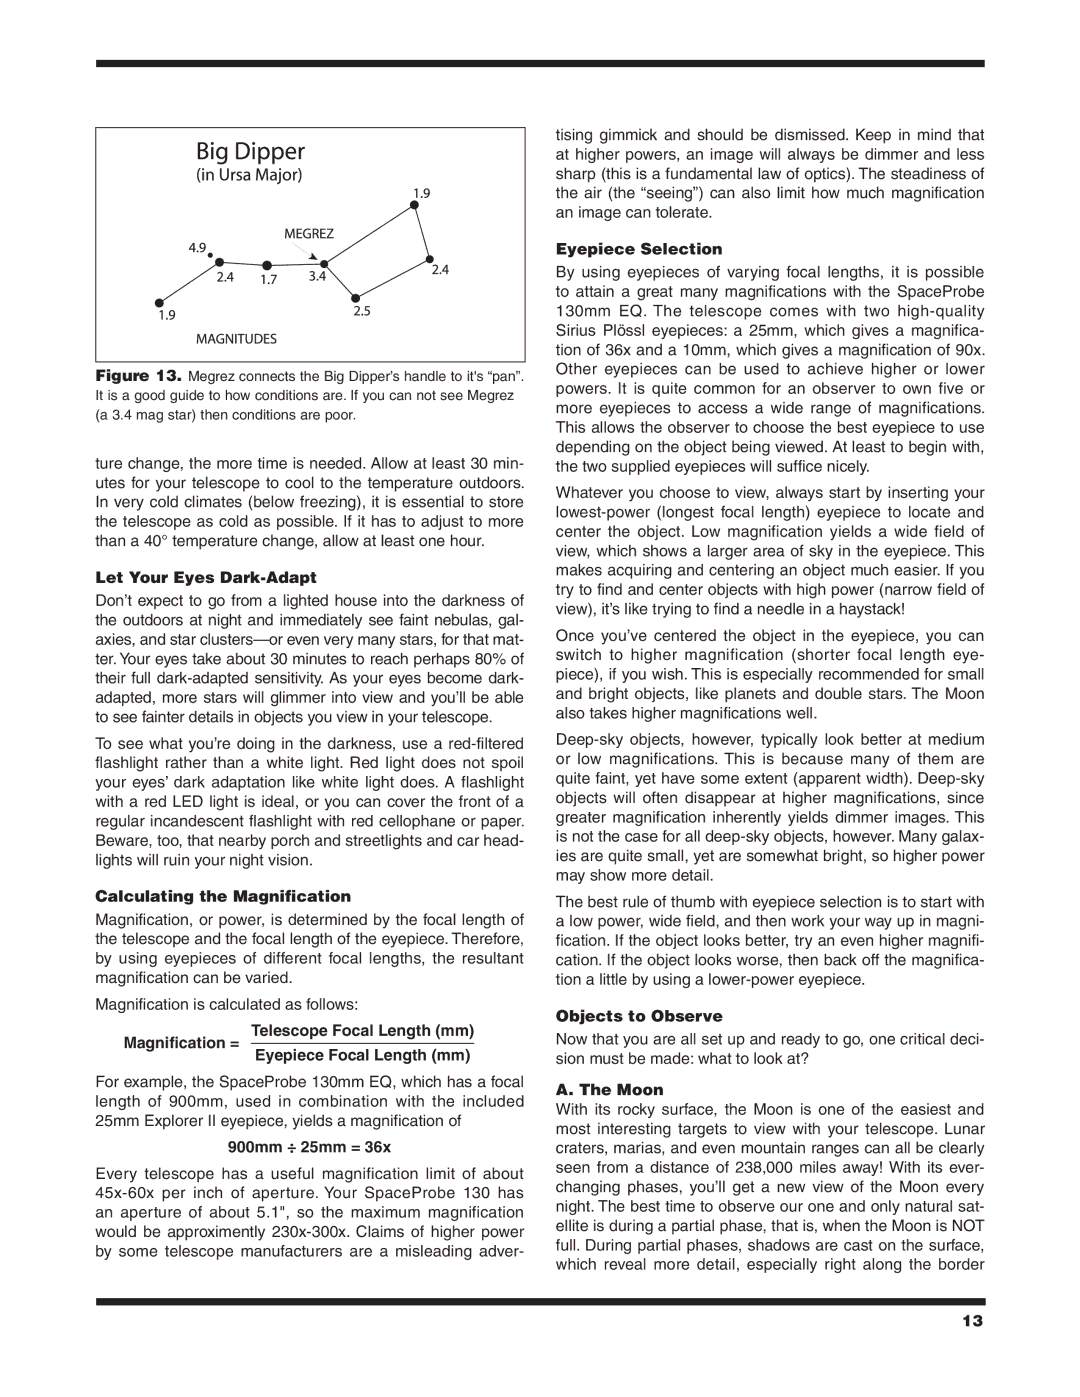
Figure 13. Megrez connects the Big Dipper’s handle to it's “pan”. It is a good guide to how conditions are. If you can not see Megrez (a 3.4 mag star) then conditions are poor.
ture change, the more time is needed. Allow at least 30 min- utes for your telescope to cool to the temperature outdoors. In very cold climates (below freezing), it is essential to store the telescope as cold as possible. If it has to adjust to more than a 40° temperature change, allow at least one hour.
Let Your Eyes Dark-Adapt
Don’t expect to go from a lighted house into the darkness of the outdoors at night and immediately see faint nebulas, gal- axies, and star
To see what you’re doing in the darkness, use a
Calculating the Magnification
Magnification, or power, is determined by the focal length of the telescope and the focal length of the eyepiece. Therefore, by using eyepieces of different focal lengths, the resultant magnification can be varied.
Magnification is calculated as follows:
Telescope Focal Length (mm)
Magnification = Eyepiece Focal Length (mm)
For example, the SpaceProbe 130mm EQ, which has a focal length of 900mm, used in combination with the included 25mm Explorer II eyepiece, yields a magnification of
900mm ÷ 25mm = 36x
Every telescope has a useful magnification limit of about
tising gimmick and should be dismissed. Keep in mind that at higher powers, an image will always be dimmer and less sharp (this is a fundamental law of optics). The steadiness of the air (the “seeing”) can also limit how much magnification an image can tolerate.
Eyepiece Selection
By using eyepieces of varying focal lengths, it is possible to attain a great many magnifications with the SpaceProbe 130mm EQ. The telescope comes with two
Whatever you choose to view, always start by inserting your
Once you’ve centered the object in the eyepiece, you can switch to higher magnification (shorter focal length eye- piece), if you wish. This is especially recommended for small and bright objects, like planets and double stars. The Moon also takes higher magnifications well.
The best rule of thumb with eyepiece selection is to start with a low power, wide field, and then work your way up in magni- fication. If the object looks better, try an even higher magnifi- cation. If the object looks worse, then back off the magnifica- tion a little by using a
Objects to Observe
Now that you are all set up and ready to go, one critical deci- sion must be made: what to look at?
A. The Moon
With its rocky surface, the Moon is one of the easiest and most interesting targets to view with your telescope. Lunar craters, marias, and even mountain ranges can all be clearly seen from a distance of 238,000 miles away! With its ever- changing phases, you’ll get a new view of the Moon every night. The best time to observe our one and only natural sat- ellite is during a partial phase, that is, when the Moon is NOT full. During partial phases, shadows are cast on the surface, which reveal more detail, especially right along the border
13