
140722, Oster ROASTER OVEN specifications
The Oster ROASTER OVEN, model 140722, is a versatile kitchen appliance designed to enhance your cooking experience. This roaster oven combines convenience and efficiency, making it an ideal addition to any home, especially for those who love to entertain or cook large meals.One of the standout features of the Oster 140722 is its large capacity. With a generous cooking space, it can accommodate everything from a whole turkey to multiple side dishes, making it a perfect choice for holidays, gatherings, and family dinners. Its ample interior space allows you to roast, bake, and slow-cook meals effortlessly.
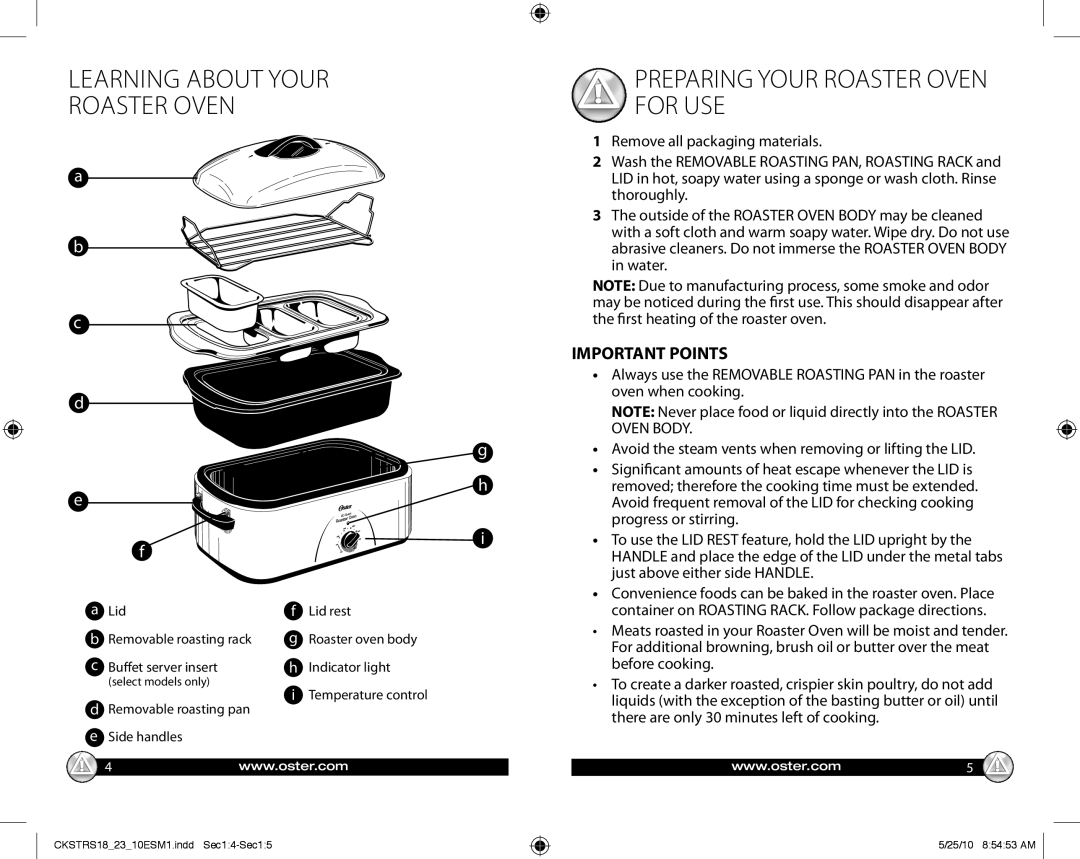
A defining characteristic of this roaster oven is its adjustable temperature control, which ranges from 150°F to 450°F. This flexibility ensures that you can achieve the perfect cooking environment for a wide variety of dishes, whether you are baking, roasting, or warming leftovers. The built-in indicator light is a helpful addition, letting you know when the oven is preheating and ready for use.
The Oster ROASTER OVEN is equipped with a turbo convection cooking technology that circulates hot air around the food, promoting even cooking and browning. This innovative feature not only enhances the flavor of your meals but also reduces cooking time, allowing you to serve delicious dishes more quickly.
Another benefit of this roaster oven is its removable rack that makes it easy to lift out food while minimizing mess. The non-stick cooking surface ensures that food doesn’t stick and makes cleanup a breeze. The exterior is designed with a durable finish, making it easy to maintain and resistant to scratches and dents.
Safety is also a priority with the Oster 140722. The oven comes with a lid that seals in moisture and heat while providing safety features such as cool-touch handles to prevent burns.
In summary, the Oster ROASTER OVEN, model 140722, stands out for its large capacity, adjustable temperature control, turbo convection technology, and ease of cleaning. These features make it a reliable tool for anyone looking to streamline their cooking process and produce flavorful meals. Whether you're roasting, baking, or slow-cooking, this roaster oven is designed to meet your culinary needs with efficiency and style.