
Electric Skillet, SPR-120710-869 specifications
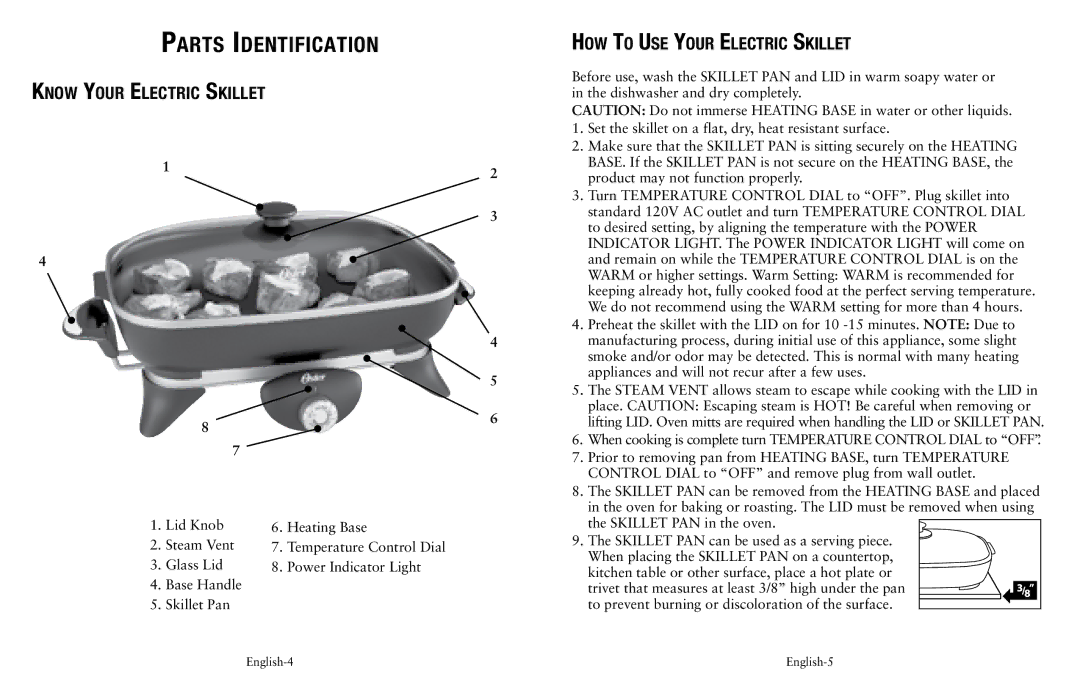
The Oster Electric Skillet (Model 166145) is a versatile kitchen appliance that offers an array of features designed to enhance cooking efficiency and convenience. This electric skillet is perfect for families, meal preppers, or anyone who enjoys making large meals with ease.One of the standout characteristics of the Oster Electric Skillet is its generous cooking surface, which typically measures around 16 inches. This spacious design allows for accommodating large quantities of food, making it ideal for family meals, entertaining guests, or batch cooking. The non-stick interior ensures that food releases easily, facilitating effortless cooking and cleaning. With a non-stick surface, cooks can use less oil or butter, promoting healthier meal preparation.
The skillet also features an adjustable temperature control, which empowers users to select the perfect heat for their cooking needs. This flexibility allows for browning, sautéing, simmering, and frying, all in one appliance. The temperature control provides a range of settings, ensuring that whatever you're cooking is done to perfection.
Another notable feature of the Oster Electric Skillet is its durable construction. Made with high-quality materials, it is designed to withstand the rigors of daily cooking. The tempered glass lid helps to trap heat and moisture while allowing users to monitor their food without lifting the lid, reducing heat loss and cooking time.
Safety is also a crucial aspect of the Oster Electric Skillet. It is equipped with cool-touch handles that remain safe to touch, even when the skillet is hot. This safety feature enhances usability, especially for those who may be more prone to accidental burns.
In terms of versatility, the Oster Electric Skillet can be used for a broad range of cooking methods. From frying breakfast eggs to simmering stews, this appliance can handle it all. Additionally, it is compatible with various types of recipes, including stir-fries, pancakes, and even desserts.
Cleanup is simplified with the Oster Electric Skillet, as many models are dishwasher-safe or can be easily wiped clean. This feature makes it an excellent choice for busy individuals or families who want to spend less time cleaning and more time enjoying their meals.
In summary, the Oster Electric Skillet (Model 166145) is a high-quality kitchen appliance that offers a user-friendly experience, ample cooking space, and a variety of features suited for multiple cooking methods. Its combination of durability, safety, and versatility makes it a valuable addition to any kitchen.