Connecting to the HUB
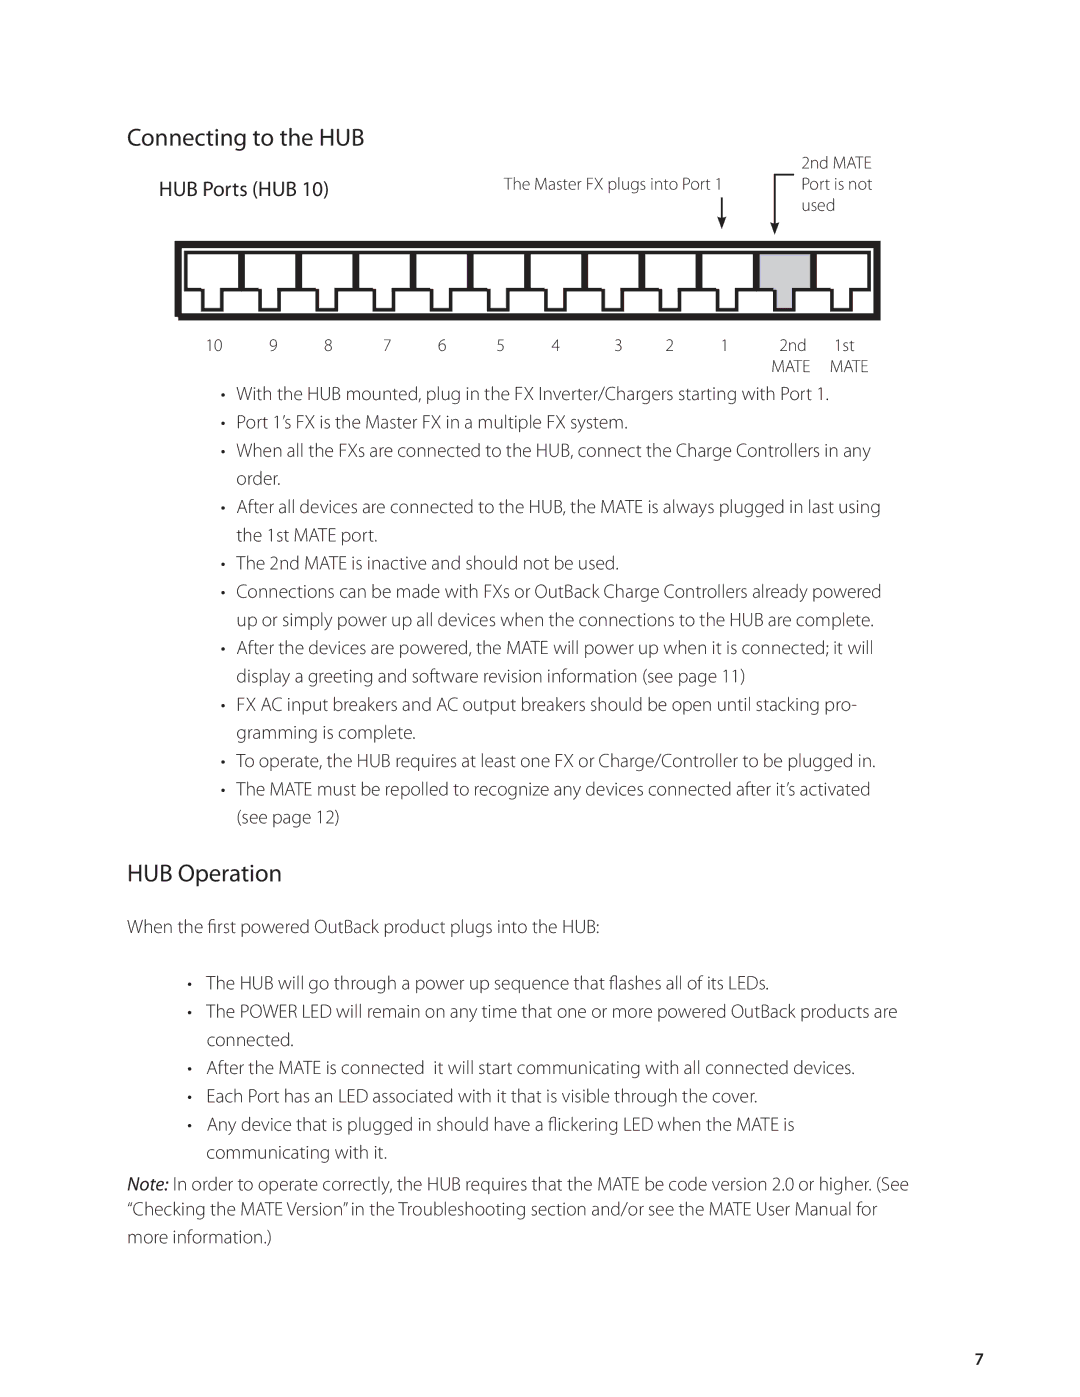
HUB Ports (HUB 10)
The Master FX plugs into Port 1
2nd MATE Port is not used
10 | 9 | 8 | 7 | 6 | 5 | 4 | 3 | 2 | 1 | 2nd | 1st |
|
|
|
|
|
|
|
|
|
| MATE | MATE |
•With the HUB mounted, plug in the FX Inverter/Chargers starting with Port 1.
•Port 1’s FX is the Master FX in a multiple FX system.
•When all the FXs are connected to the HUB, connect the Charge Controllers in any order.
•After all devices are connected to the HUB, the MATE is always plugged in last using the 1st MATE port.
•The 2nd MATE is inactive and should not be used.
•Connections can be made with FXs or OutBack Charge Controllers already powered up or simply power up all devices when the connections to the HUB are complete.
•After the devices are powered, the MATE will power up when it is connected; it will display a greeting and software revision information (see page 11)
•FX AC input breakers and AC output breakers should be open until stacking pro- gramming is complete.
•To operate, the HUB requires at least one FX or Charge/Controller to be plugged in.
•The MATE must be repolled to recognize any devices connected after it’s activated (see page 12)
HUB Operation
When the first powered OutBack product plugs into the HUB:
•The HUB will go through a power up sequence that flashes all of its LEDs.
•The POWER LED will remain on any time that one or more powered OutBack products are connected.
•After the MATE is connected it will start communicating with all connected devices.
•Each Port has an LED associated with it that is visible through the cover.
•Any device that is plugged in should have a flickering LED when the MATE is communicating with it.
Note: In order to operate correctly, the HUB requires that the MATE be code version 2.0 or higher. (See “Checking the MATE Version” in the Troubleshooting section and/or see the MATE User Manual for more information.)
7