Owner’s Manual
System Setup
3.With the cursor pointing to channel calibration, press SET on the front panel or the remote.
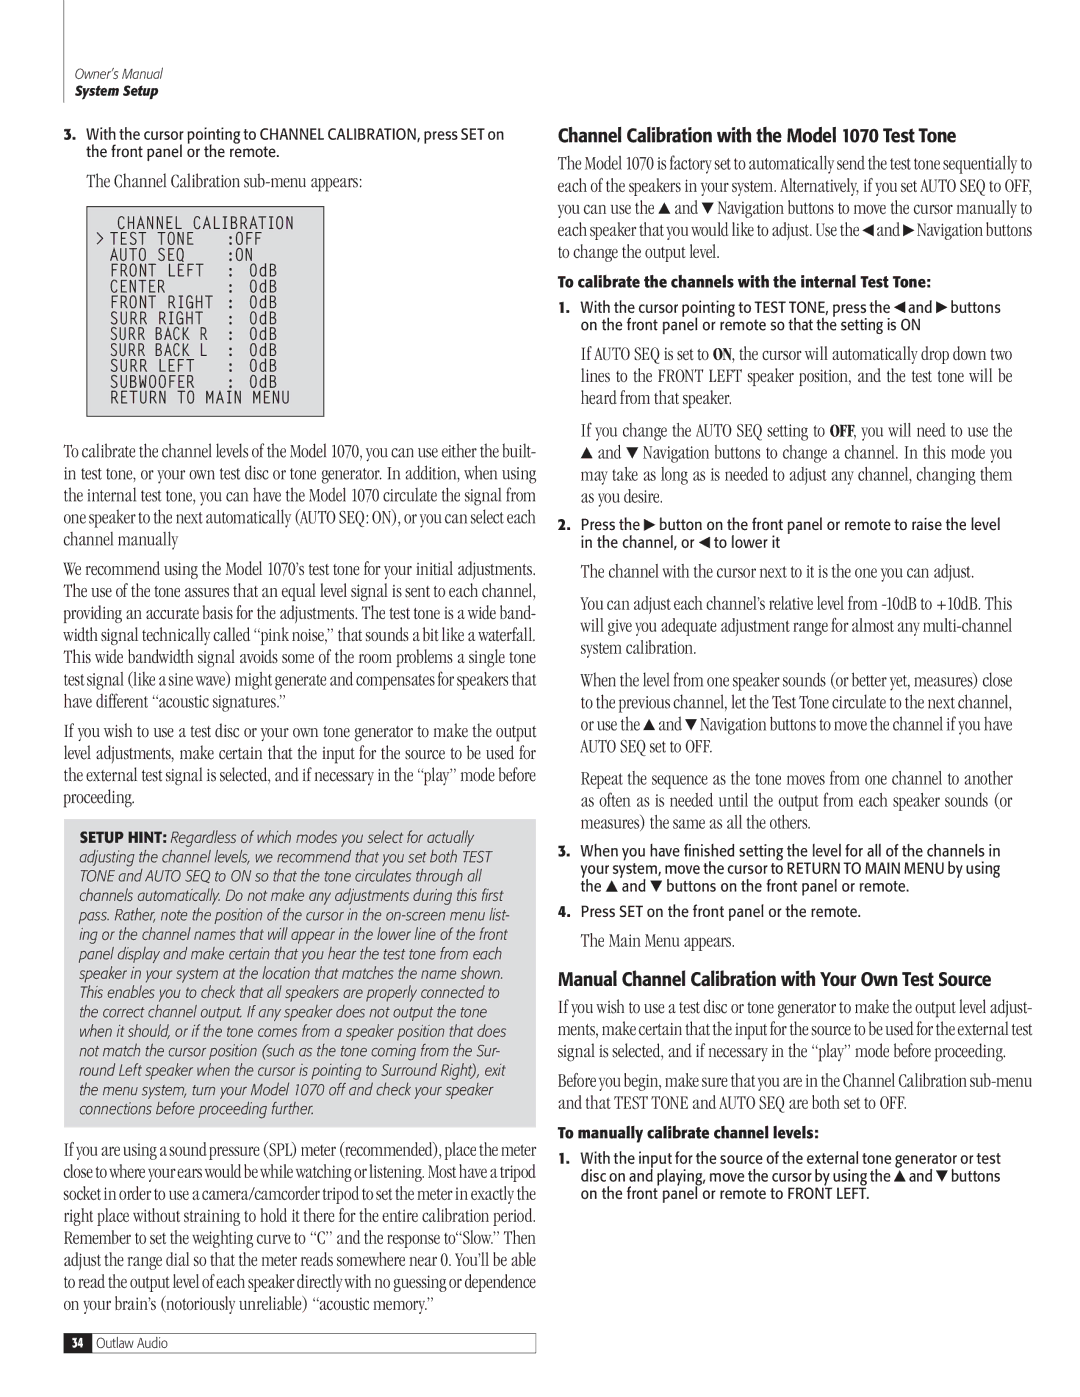
The Channel Calibration sub-menu appears:
channel calibration |
> test | tone | :off |
AUTO | SEQ | :ON |
front left | : 0db |
center | : 0db |
front right | : 0db |
surr | Right | : 0db |
surr back R | : 0db |
surr back l | : 0db |
surr | LEFT | : 0db |
subwoofer | : 0db |
return to main menu
To calibrate the channel levels of the Model 1070, you can use either the built- in test tone, or your own test disc or tone generator. In addition, when using the internal test tone, you can have the Model 1070 circulate the signal from one speaker to the next automatically (AUTO SEQ: ON), or you can select each channel manually
We recommend using the Model 1070’s test tone for your initial adjustments. The use of the tone assures that an equal level signal is sent to each channel, providing an accurate basis for the adjustments. The test tone is a wide band- width signal technically called “pink noise,” that sounds a bit like a waterfall. This wide bandwidth signal avoids some of the room problems a single tone test signal (like a sine wave) might generate and compensates for speakers that have different “acoustic signatures.”
If you wish to use a test disc or your own tone generator to make the output level adjustments, make certain that the input for the source to be used for the external test signal is selected, and if necessary in the “play” mode before proceeding.
SETUP HINT: Regardless of which modes you select for actually adjusting the channel levels, we recommend that you set both TEST TONE and AUTO SEQ to ON so that the tone circulates through all channels automatically. Do not make any adjustments during this first pass. Rather, note the position of the cursor in the on-screen menu list- ing or the channel names that will appear in the lower line of the front panel display and make certain that you hear the test tone from each speaker in your system at the location that matches the name shown. This enables you to check that all speakers are properly connected to the correct channel output. If any speaker does not output the tone when it should, or if the tone comes from a speaker position that does not match the cursor position (such as the tone coming from the Sur- round Left speaker when the cursor is pointing to Surround Right), exit the menu system, turn your Model 1070 off and check your speaker connections before proceeding further.
If you are using a sound pressure (SPL) meter (recommended), place the meter close to where your ears would be while watching or listening. Most have a tripod socket in order to use a camera/camcorder tripod to set the meter in exactly the right place without straining to hold it there for the entire calibration period. Remember to set the weighting curve to “C” and the response to“Slow.” Then adjust the range dial so that the meter reads somewhere near 0. You’ll be able to read the output level of each speaker directly with no guessing or dependence on your brain’s (notoriously unreliable) “acoustic memory.”
Channel Calibration with the Model 1070 Test Tone
The Model 1070 is factory set to automatically send the test tone sequentially to each of the speakers in your system. Alternatively, if you set AUTO SEQ to OFF, you can use the  and
and  Navigation buttons to move the cursor manually to each speaker that you would like to adjust. Use the
  and
and  Navigation buttons to change the output level.
To calibrate the channels with the internal Test Tone:
1.With the cursor pointing to test tone, press the  and
and  buttons on the front panel or remote so that the setting is ON
If AUTO SEQ is set to ON, the cursor will automatically drop down two lines to the FRONT LEFT speaker position, and the test tone will be heard from that speaker.
If you change the AUTO SEQ setting to OFF, you will need to use the  and
and  Navigation buttons to change a channel. In this mode you may take as long as is needed to adjust any channel, changing them
as you desire.
2.Press the  button on the front panel or remote to raise the level in the channel, or
  to lower it
The channel with the cursor next to it is the one you can adjust.
You can adjust each channel’s relative level from -10dB to +10dB. This will give you adequate adjustment range for almost any multi-channel system calibration.
When the level from one speaker sounds (or better yet, measures) close to the previous channel, let the Test Tone circulate to the next channel, or use the  and
and  Navigation buttons to move the channel if you have AUTO SEQ set to OFF.
Repeat the sequence as the tone moves from one channel to another as often as is needed until the output from each speaker sounds (or measures) the same as all the others.
3.When you have finished setting the level for all of the channels in your system, move the cursor to return to MAIN menu by using the  and
and  buttons on the front panel or remote.
4.Press SET on the front panel or the remote.
The Main Menu appears.
Manual Channel Calibration with Your Own Test Source
If you wish to use a test disc or tone generator to make the output level adjust- ments, make certain that the input for the source to be used for the external test signal is selected, and if necessary in the “play” mode before proceeding.
Before you begin, make sure that you are in the Channel Calibration sub-menu and that TEST TONE and AUTO SEQ are both set to OFF.
To manually calibrate channel levels:
1.With the input for the source of the external tone generator or test disc on and playing, move the cursor by using the  and
and  buttons on the front panel or remote to FRONT LEFT.