Setting Picture
Using the Preset Picture Mode
1 Press MENU to display the menu main page.
The [Video] menu page will be highlighted automatically.
Video Audio Screen Program Option
2
3
4
5
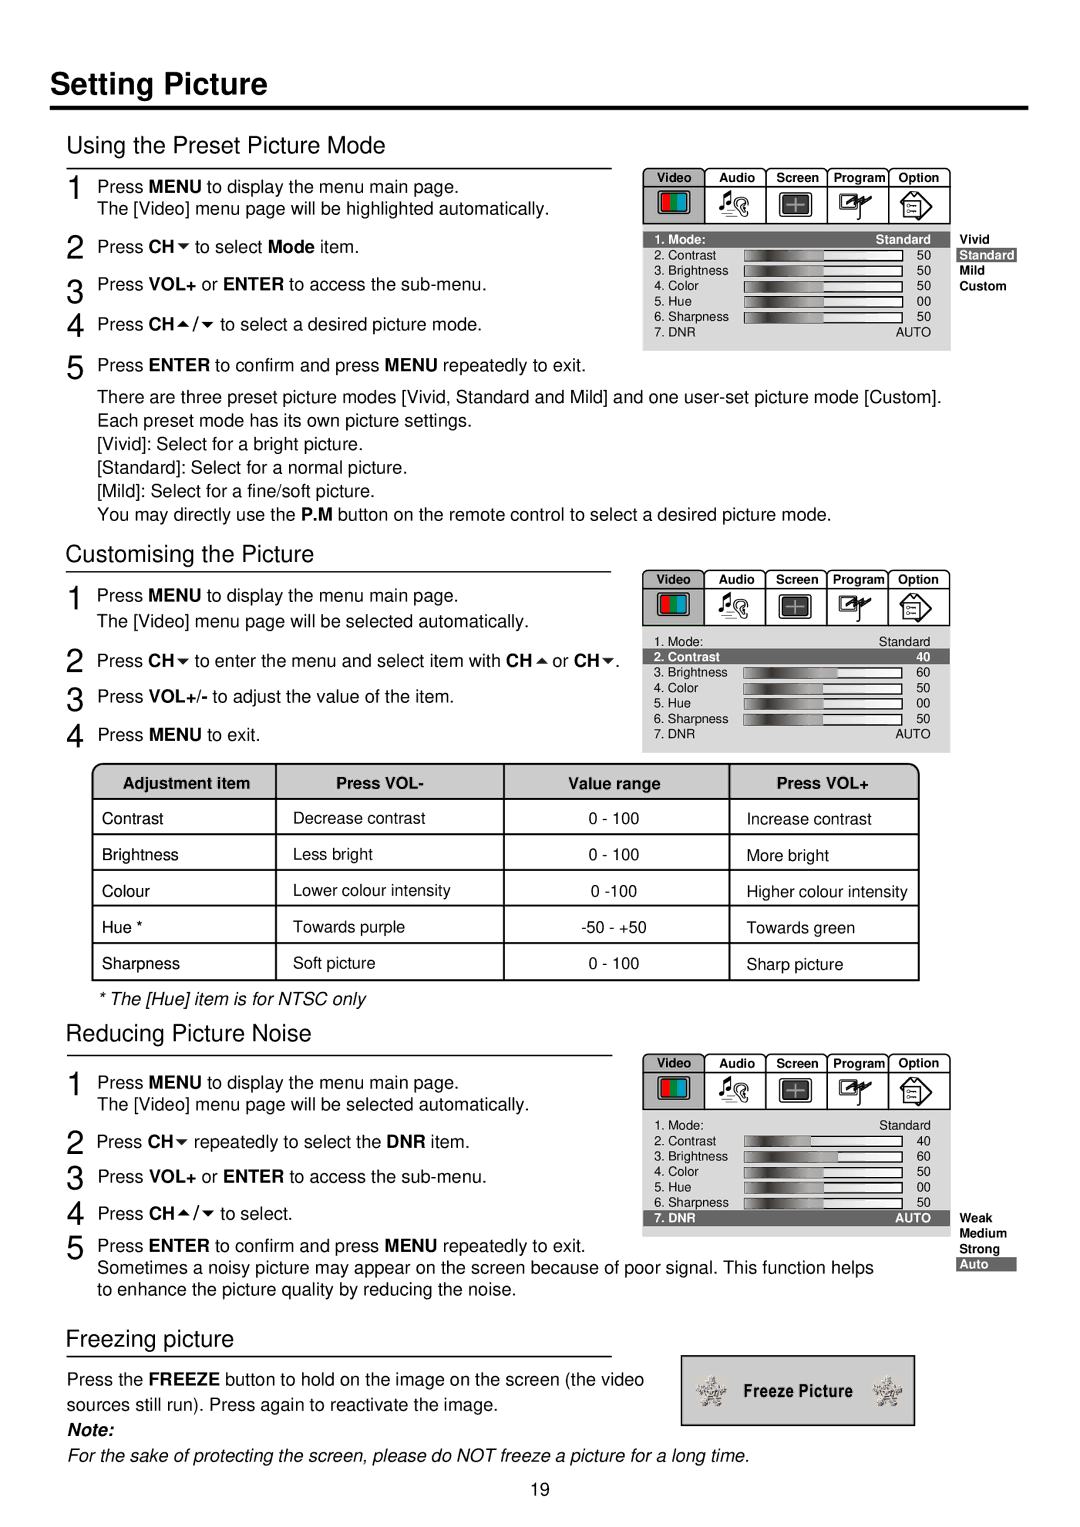
Press CH to select Mode item. | 1. | Mode: | Standard | Vivid | |||||
2. Contrast |
|
|
| 50 | Standard | ||||
|
|
| |||||||
Press VOL+ or ENTER to access the | 3. | Brightness |
|
|
| 50 | Mild | ||
|
|
| |||||||
4. Color |
|
| 50 | Custom | |||||
|
|
| |||||||
|
| 5. | Hue |
| 00 |
| |||
|
|
|
|
| |||||
Press CH | to select a desired picture mode. | 6. | Sharpness |
|
| 50 |
| ||
|
|
|
| ||||||
7. DNR | AUTO |
| |||||||
Press ENTER to confirm and press MENU repeatedly to exit.
There are three preset picture modes [Vivid, Standard and Mild] and one
[Vivid]: Select for a bright picture.
[Standard]: Select for a normal picture.
[Mild]: Select for a fine/soft picture.
You may directly use the P.M button on the remote control to select a desired picture mode.
Customising the Picture
1 | Press MENU to display the menu main page. |
| The [Video] menu page will be selected automatically. |
2 | Press CH to enter the menu and select item with CH or CH . |
3 Press VOL+/- to adjust the value of the item. 4 Press MENU to exit.
Video | Audio | Screen Program Option | |
1. | Mode: |
| Standard |
2. | Contrast | 40 | |
3. | Brightness | 60 | |
4. | Color |
| 50 |
5. | Hue |
| 00 |
6. | Sharpness | 50 | |
7. DNR |
| AUTO | |
Adjustment item | Press VOL- | Value range | Press VOL+ |
|
|
|
|
Contrast | Decrease contrast | 0 - 100 | Increase contrast |
|
|
|
|
Brightness | Less bright | 0 - 100 | More bright |
|
|
|
|
Colour | Lower colour intensity | 0 | Higher colour intensity |
Hue * | Towards purple | Towards green | |
|
|
|
|
Sharpness | Soft picture | 0 - 100 | Sharp picture |
|
|
|
|
* The [Hue] item is for NTSC only
Reducing Picture Noise
1 Press MENU to display the menu main page.
The [Video] menu page will be selected automatically.
Video Audio Screen Program Option
2
3
4
5
Press CH repeatedly to select the DNR item. | 1. | Mode: | Standard | |||||
2. Contrast |
|
|
| 40 | ||||
|
|
| ||||||
|
| 3. | Brightness |
|
|
| 60 | |
|
|
|
|
| ||||
Press VOL+ or ENTER to access the | 4. | Color |
|
| 50 | |||
|
|
| ||||||
5. | Hue |
|
|
| 00 | |||
|
|
|
| |||||
Press CH | to select. | 6. | Sharpness |
|
| 50 | ||
|
|
| ||||||
7. DNR | AUTO | |||||||
Press ENTER to confirm and press MENU repeatedly to exit.
Sometimes a noisy picture may appear on the screen because of poor signal. This function helps to enhance the picture quality by reducing the noise.
Weak
Medium
Strong
Auto
Freezing picture
Press the FREEZE button to hold on the image on the screen (the video sources still run). Press again to reactivate the image.
Note:
For the sake of protecting the screen, please do NOT freeze a picture for a long time.
19