SET UP for MULTI DISPLAY
Item | Details |
|
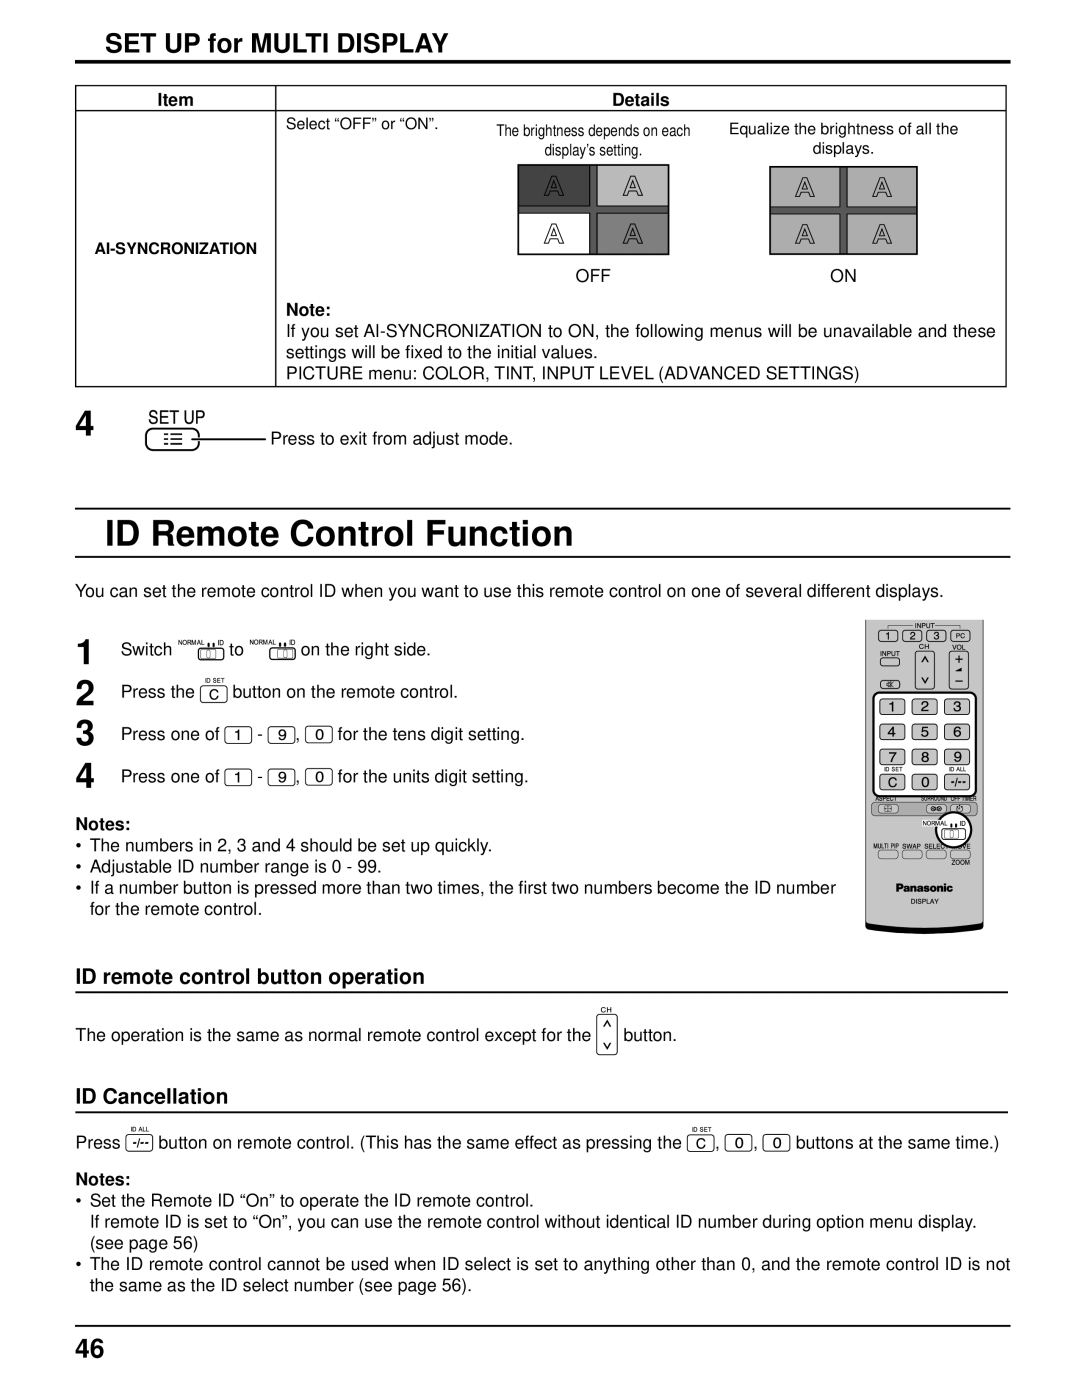
Select “OFF” or “ON”. | The brightness depends on each | Equalize the brightness of all the |
| display’s setting. | displays. |
| |
OFF | ON |
Note:
If you set
PICTURE menu: COLOR, TINT, INPUT LEVEL (ADVANCED SETTINGS)
4![]() Press to exit from adjust mode.
Press to exit from adjust mode.
ID Remote Control Function
You can set the remote control ID when you want to use this remote control on one of several different displays.
1
2
3
4
Switch ![]()
![]()
![]()
![]()
![]()
![]()
![]() to
to ![]()
![]()
![]()
![]() on the right side.
on the right side.
Press the ![]() button on the remote control.
button on the remote control.
Press one of ![]() -
- ![]() ,
, ![]() for the tens digit setting.
for the tens digit setting.
Press one of ![]() -
- ![]() ,
, ![]() for the units digit setting.
for the units digit setting.
Notes:
• The numbers in 2, 3 and 4 should be set up quickly.
• Adjustable ID number range is 0 - 99.
• If a number button is pressed more than two times, the first two numbers become the ID number for the remote control.
ID remote control button operation
The operation is the same as normal remote control except for the ![]() button.
button.
ID Cancellation
Press ![]() button on remote control. (This has the same effect as pressing the
button on remote control. (This has the same effect as pressing the ![]() ,
, ![]() ,
, ![]() buttons at the same time.)
buttons at the same time.)
Notes:
•Set the Remote ID “On” to operate the ID remote control.
If remote ID is set to “On”, you can use the remote control without identical ID number during option menu display. (see page 56)
•The ID remote control cannot be used when ID select is set to anything other than 0, and the remote control ID is not the same as the ID select number (see page 56).
46