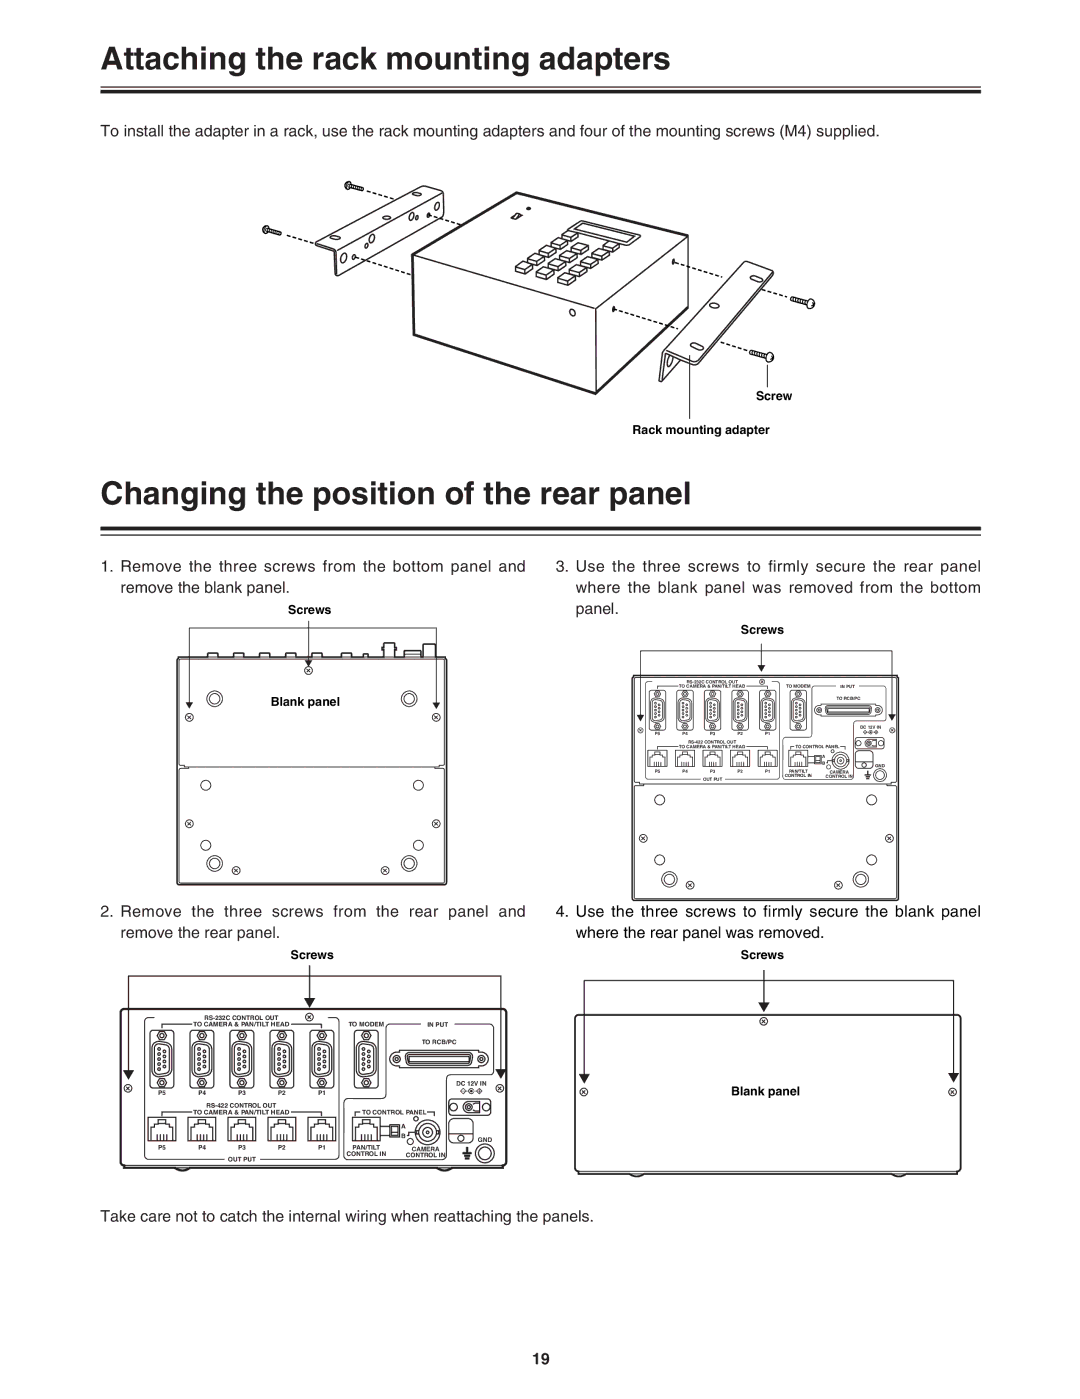
Attaching the rack mounting adapters
To install the adapter in a rack, use the rack mounting adapters and four of the mounting screws (M4) supplied.
Screw
Rack mounting adapter
Changing the position of the rear panel
1.Remove the three screws from the bottom panel and remove the blank panel.
Screws |
Blank panel |
3.Use the three screws to firmly secure the rear panel where the blank panel was removed from the bottom
panel.
Screws
|
|
|
|
| |||
| TO CAMERA & PAN/TILT HEAD |
| TO MODEM |
| IN PUT | ||
|
|
|
|
|
|
| TO RCB/PC |
|
|
|
|
|
|
| DC 12V IN |
P5 | P4 | P3 | P2 | P1 |
|
|
|
|
|
|
|
|
|
| |
| TO CAMERA & PAN/TILT HEAD |
| TO CONTROL PANEL | ||||
|
|
|
|
|
| A |
|
|
|
|
|
|
| B | GND |
|
|
|
|
|
|
| |
P5 | P4 | P3 | P2 | P1 | PAN/TILT |
| CAMERA |
|
| OUT PUT |
|
| CONTROL IN |
| CONTROL IN |
|
|
|
|
|
|
| |
2.Remove the three screws from the rear panel and remove the rear panel.
Screws
4.Use the three screws to firmly secure the blank panel where the rear panel was removed.
Screws
|
|
|
|
| |||
| TO CAMERA & PAN/TILT HEAD |
| TO MODEM |
| IN PUT | ||
|
|
|
|
|
|
| TO RCB/PC |
|
|
|
|
|
|
| DC 12V IN |
P5 | P4 | P3 | P2 | P1 |
|
|
|
|
|
|
|
|
|
| |
| TO CAMERA & PAN/TILT HEAD |
| TO CONTROL PANEL | ||||
|
|
|
|
|
| A |
|
|
|
|
|
|
| B | GND |
|
|
|
|
|
|
| |
P5 | P4 | P3 | P2 | P1 | PAN/TILT |
| CAMERA |
|
| OUT PUT |
|
| CONTROL IN |
| CONTROL IN |
|
|
|
|
|
|
| |
Blank panel
Take care not to catch the internal wiring when reattaching the panels.
19