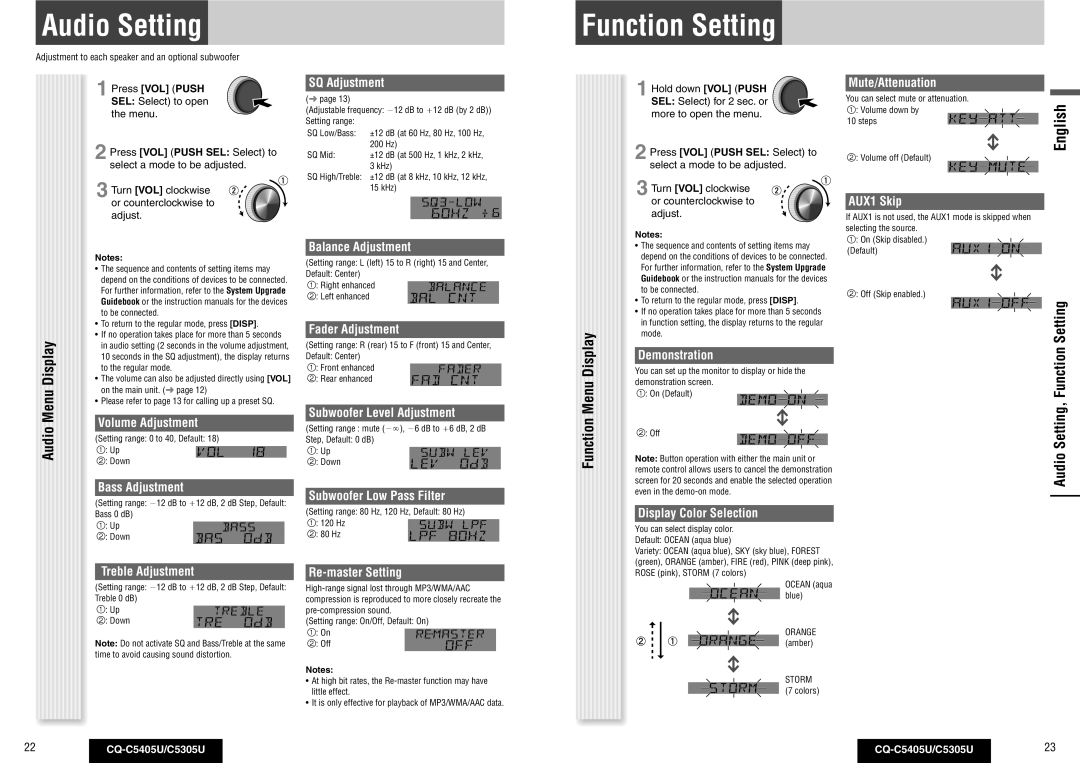
Audio Setting
Adjustment to each speaker and an optional subwoofer
Function Setting
1 Press [VOL] (PUSH SEL: Select) to open the menu.
2 Press [VOL] (PUSH SEL: Select) to select a mode to be adjusted.
3 Turn [VOL] clockwise or counterclockwise to adjust.
| Notes: | |||||||
| • The sequence and contents of setting items may | |||||||
| depend on the conditions of devices to be connected. | |||||||
| For further information, refer to the System Upgrade | |||||||
| Guidebook or the instruction manuals for the devices | |||||||
| to be connected. | |||||||
| • To return to the regular mode, press [DISP]. | |||||||
Display | • If no operation takes place for more than 5 seconds | |||||||
in audio setting (2 seconds in the volume adjustment, | ||||||||
| ||||||||
| 10 seconds in the SQ adjustment), the display returns | |||||||
| to the regular mode. | |||||||
| • The volume can also be adjusted directly using [VOL] | |||||||
Menu | on the main unit. ( page 12) | |||||||
• Please refer to page 13 for calling up a preset SQ. | ||||||||
| ||||||||
|
|
|
|
|
|
|
| |
Audio | Volume Adjustment | |||||||
(Setting range: 0 to 40, Default: 18) | ||||||||
| ||||||||
| : Up |
|
|
|
| |||
|
|
|
| |||||
| : Down |
|
|
|
| |||
|
|
|
|
|
|
|
| |
| Bass Adjustment | |||||||
| (Setting range: 12 dB to 12 dB, 2 dB Step, Default: | |||||||
| Bass 0 dB) | |||||||
| : Up |
|
|
|
| |||
|
|
| ||||||
| : Down |
|
|
|
| |||
|
|
|
|
|
|
|
| |
| Treble Adjustment | |||||||
| (Setting range: 12 dB to 12 dB, 2 dB Step, Default: | |||||||
| Treble 0 dB) | |||||||
| : Up |
|
| |||||
|
| |||||||
| : Down |
|
| |||||
|
|
|
|
|
|
|
| |
Note: Do not activate SQ and Bass/Treble at the same time to avoid causing sound distortion.
SQ Adjustment
( page 13)
(Adjustable frequency: 12 dB to 12 dB (by 2 dB)) Setting range:
SQ Low/Bass:
SQ Mid:
SQ High/Treble:
Balance Adjustment
(Setting range: L (left) 15 to R (right) 15 and Center,
Default: Center)
: Right enhanced
: Left enhanced
Fader Adjustment
(Setting range: R (rear) 15 to F (front) 15 and Center,
Default: Center)
: Front enhanced
: Rear enhanced
Subwoofer Level Adjustment
(Setting range : mute (), 6 dB to 6 dB, 2 dB
Step, Default: 0 dB)
: Up
: Down
Subwoofer Low Pass Filter
(Setting range: 80 Hz, 120 Hz, Default: 80 Hz)
: 120 Hz
: 80 Hz
Re-master Setting
(Setting range: On/Off, Default: On)
: On
: Off
Notes:
•At high bit rates, the
•It is only effective for playback of MP3/WMA/AAC data.
Function Menu Display
1 Hold down [VOL] (PUSH ![]() SEL: Select) for 2 sec. or
SEL: Select) for 2 sec. or ![]()
![]() more to open the menu.
more to open the menu. ![]()
![]()
![]()
2 Press [VOL] (PUSH SEL: Select) to select a mode to be adjusted.
3 Turn [VOL] clockwise or counterclockwise to adjust.
Notes:
•The sequence and contents of setting items may depend on the conditions of devices to be connected. For further information, refer to the System Upgrade Guidebook or the instruction manuals for the devices to be connected.
•To return to the regular mode, press [DISP].
•If no operation takes place for more than 5 seconds in function setting, the display returns to the regular mode.
Demonstration
You can set up the monitor to display or hide the demonstration screen.
: On (Default)
: Off
Note: Button operation with either the main unit or remote control allows users to cancel the demonstration screen for 20 seconds and enable the selected operation even in the
Display Color Selection
You can select display color. Default: OCEAN (aqua blue)
Variety: OCEAN (aqua blue), SKY (sky blue), FOREST (green), ORANGE (amber), FIRE (red), PINK (deep pink), ROSE (pink), STORM (7 colors)
OCEAN (aqua blue)
ORANGE (amber)
STORM (7 colors)
Mute/Attenuation
You can select mute or attenuation. : Volume down by
10 steps
: Volume off (Default)
AUX1 Skip
If AUX1 is not used, the AUX1 mode is skipped when selecting the source.
: On (Skip disabled.) (Default)
: Off (Skip enabled.)
English
Audio Setting, Function Setting
22 |
| 23 | ||
|
|
|
|
|
