N
E Preparations (Remote Control)
G
L
I
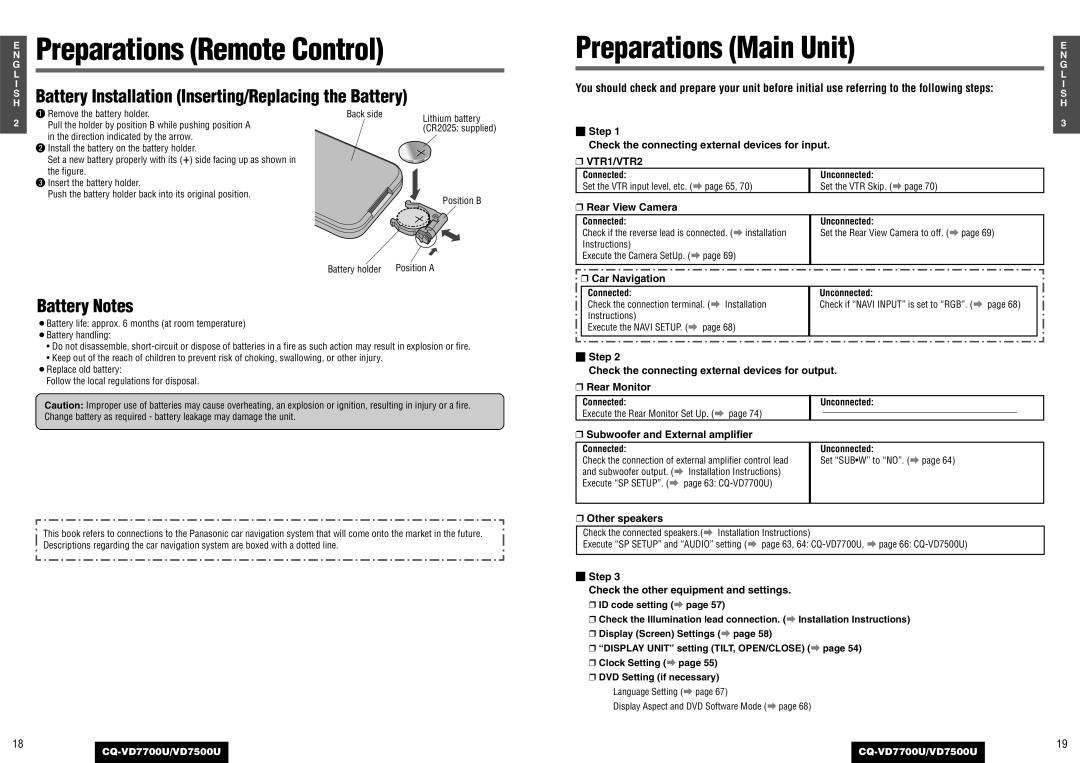
S Battery Installation (Inserting/Replacing the Battery)
H
2 | q Remove the battery holder. |
| Back side | Lithium battery | ||
Pull the holder by position B while pushing position A |
|
| ||||
|
| (CR2025: supplied) | ||||
|
| |||||
| in the direction indicated by the arrow. |
|
| |||
|
|
|
|
|
| |
| w Install the battery on the battery holder. |
|
|
|
|
|
| Set a new battery properly with its (+) side facing up as shown in |
|
|
|
|
|
|
|
|
|
|
| |
| the figure. |
|
|
|
|
|
| e Insert the battery holder. |
|
|
|
|
|
| Push the battery holder back into its original position. |
|
|
|
| Position B |
|
|
|
|
|
| |
|
|
|
|
|
|
|
Battery holder | Position A |
Battery Notes
¡Battery life: approx. 6 months (at room temperature) ¡Battery handling:
•Do not disassemble,
•Keep out of the reach of children to prevent risk of choking, swallowing, or other injury.
¡Replace old battery:
Follow the local regulations for disposal.
Caution: Improper use of batteries may cause overheating, an explosion or ignition, resulting in injury or a fire. Change battery as required - battery leakage may damage the unit.
This book refers to connections to the Panasonic car navigation system that will come onto the market in the future. Descriptions regarding the car navigation system are boxed with a dotted line.
18
Preparations (Main Unit) |
|
| N | ||||
|
|
|
|
|
|
| E |
|
|
|
|
|
|
| G |
|
|
|
|
|
|
| |
|
|
|
|
|
|
| L |
You should check and prepare your unit before initial use referring to the following steps: |
|
| I | ||||
|
|
|
|
|
|
| S |
|
|
|
|
|
|
| H |
■ Step 1 |
|
|
|
| 3 | ||
|
|
|
|
| |||
|
|
|
|
| |||
|
| Check the connecting external devices for input. |
|
|
| ||
❒ VTR1/VTR2 |
|
|
|
|
| ||
|
| Connected: | Unconnected: |
|
|
| |
|
| Set the VTR input level, etc. (a page 65, 70) | Set the VTR Skip. (a page 70) |
|
|
| |
❒ Rear View Camera |
|
|
|
|
| ||
|
|
|
|
|
|
|
|
|
| Connected: | Unconnected: |
|
|
| |
|
| Check if the reverse lead is connected. (a installation | Set the Rear View Camera to off. (a page 69) |
|
|
| |
|
| Instructions) |
|
|
|
|
|
|
| Execute the Camera SetUp. (a page 69) |
|
|
|
|
|
|
|
|
|
|
|
|
|
|
|
|
|
|
|
|
|
|
| ❒ Car Navigation |
|
|
|
|
|
|
|
|
|
|
| ||
|
|
|
|
|
|
| |
|
| Connected: | Unconnected: |
|
|
|
|
|
| Check the connection terminal. (a Installation | Check if “NAVI INPUT” is set to “RGB”. (a page 68) |
|
|
|
|
|
| Instructions) |
|
|
|
|
|
|
| Execute the NAVI SETUP. (a page 68) |
|
|
|
|
|
|
|
|
|
|
|
|
|
|
|
|
|
|
|
|
|
■Step 2
Check the connecting external devices for output.
❒ Rear Monitor
Connected: | Unconnected: | ||
Execute the Rear Monitor Set Up. (a page 74) |
|
|
|
|
|
| |
❒ Subwoofer and External amplifier
Connected: | Unconnected: |
Check the connection of external amplifier control lead | Set “SUB•W” to “NO”. (a page 64) |
and subwoofer output. (a Installation Instructions) |
|
Execute “SP SETUP”. (a page 63: |
|
|
|
❒Other speakers
Check the connected speakers.(a Installation Instructions)
Execute “SP SETUP” and “AUDIO” setting (a page 63, 64:
■Step 3
Check the other equipment and settings.
❒ID code setting (a page 57)
❒Check the Illumination lead connection. (a Installation Instructions)
❒Display (Screen) Settings (a page 58)
❒“DISPLAY UNIT” setting (TILT, OPEN/CLOSE) (a page 54)
❒Clock Setting (a page 55)
❒DVD Setting (if necessary)
Language Setting (a page 67)
Display Aspect and DVD Software Mode (a page 68)
19