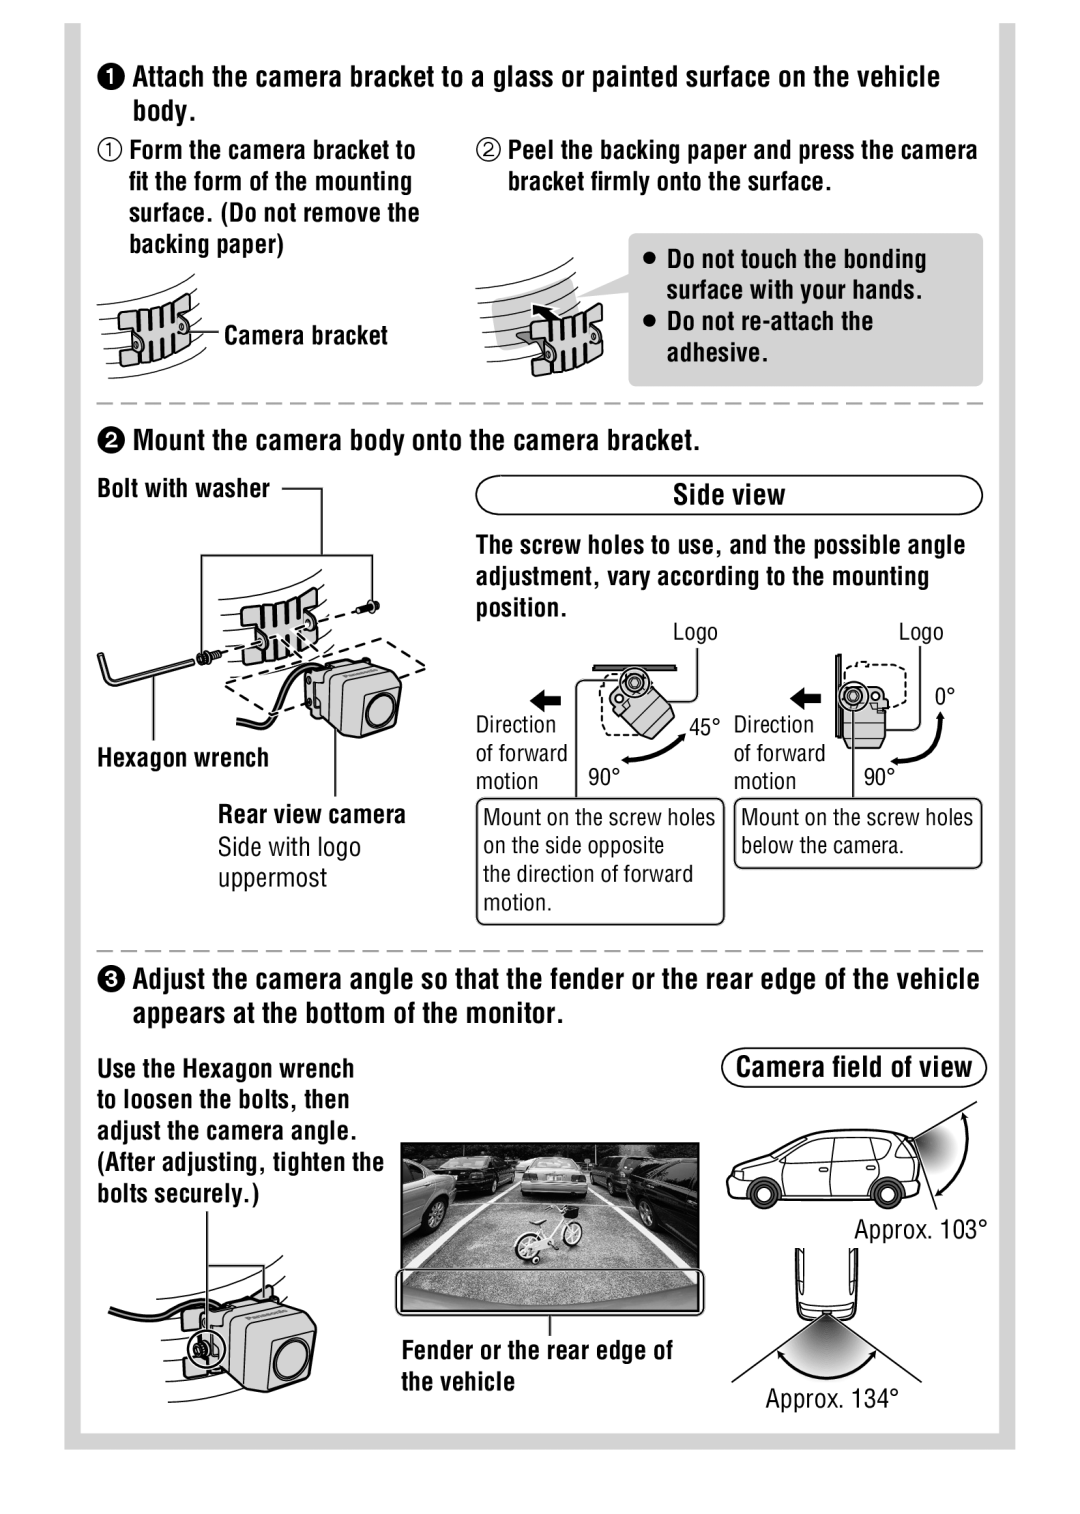
Attach the camera bracket to a glass or painted surface on the vehicle body.
Form the camera bracket to fit the form of the mounting surface. (Do not remove the backing paper)
![]()
![]() Camera bracket
Camera bracket
Peel the backing paper and press the camera bracket firmly onto the surface.
ODo not touch the bonding surface with your hands.
O Do not re-attach the adhesive.
Mount the camera body onto the camera bracket.
Bolt with washer
Side view
The screw holes to use, and the possible angle adjustment, vary according to the mounting position.
Hexagon wrench
Rear view camera
Side with logo uppermost
| Logo |
Direction | 45° |
of forward | 90° |
motion |
Mount on the screw holes on the side opposite
the direction of forward motion.
Logo
0°
Direction |
|
of forward | 90° |
motion |
Mount on the screw holes below the camera.
Adjust the camera angle so that the fender or the rear edge of the vehicle appears at the bottom of the monitor.
Use the Hexagon wrench to loosen the bolts, then adjust the camera angle.
(After adjusting, tighten the bolts securely.)
Fender or the rear edge of the vehicle
Camera field of view
Approx. 103°
Approx. 134°
