Operating Instructions
Dear Customer
Information for Your Safety
DMC-FX7
FCC Note U.S. only
About the Lens
If you will not be using the camera for a long time
Care for the camera
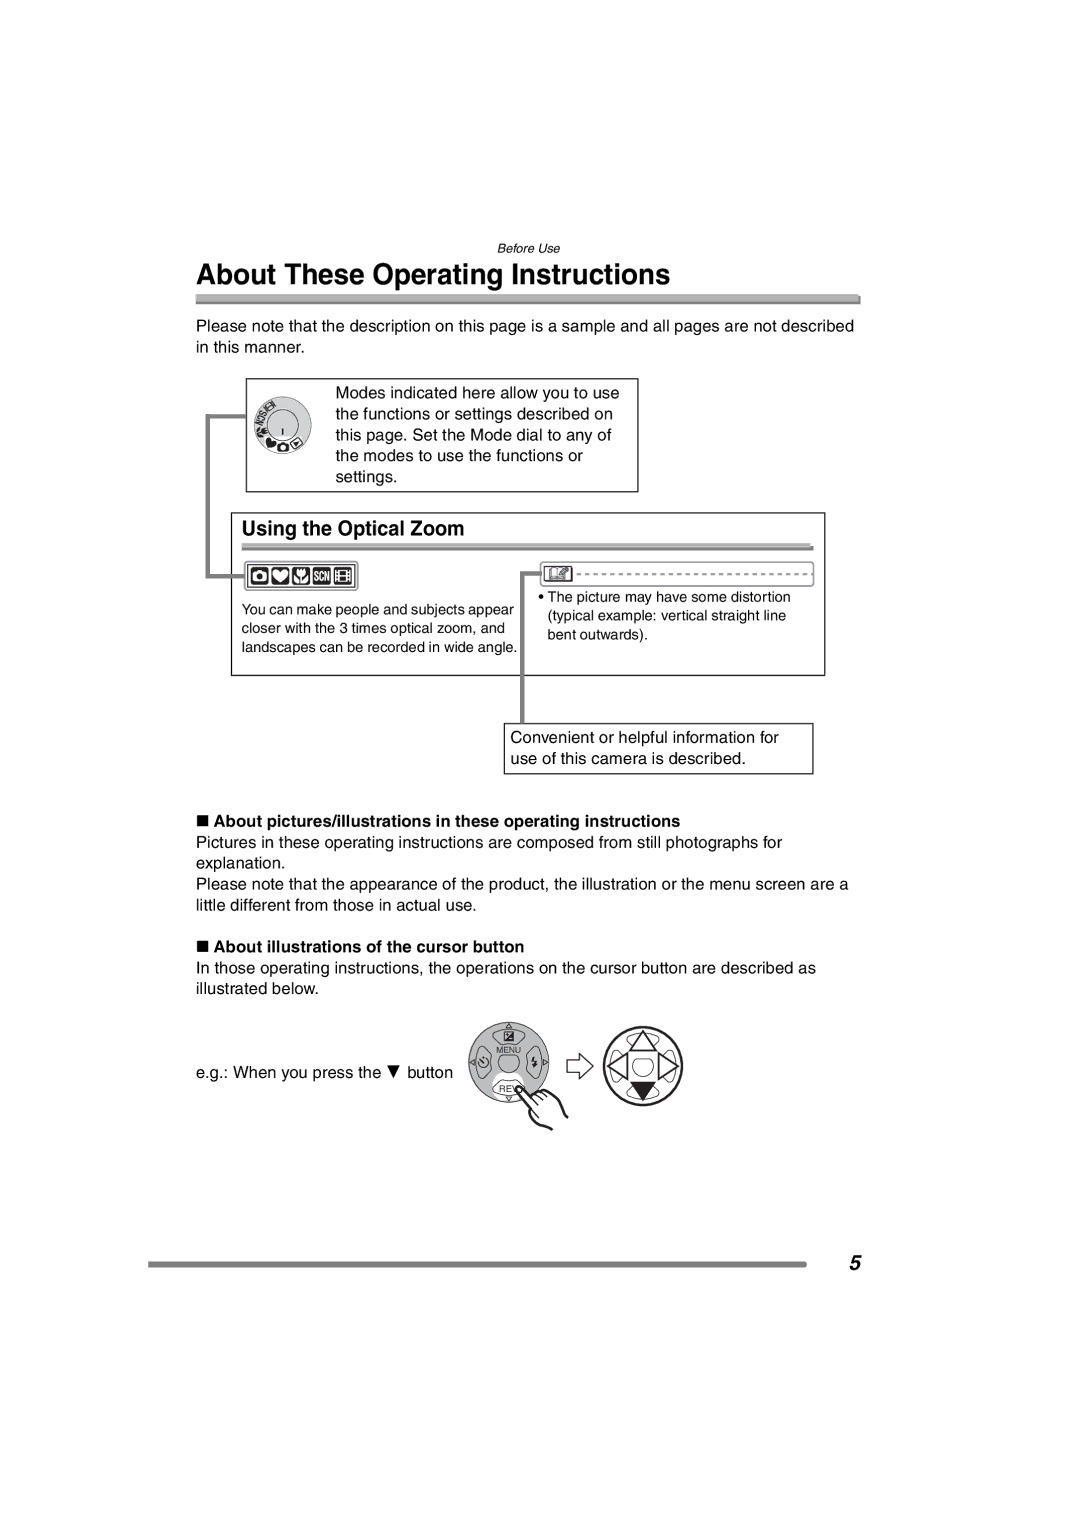
About illustrations of the cursor button
When you press the 4 button
About These Operating Instructions
Contents
Slide Show
Dpof Print
Audio DUB
Trimming
Standard Accessories
Names of the Components
Self-timer Indicator P40
Flash P37
Lens part
Mode Dial P27
Camera Switch P20
Card/Battery Door P14
Speaker for Operational Sound
Quick Guide
Charge the battery. P12
Play back the pictures
Set the clock. P18
Connect the charger to the electrical outlet
Charging the Battery with the Charger
Detach the battery
About the Battery
Inserting/Removing the Battery
Inserting/Removing the Card
Slide the card/battery door to open it
About the Card
Access to the card
About handling a card
SD Memory Card supplied MultiMediaCard optional
Hdtv
Approximate number of recordable pictures and the size
223 256 MB 390 709 1200 1950
445 512 MB 785 1429 2418 3929
Select Clock SET from the Setup menu. P20
Setting Date/Time Clock Set
Initial setting
Set date and time
Preparation
Turn the camera on Select the Setup Menu
Setup Menu
Be sure to press 1 at the end to determine the setting
Select the desired item Press the Menu button
Menu Functions
Power Save
Monitor
Auto Review
ECO Economy
NO.RESET
OFF
Beep
USB Mode
Reset
Video OUT
Scene Menu
Simple mode P32
Playback mode P45
About the LCD Monitor
Selecting the screen to be used
Recording guide line
Example of histogram
Histogram
Taking Pictures
Mode Dial
Taking pictures
Turn the camera on Set the mode dial to Normal picture mode
Take a picture
Correct posture for taking good pictures
AF/AE Lock AF Auto Focus AE Auto Exposure
Exposure
Focusing
Jitter camera shake
Recording pictures basic
Settings in Simple mode PICT.MODE
Taking Pictures in Simple Mode
Select the desired item and set the desired value
Mail
Economy OFF
Other Settings in Simple mode
MODE2
Enlarge
NO.RESET Reset USB Mode Video OUT Language Economy
You cannot set the following items in the Simple mode
PICT.SIZE Quality Audio REC
Zoom
Checking the Recorded Picture Review
When the mode dial is in a recording mode, press
Enlarge and shift the picture
1k4k8k 8k4k1k
To make subjects appear further away use Wide
Using the Optical Zoom
To make subjects appear closer use Tele
Switching to the appropriate flash setting
Taking Pictures using the Built-in Flash
Photo flash
Do not cover it with your finger or any other items
ISO80
Available flash settings by recording mode
AUTO¢
60 1/2000
Focus on the subject to take the picture
Taking Pictures with the Self-timer
Switch the self-timer setting
Under exposed
Compensating the Exposure
Compensate the exposure toward positive
Properly Exposed Over exposed
Taking Pictures using Auto Bracket
MODE1
Optical Image Stabilizer Stabilizer
Number of pictures recorded in burst mode
Taking Pictures using Burst Mode
High speed Low speed No limit No display canceled
Select the picture
Playing Back Pictures
Pictures Multi Playback
Switch to multi screen
Select the pictures
To return to the normal playback
Enlarge the picture
Using the Playback Zoom
Shift the picture
1k2k4k8k16k 16k8k4k2k1k
Select the picture to be deleted
Deleting Pictures
Select Multi Delete
Select the pictures to be deleted
Select ALL Delete
Delete the pictures
Delete all of the pictures
It is possible to delete up to 50 pictures all at once
Focus range
Using the Mode Dial
Macro mode
When the subject is focused, the focus indication 1 lights
Motion image mode
Select Motion Rate
Press the shutter button fully to start the recording
SD Memory Card Motion rate sec Capacity
Available recording time seconds
Night Scenery P55 Night Portrait P56
Scene mode
Fireworks P56 Party P57 Snow P57
Self Portrait P58
Technique for Sports mode
Technique for Portrait mode To make this mode more effective
Technique for Night scenery mode
Scenery mode
Technique for Fireworks mode
Technique for Night portrait mode
Technique for Party mode
Party mode Snow mode
Technique for Self-portrait mode
This mode allows you to take a picture of yourself
Zoom P66 COL.EFFECT P66 PICT.ADJ. P66 Flip ANIM. P67
Using the REC mode menu
Slow Shutter P65
White Balance W.BALANCE
For auto setting auto
Daylight
On a bright day
Adjusted when the photo flash is insufficient
Setting the White Balance manually White set
About the white balance fine adjustment
About the white balance
1920k1080 pixels
ISO Sensitivity Sensitivity Picture Size PICT.SIZE
ISO sensitivity 400
Quality Quality Audio Recording Audio REC
Area-focusing Camera focuses on any
AF Mode AF Mode
AF Assist Lamp
Slow shutter Setting
Slow Shutter Slow Shutter
AF assist lamp does not turn
Digital Zoom D.ZOOM
Picture Adjustment PICT.ADJ
Select Flip Anim
Flip Animation Flip Anim
Select Image Capture
REC PICT.ADJ
Select Create Motion Image
Capture images for flip animation
Select Frame Rate and set the number of frames
Select Create Motion Image and create a flip animation
Deleting all still images used to create flip animation
Cursor displayed during playback corresponds to 3/4/ 2/1
Playing Back Pictures with Audio/Motion Images
To pause
Picture with audio cannot be resized P78 or trimmed P79
Rotating the Picture Rotate
Using the Play mode menu
Select the picture to be rotated and set it
Select Rotate
Select Dpof PRINT, then select SINGLE, Multi or Cancel
Setting the Picture to be Printed and the Number
To print the date
To cancel all settings Select YES to cancel all settings
Cancel
Select PROTECT, then select SINGLE, Multi or Cancel
Preventing Accidental Erasure of the Picture Protect
SET
Set the items of the Slide Show
Playing Back with Slide Show
Select Slide SHOW, then select ALL or Dpof
SD Slide Show
Select Start
By pressing the Menu button, the Slide Show stops
Select the picture and start audio recording
Adding Audio to Recorded Stop audio recording
Select Resize
Resizing the Pictures Resize
Select the size and set it
Select YES or no and set it Select the picture and set it
Select Trimming
Trimming the Pictures
Select the picture to trim and set it
Enlarge or decrease the picture
Select YES or no and set it
Shift the picture and press the shutter button fully to set
Initializing the Card Format
Select Format
During formatting, do not turn the camera off
Playing back pictures with the supplied cable
Playing Back Pictures with a TV Screen
Turn the camera and the TV off
Playback pictures on TV with SD Memory Card slot
USB Mode
Before Connecting with USB Connection Cable
Select USB Mode
Select PC or PictBridge PTP
Message
When using Windows 98/98 SE
Connecting to a PC
PC Windows
About PictBridge PTP setting
Macintosh
PictBridge PTP Windows
When the Dpof Select Single Print is not set
Connecting to a PictBridge-compliant Printer
USB connection cable supplied AC adaptor DMW-CAC2 optional
PICTURE. P89
Single picture
Set the print settings
Select a picture to be printed
Select Dpof Picture
Select Print Start and then print out the picture
Dpof picture
Set the Dpof print with this camera in advance. P72
Setting the date printing with the Dpof print in advance
Recording
Screen Display
17 16
1000 DEC
Recording in simple mode
Flip animation P67
Playback
Others
Store the removed battery in the battery carrying case
Battery
When you go out, bring charged spare batteries
Dispose of an unusable battery
Folder Composition
Printing pictures recorded with Hdtv mode
Card100PANA
Export Misc PRIVATE1
Message Display
Troubleshooting
Clock setting is
Monochrome When connecting to a
Reset
Blurred
Monitor Noise appears on
Or always lit on the LCD
LCD monitor
Appears on the LCD
Specifications
Weight
Dimensions
Operating Temperature
Battery Charger Panasonic DE-991B
Accessory#
Digital Camera Accessory System
For USA Customers
Digital Camera Accessory Order Form
Request for Service Notice For USA Only
Electric of Puerto RICO, INC. Ave de Infanteria, Km .5, San
Limited Warranty For USA Only
Limited Warranty Coverage
Carry-In or Mail-In Service
Centralized Factory Servicenter
Customer Services Directory For USA Only
Backlight Compensation Brightness of the LCD Monitor
Index
Date Printing
LCD Monitor
Resizing Review Rotate Scene Menu Scene Mode Scenery Mode
USB Connection Cable USB Mode
Setup Menu Simple Mode
Slow Shutter Snow Mode Sports Mode
Cargue la batería
Spanish Quick Use Guide/Guía española de uso rápido
Reproduzca las imágenes
Ajuste el reloj
Panasonic Canada Inc