How to use P-touch Transfer Manager & P-touch Library
Transfer function is needed to use
To transfer the templates via network, you need to prepare BRAdmin Professional or Web BRAdmin. Download them from our website. (For Network models only)
 Starting up
 P-touch Transfer Manager
1 Click the [Start] button, then choose [All programs (Programs)] - [Brother
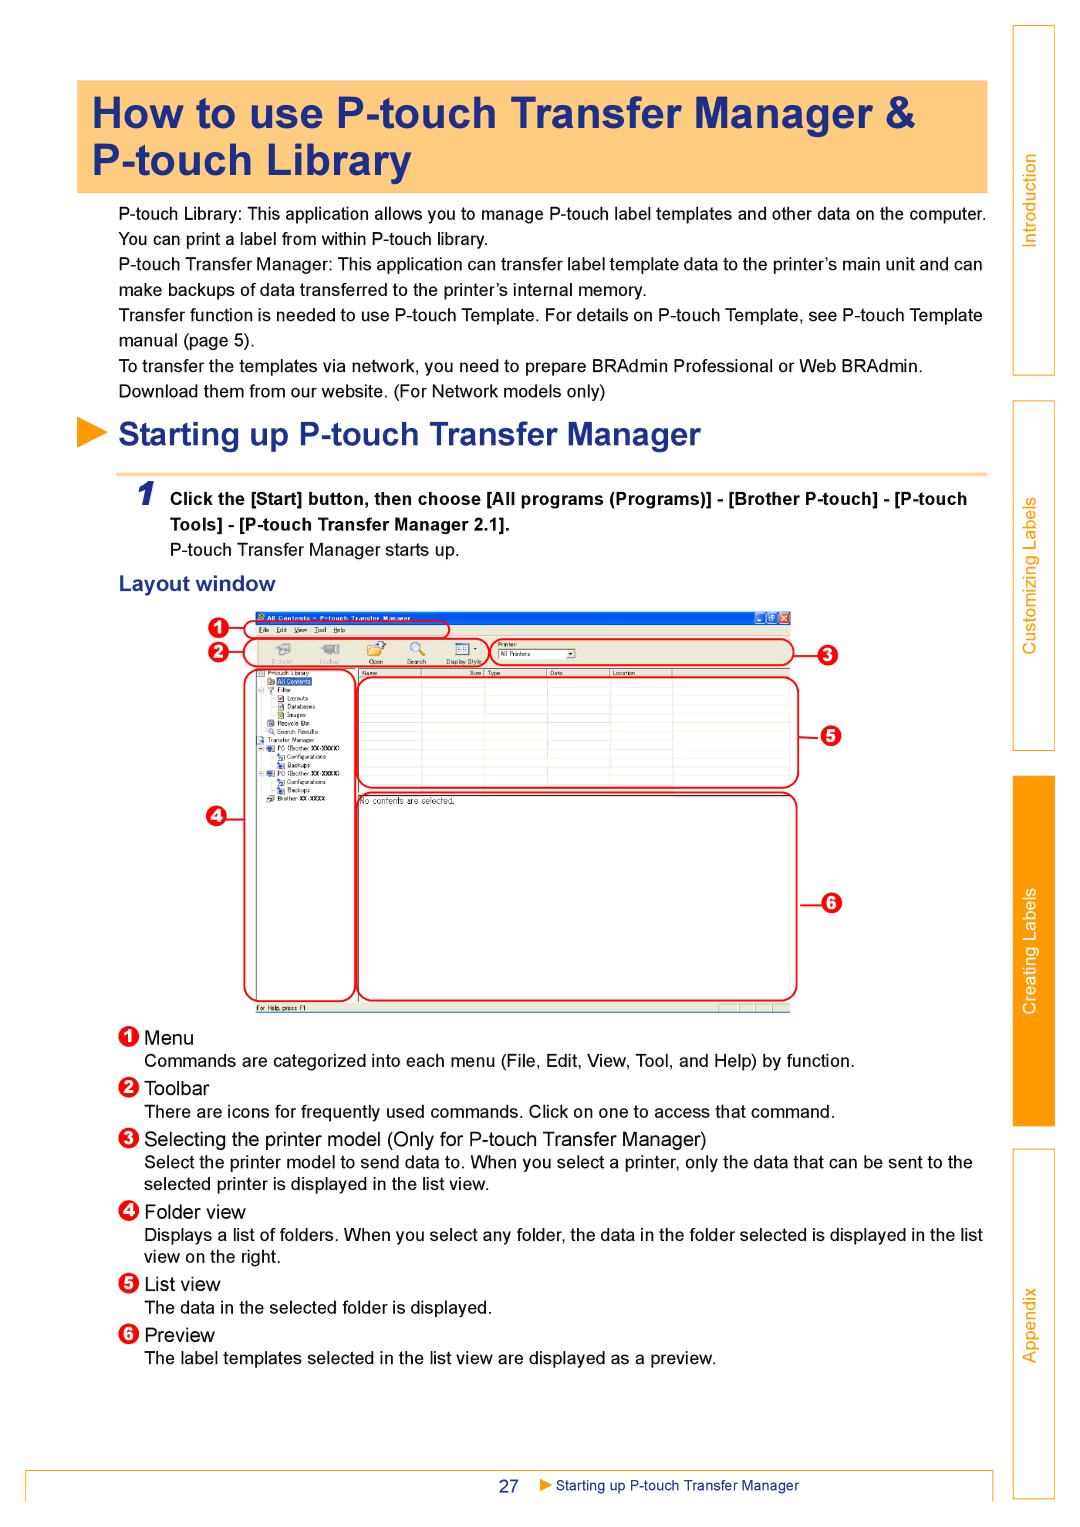
Layout window
1![]()
![]()
2![]()
![]()
![]() 3
3
5
4
6
1Menu
Commands are categorized into each menu (File, Edit, View, Tool, and Help) by function.
2Toolbar
There are icons for frequently used commands. Click on one to access that command.
3Selecting the printer model (Only for
Select the printer model to send data to. When you select a printer, only the data that can be sent to the selected printer is displayed in the list view.
4Folder view
Displays a list of folders. When you select any folder, the data in the folder selected is displayed in the list view on the right.
5List view
The data in the selected folder is displayed.
6Preview
The label templates selected in the list view are displayed as a preview.
27![]() Starting up
Starting up