TD-series
Software Users Guide
Introduction Customizing Labels Creating Labels Appendix
Contents
Printing the list of label templates
Introduction
Trademarks
About this Guide
Manual Structure
Symbols used in this Guide
P-touch Template manual
Introduction
Customizing Labels Creating Labels Appendix
Customizing Labels
Add new paper format
1 For Windows XP
For Windows Vista
3 Click Paper Size Setup
1 New
2 Edit
3 Delete
5 Enter the settings for the paper to be used, and then click Add
4 Click New
6 Click Exit
Introduction
Introduction
Customizing Labels
Creating Labels
Distributing only paper formats
Creating Labels
Label creation overview
From label creation to printing
2 Prepare the appropriate RD Roll for the label you want to create
How to use the P-touch Editor
Starting P-touch Editor
1 Click Start-All Programs Programs Brother P-touch-P-touch Editor
2 Choose an option in the New/Open dialog box and click
Layout window
2 Command bar
7 Mode Switch
Express Mode
7 Mode Switch
Professional Mode
1 Menu bar
2 Standard toolbar
Snap Mode
appears. Click
2 Snap mode appears
Introduction Customizing Labels
Start P-touch Editor Help
When you start the P-touch Editor 5.0 and the
Start from Start button
Start from New/Open dialog
Printing the Help description
1 In the Contents tab, choose any topic you want to print
2 Click on the Toolbar 
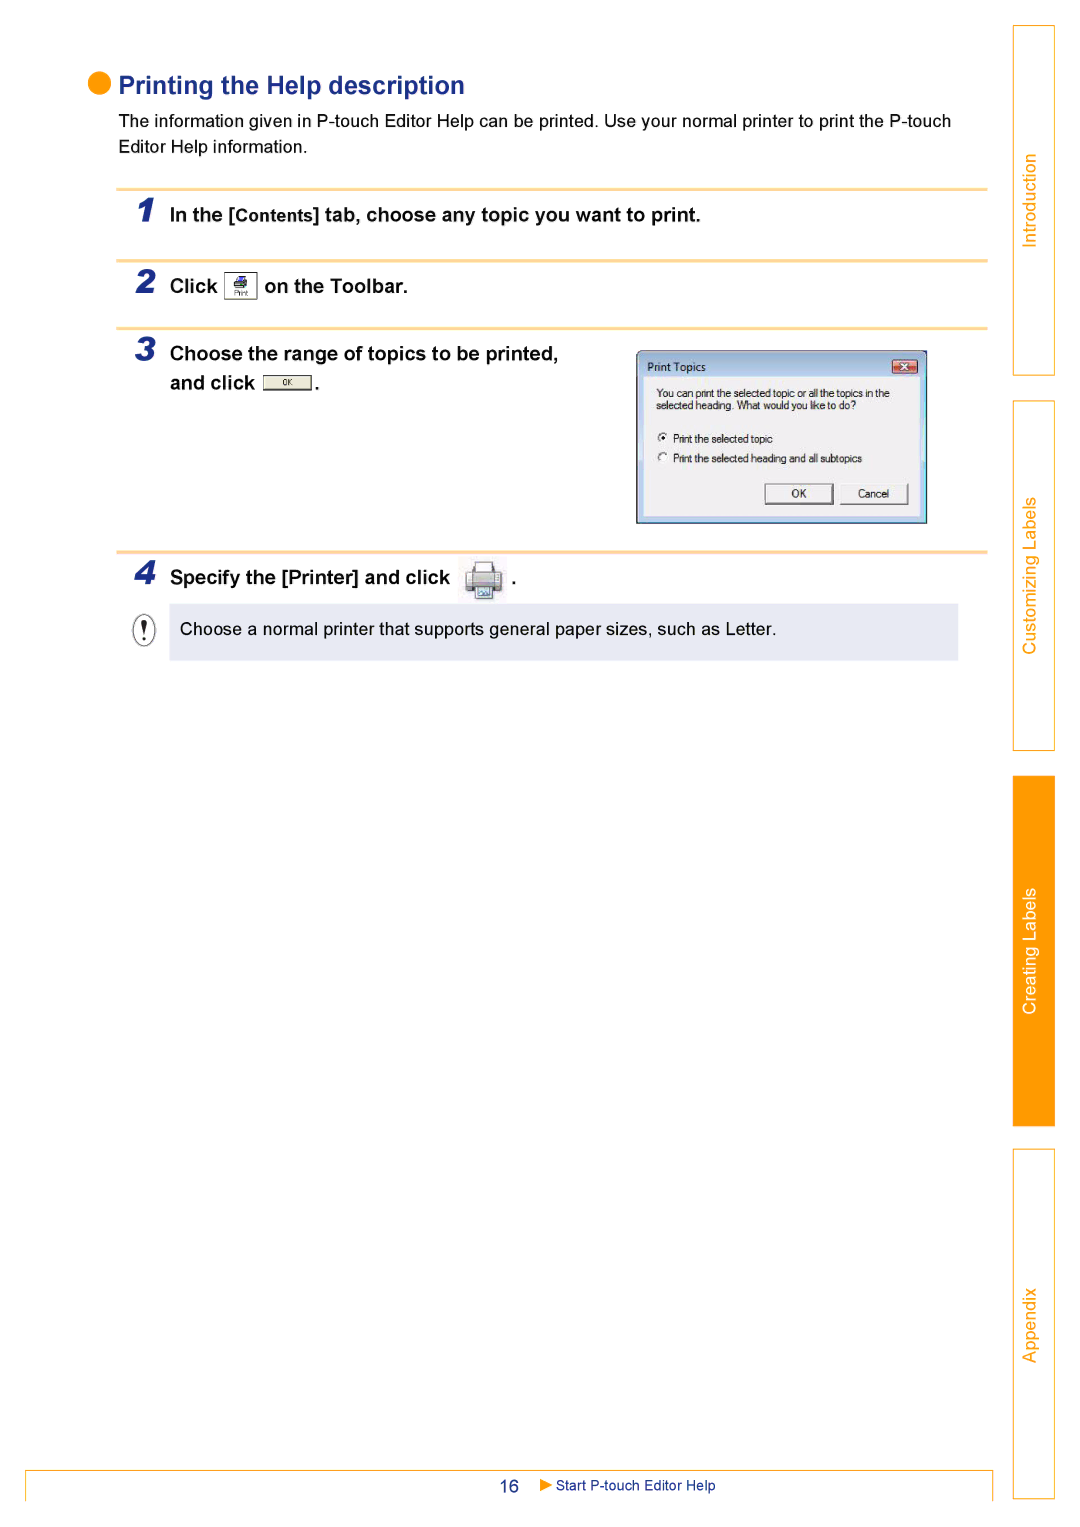
3 Choose the range of topics to be printed
and click
Setting the Printer Driver
Printing directly from other applications
1 For Windows XP
For Windows Vista
3 Choose each item and click
4 Close the Printers window
Introduction Customizing Labels
Creating Labels
Printing from other applications
When you click Page Layout the ribbon appears. Then click
Setup
1 Click and
Creating labels with other applications by using the Add-In function
Registering and canceling the Add-In function
For details or installation information, see the P-touch Editor Help
1 Click Start-All Programs Brother P-touch-P-touch Tools
Express Mode
Introduction Customizing Labels
Creating Labels
Appendix
Creating labels using Microsoft Word
Microsoft Word
2 On the Microsoft Word ribbon/standard toolbar, click
Introduction Customizing Labels
Creating labels using Microsoft Excel
Microsoft Excel
3 In Label Layout, make adjustments to the
2 On the Microsoft Excel ribbon/standard toolbar, click
How to add text from Microsoft Excel to a Label List
Introduction Customizing Labels
Creating Labels
Appendix
Creating labels using the Contacts data in Microsoft Outlook
Microsoft Outlook
3 In Label Layout, make adjustments to the
2 On the Microsoft Outlook ribbon/standard toolbar, click
How to add text from Microsoft Outlook to a Label List
Introduction Customizing Labels
Creating Labels
Appendix
How to use P-touch Transfer Manager & P-touch Library
Starting up P-touch Transfer Manager
Layout window
1 Menu
Transferring label templates from the PC to the printer via USB
Explanations of the Icons
1 Select the printer to transfer data to
Introduction Customizing Labels
3 Drag the transfer data to the folder you just made
5 Select the data or folder you want to transfer, then click
6 Click OK
Introduction Customizing Labels
Transfer the templates to the printer via network
Start BRAdmin Professional A or Web BRAdmin B
Click
to save the registered template in .blf format
Backing up label templates
2 Select the printer to back up from, then click
3 Click OK
Introduction Customizing Labels
Deleting label templates in the printer
2 Right click the printer, then select All Delete
3 Click OK
Introduction Customizing Labels
Starting up P-touch Library
Opening and editing data
Printing labels
1 Choose the data you want to edit, then click
Searching labels
3 Click Begin Search
1 Click
Introduction Customizing Labels
Transferring label templates with P-touch Transfer Express
1. Preparing P-touch Transfer Express
Select your region/country - Choose your product - Downloads
2 Download Transfer Express to any location on the computer
2. Transferring the label template to P-touch Transfer Manager
3. Saving the label template as a Transfer Package file .pdz
1 In the folder view, select Configurations
1 In P-touch Editor, open the label template to be transferred
2 Select the label template to be distributed
3 Click File - Save Transfer File
4 Type in the name, and then click Save
Introduction Customizing Labels
1 Move the Transfer Package file .pdz to the folder Transfer Express
2 Distribute all files in the folder Transfer Express to the user
Introduction
Customizing Labels
5. Transferring the Transfer Package file .pdz to TD-4000/4100N
Using a USB cable, connect the TD-4000/4100N to the computer
When there is a single Transfer Package
Turn on the TD-4000/4100N
Click Transfer Click Yes
5 Click OK
Introduction Customizing Labels
Creating Labels
Printing the list of label templates
1 Install a roll of labels with a width of 250.8mm or more
2 Hold down the FEED button
Introduction Customizing Labels
Printing labels using P-touch templates
P-touch Template function
Preparation
Barcode printing Î page
3 Scan the “P-touch template command” barcode
Preset template printing
6 The specified label is printed
Barcode printing
Barcode printing
Creating Labels
Introduction Customizing Labels
Appendix
7 Scan the key barcode whose data is to be used in the database file
Introduction Customizing Labels
Creating Labels
Appendix
Distributed printing
Printing labels distributed to multiple printers
for distributed printing.1
Introduction Customizing Labels
6 Click OK to close the label size setting window
7 Click OK to close the “Distributed Printing Settings” window
5 Specify the label size to be used for printing
A.If only one printer has been selected
General procedure for the P-touch Template function
Appendix
3 Scan the “P-touch template command” barcode
4 Scan the “Basic settings” barcode
List of barcodes for specifying settings
P-touch template command Initialize + begin specifying settings
Basic settings
Introduction
Preset template number
Preset template
Preset template
Preset template
Preset template
Preset template
Preset template
Select template Delimiter Begin printing