3 Click [Paper Size Setup].
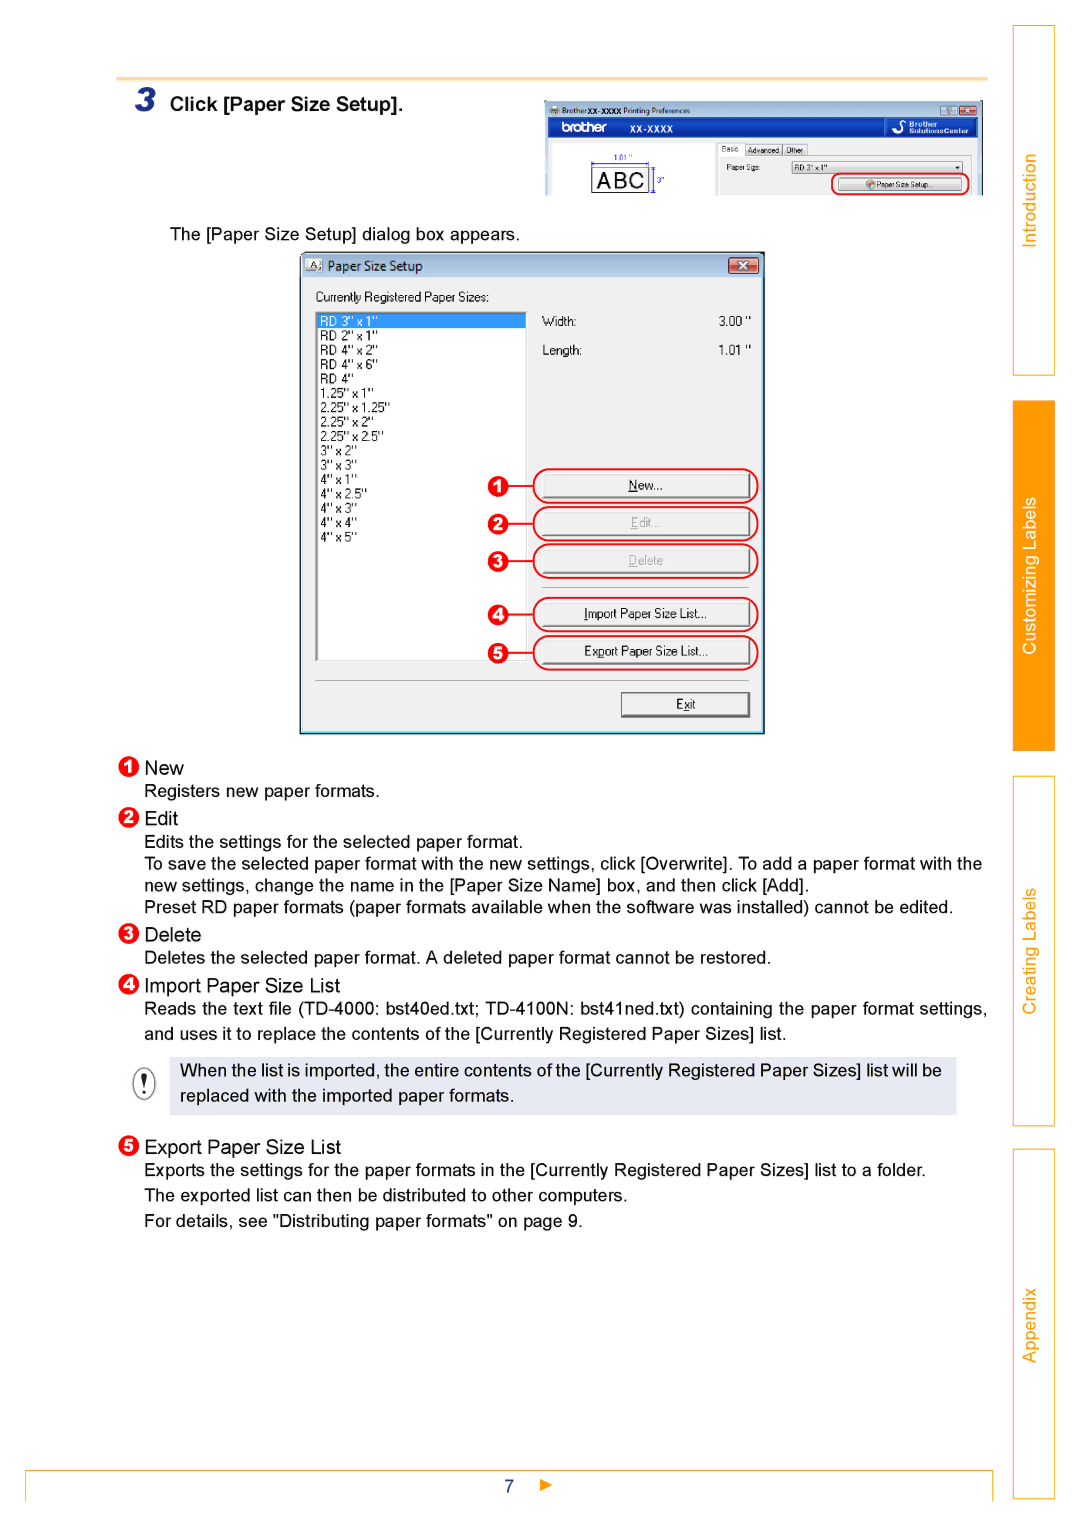
The [Paper Size Setup] dialog box appears.
1 ![]()
![]()
2 ![]()
![]()
3 ![]()
![]()
4 ![]()
![]()
5 ![]()
![]()
Introduction
Customizing Labels
1New
Registers new paper formats.
2Edit
Edits the settings for the selected paper format.
To save the selected paper format with the new settings, click [Overwrite]. To add a paper format with the new settings, change the name in the [Paper Size Name] box, and then click [Add].
Preset RD paper formats (paper formats available when the software was installed) cannot be edited.
3Delete
Deletes the selected paper format. A deleted paper format cannot be restored.
4Import Paper Size List
Reads the text file
When the list is imported, the entire contents of the [Currently Registered Paper Sizes] list will be replaced with the imported paper formats.
5Export Paper Size List
Exports the settings for the paper formats in the [Currently Registered Paper Sizes] list to a folder. The exported list can then be distributed to other computers.
For details, see "Distributing paper formats" on page 9.
7
Creating Labels
Appendix
