How to add text from Microsoft® Outlook® to a Label List
For first time use, the message "Record data in the Label List?" is displayed. If you click Yes, new records are automatically created in the Label List and the text is added to each field shown below from next time you register the text: Each time you add new information into your label list it also records the following information for your reference.
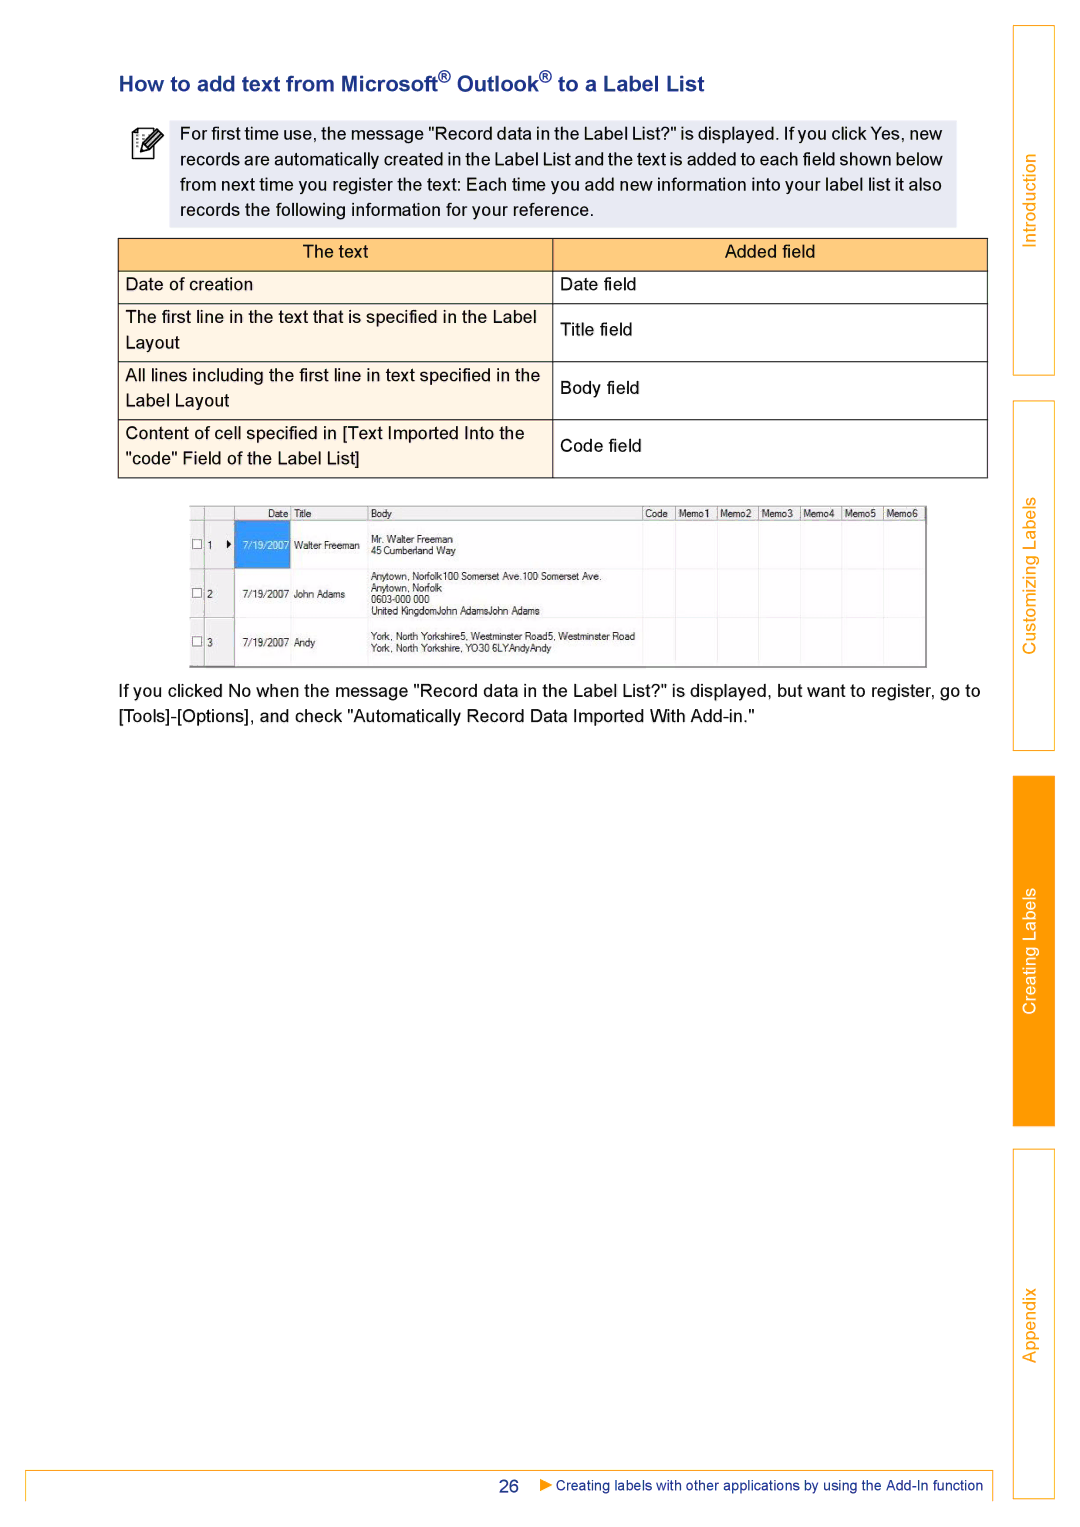
The text | Added field | |
|
| |
Date of creation | Date field | |
|
| |
The first line in the text that is specified in the Label | Title field | |
Layout | ||
| ||
|
| |
All lines including the first line in text specified in the | Body field | |
Label Layout | ||
| ||
|
| |
Content of cell specified in [Text Imported Into the | Code field | |
"code" Field of the Label List] | ||
| ||
|
|
If you clicked No when the message "Record data in the Label List?" is displayed, but want to register, go to
26 | Creating labels with other applications by using the |