STEP 5 : Setting
Easy Setting
After connecting your new player for the first time and pressing [Í], a screen for the basic settings will appear.
Preparation
Turn on the television and select the appropriate video input on the television.
1 Press [Í].
Setup screen appears.
If this unit is connected to a Panasonic TV (VIERA) supporting HDAVI Control 2 or later via an HDMI cable, then the setting information on the TV is acquired by this TV.
2 Follow the
After completing “Easy Setting”, you can perform “Network Easy Setting”.
≥You can perform this setup anytime by selecting “Easy Setting” in the Setup menu. (> 31)
≥You can also change these settings individually. (> 29 – 31)
≥Initial setting is set to “2ch (Downmix) + 5.1ch”, so you will need to select “7.1ch” if using the 7.1ch output.
Analog Audio Output
Set unit’s analog audio output.
Select “7.1ch” only when connected to an audio receiver through 7.1ch analog connections.
Otherwise, select “2ch (Downmix) + 5.1ch”.
2ch (Downmix) + 5.1ch
7.1ch
![]() OK
OK
![]() RETURN
RETURN
Network Easy Setting
For Australia and New Zealand
After completing “Easy Setting”, you will be asked to perform “Network Easy Setting”.
Select “Wired” or “Wireless” and press [OK].
Network Easy Setting (Connection Test)
Select a connection mode.
Current setting | : Wired |
LAN cable connection:
Connect a LAN cable to the unit and select “Wired”.
Wireless LAN connection:
Connect the Wireless LAN Adaptor
Wired
Wireless
![]() OK
OK
![]() RETURN
RETURN
∫“Wired” connection
Follow the
≥When you experience problems (> 13)
12
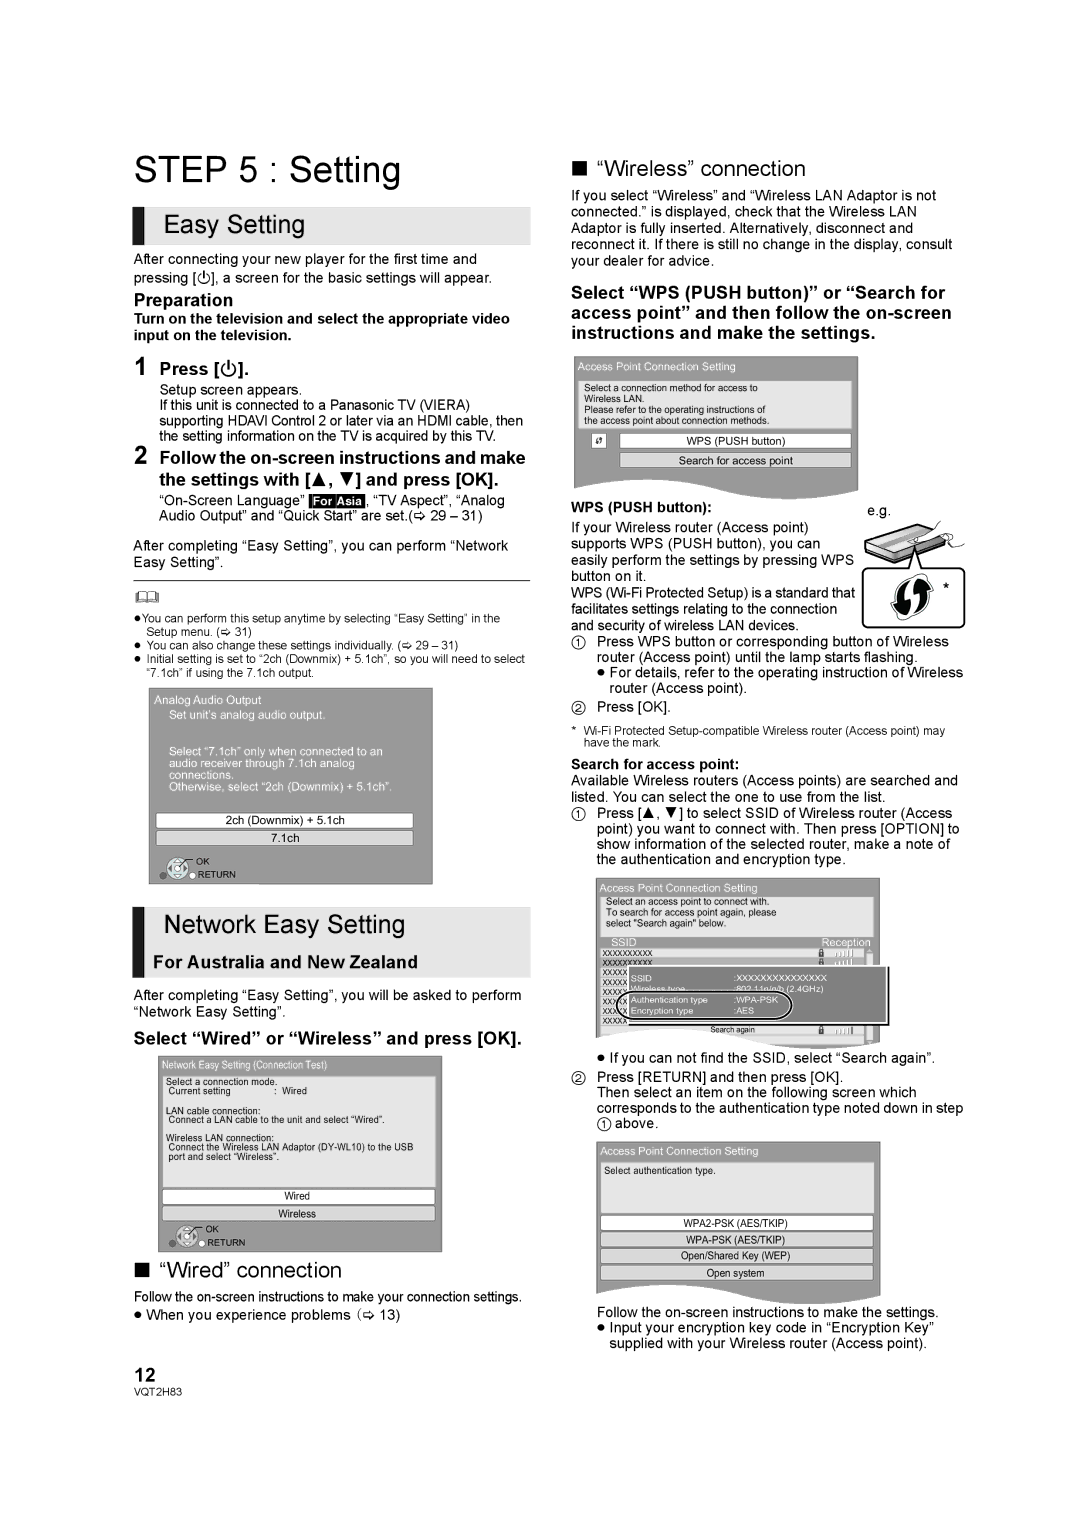
∫“Wireless” connection
If you select “Wireless” and “Wireless LAN Adaptor is not connected.” is displayed, check that the Wireless LAN Adaptor is fully inserted. Alternatively, disconnect and reconnect it. If there is still no change in the display, consult your dealer for advice.
Select “WPS (PUSH button)” or “Search for access point” and then follow the
Access Point Connection Setting
Select a connection method for access to Wireless LAN.
Please refer to the operating instructions of the access point about connection methods.
WPS (PUSH button)
Search for access point
WPS (PUSH button): | e.g. |
If your Wireless router (Access point) supports WPS (PUSH button), you can easily perform the settings by pressing WPS button on it.
WPS
1Press WPS button or corresponding button of Wireless router (Access point) until the lamp starts flashing.
≥For details, refer to the operating instruction of Wireless router (Access point).
2Press [OK].
*
Search for access point:
Available Wireless routers (Access points) are searched and listed. You can select the one to use from the list.
1Press [3, 4] to select SSID of Wireless router (Access point) you want to connect with. Then press [OPTION] to show information of the selected router, make a note of the authentication and encryption type.
Access Point Connection Setting
Select an access point to connect with. To search for access point again, please select "Search again" below.
SSID | Reception |
XXXXXXXXXX |
|
XXXXXXXXXX |
|
XXXXXXXXXX | :XXXXXXXXXXXXXXX |
SSID | |
XXXXXXXXXX | :802.11n/g/b (2.4GHz) |
Wireless type | |
XXXXXXXXXX |
|
XXXXXXXXXXAuthentication type | |
XXXXXXXXXXEncryption type | :AES |
XXXXXXXXXX |
|
Search again
≥If you can not find the SSID, select “Search again”.
2Press [RETURN] and then press [OK].
Then select an item on the following screen which corresponds to the authentication type noted down in step 1 above.
Access Point Connection Setting
Select authentication type.
Open/Shared Key (WEP)
Open system
Follow the on-screen instructions to make the settings.
≥Input your encryption key code in “Encryption Key” supplied with your Wireless router (Access point).
VQT2H83