Control reference guide
1
|
|
| 7 |
2 | INTERNET |
| 8 |
3 | HOME | KEYS | 9 |
4
5 |
| OPTION |
| RETURN | 10 |
6 | R | G | Y | B |
|
|
|
|
|
|
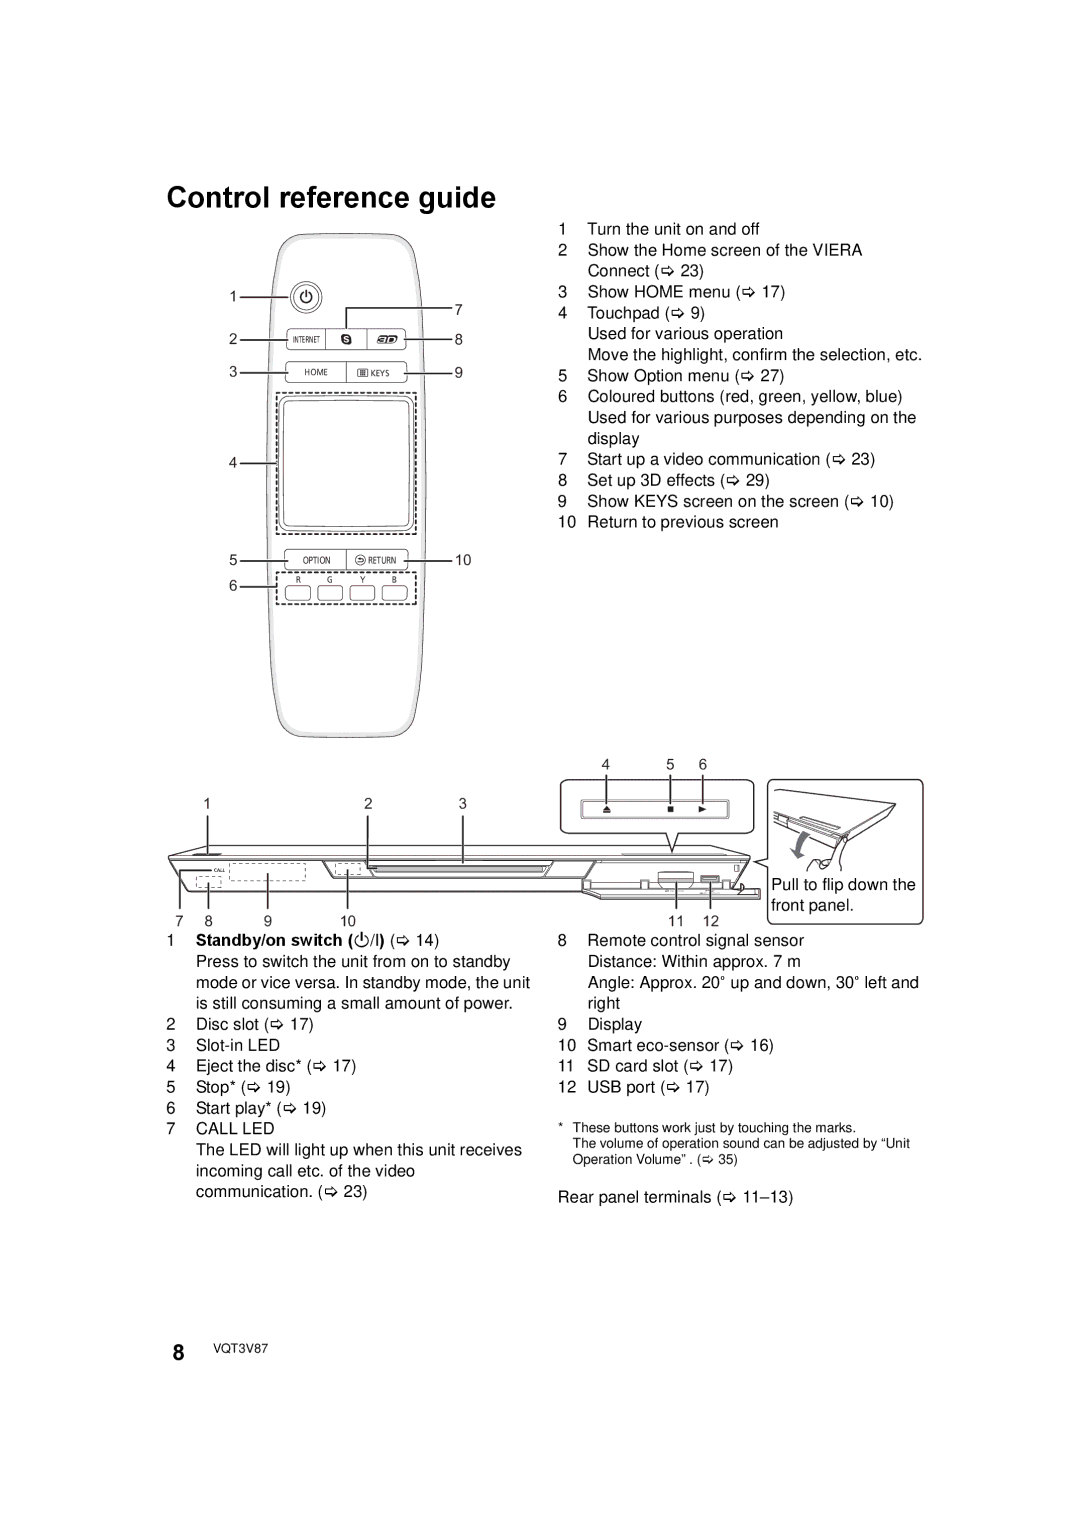
1Turn the unit on and off
2Show the Home screen of the VIERA Connect (> 23)
3Show HOME menu (> 17)
4Touchpad (> 9)
Used for various operation
Move the highlight, confirm the selection, etc.
5Show Option menu (> 27)
6Coloured buttons (red, green, yellow, blue) Used for various purposes depending on the display
7Start up a video communication (> 23)
8Set up 3D effects (> 29)
9Show KEYS screen on the screen (> 10)
10Return to previous screen
4 | 5 | 6 |
1 | 2 | 3 |
Pull to flip down the front panel.
7 | 8 | 9 | 10 | 11 | 12 |
1Standby/on switch (Í/I) (> 14)
Press to switch the unit from on to standby mode or vice versa. In standby mode, the unit is still consuming a small amount of power.
2Disc slot (> 17)
3Slot-in LED
4Eject the disc* (> 17)
5Stop* (> 19)
6Start play* (> 19)
7CALL LED
The LED will light up when this unit receives incoming call etc. of the video communication. (> 23)
8Remote control signal sensor Distance: Within approx. 7 m
Angle: Approx. 20e up and down, 30e left and right
9Display
10Smart
11SD card slot (> 17)
12USB port (> 17)
*These buttons work just by touching the marks.
The volume of operation sound can be adjusted by “Unit Operation Volume” . (> 35)
Rear panel terminals (> 11–13)
8 VQT3V87
