Home
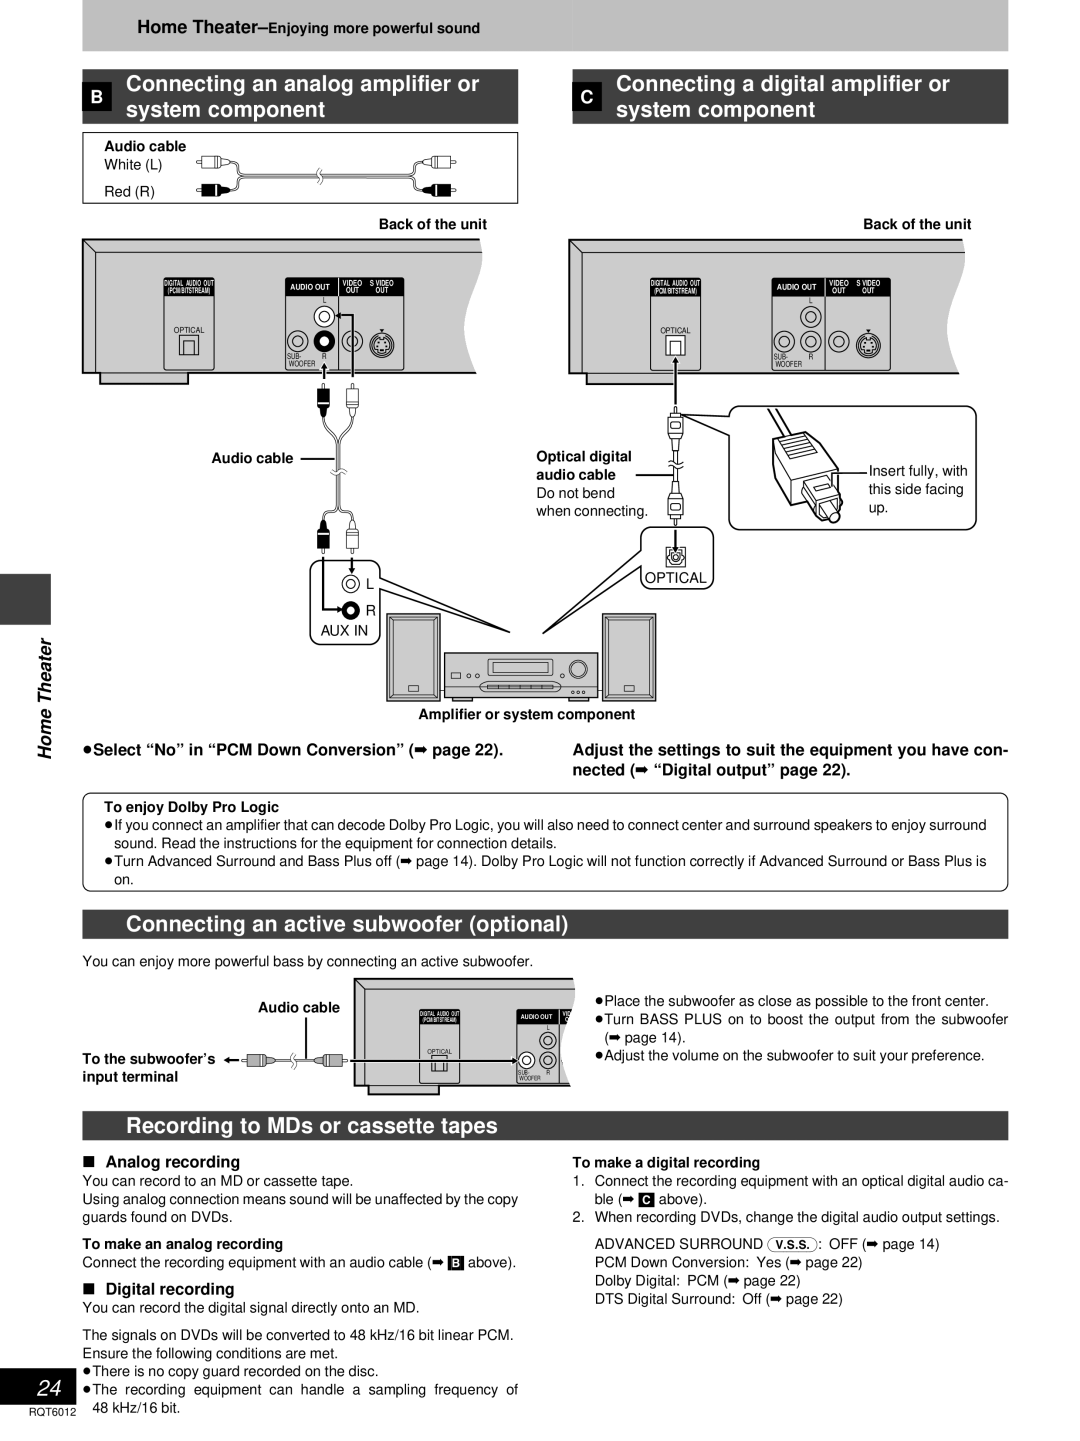
» Connecting an analog amplifier or
B
system component
Audio cable
White (L)
Red (R)
Back of the unit
DIGITAL AUDIO OUT | AUDIO OUT | VIDEO | S VIDEO | ||
(PCM/BITSTREAM) | OUT | OUT | |||
|
| ||||
|
| L |
|
| |
OPTICAL |
|
|
|
| |
| SUB- | R |
|
| |
| WOOFER |
|
|
| |
» Connecting a digital amplifier or
C
system component
Back of the unit
DIGITAL AUDIO OUT | AUDIO OUT | VIDEO | S VIDEO | ||
(PCM/BITSTREAM) | OUT | OUT | |||
|
| ||||
|
| L |
|
| |
OPTICAL |
|
|
|
| |
| SUB- | R |
|
| |
| WOOFER |
|
|
| |
Home Theater
Audio cable |
| Optical digital | Insert fully, with |
|
| audio cable | |
|
| Do not bend | this side facing |
|
| when connecting. | up. |
| L | OPTICAL |
|
|
|
| |
| R |
|
|
| AUX IN |
|
|
Amplifier or system component
³Select “No” in “PCM Down Conversion” (á page 22). | Adjust the settings to suit the equipment you have con- |
| nected (á “Digital output” page 22). |
To enjoy Dolby Pro Logic
³If you connect an amplifier that can decode Dolby Pro Logic, you will also need to connect center and surround speakers to enjoy surround sound. Read the instructions for the equipment for connection details.
³Turn Advanced Surround and Bass Plus off (á page 14). Dolby Pro Logic will not function correctly if Advanced Surround or Bass Plus is on.
Connecting an active subwoofer (optional)
You can enjoy more powerful bass by connecting an active subwoofer.
Audio cable |
|
|
| ³Place the subwoofer as close as possible to the front center. |
DIGITAL AUDIO OUT | AUDIO OUT | VIDEO | ³Turn BASS PLUS on to boost the output from the subwoofer | |
| (PCM/BITSTREAM) | OUT | ||
|
| L |
| (á page 14). |
|
|
|
| |
To the subwoofer’s | OPTICAL |
|
| ³Adjust the volume on the subwoofer to suit your preference. |
|
|
| ||
input terminal |
| SUB- R |
|
|
| WOOFER |
|
|
Recording to MDs or cassette tapes
ºAnalog recording
You can record to an MD or cassette tape.
Using analog connection means sound will be unaffected by the copy guards found on DVDs.
To make an analog recording
Connect the recording equipment with an audio cable (á [B] above).
ºDigital recording
You can record the digital signal directly onto an MD.
The signals on DVDs will be converted to 48 kHz/16 bit linear PCM. Ensure the following conditions are met.
³There is no copy guard recorded on the disc.
³The recording equipment can handle a sampling frequency of RQT6012 48 kHz/16 bit.
To make a digital recording
1.Connect the recording equipment with an optical digital audio ca- ble (á [C] above).
2.When recording DVDs, change the digital audio output settings.
ADVANCED SURROUND (V.S.S.): OFF (á page 14)
PCM Down Conversion: Yes (á page 22)
Dolby Digital: PCM (á page 22)
DTS Digital Surround: Off (á page 22)