Reference for Adjusting Torque
Setting | Torque | Use |
1Approx: 0.29 N·m
(3.0
5Approx: 0.82 N·m
(8.4
9 | Approx: 1.35 N·m |
| |
(13.8 | |||
| |||
|
| screws | |
13 | Approx: 1.88 N·m | ||
(19.2 |
| ||
|
| ||
17Approx: 2.41 N·m
(24.6
21Approx: 2.94 N·m
(30.0
For power-
Approx: 4.4 N·m ful driving (45.0
drilling
●When using at high speeds, set the clutch at 10 or below. (Operation stops at the maximum torque of 1.5 N·m (15
●The auto
NOTE:
The chart is only a reference. The torque settings may differ by materi- als, types of screws, etc. Please test it at your own conditions before use.
Control Panel
Manufacturer settings upon shipment
●Count system: Count down system
●Count setting value: 99
●Buzzer sound pitch: b1 (Low sound)
●Double tightening counting preven- tion count time: 0 (OFF)
●Hold switch: Released
Please set the settings according to conditions of use.
Screw count function
●Counts the number of auto stops. (Counts the number of screws driven)
●The count method can be selected from “UP” or “DOWN”.
●When the set number of screws to be driven is reached, a buzzer sounds and the count value is reset.
●The buzzer sound can be selected from 3 types of sound.
●Double tightening counting prevention function
Work (double tightening and screw driving confirmation, etc.) that began within the set time is not counted after the driven screws are counted.
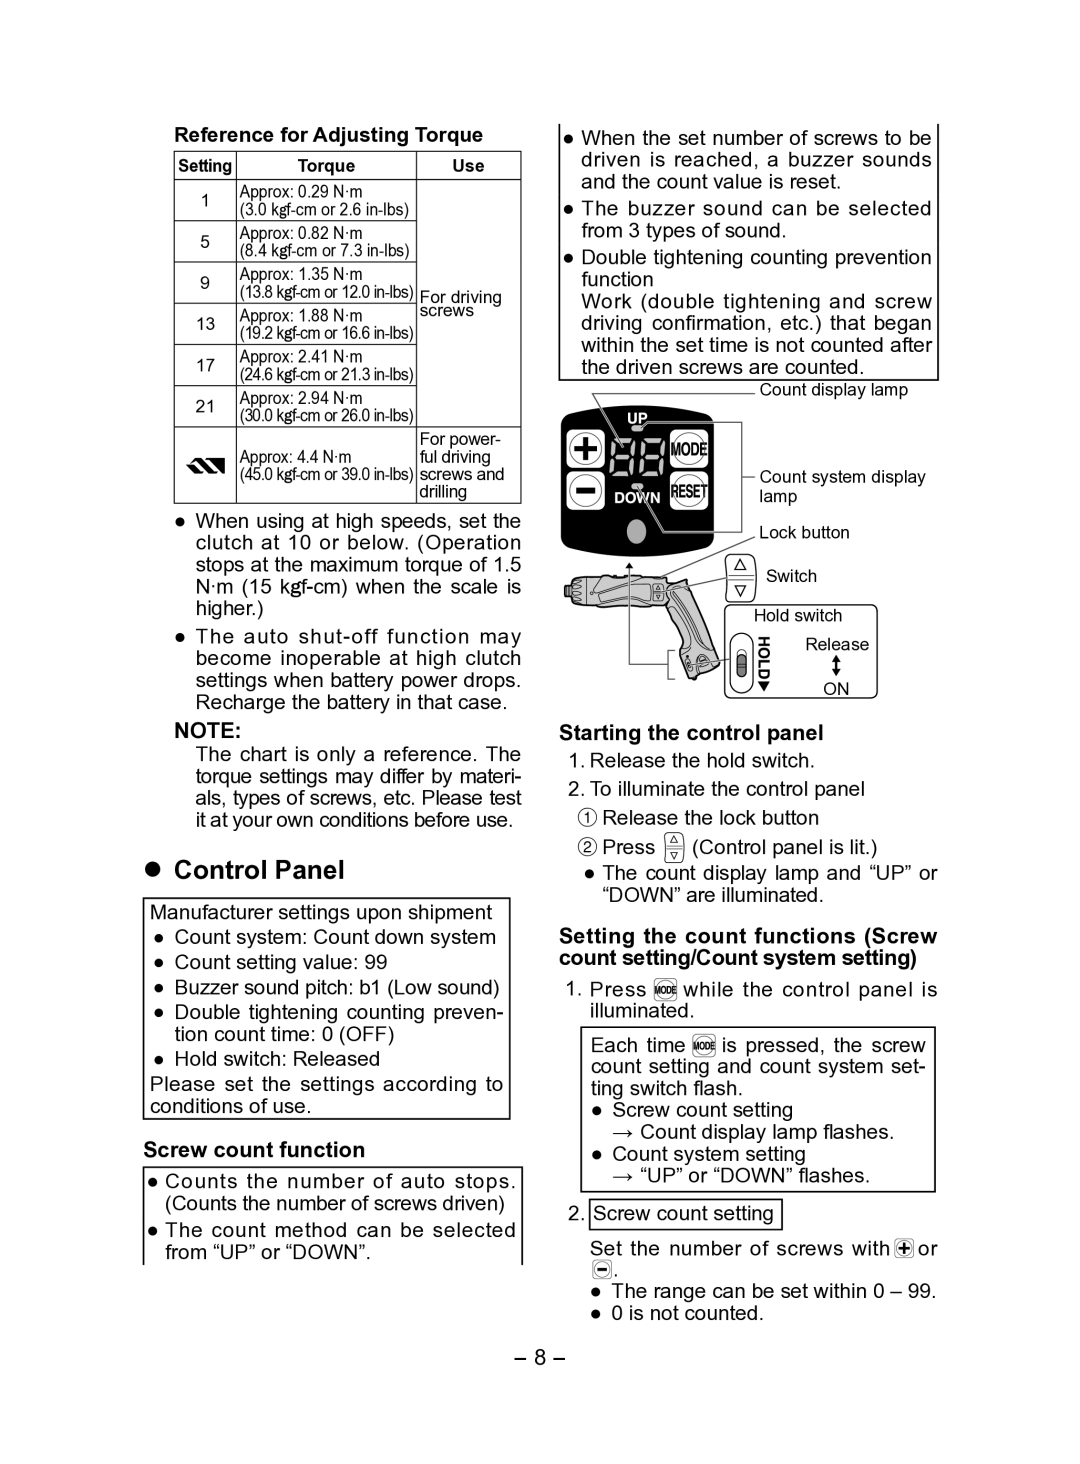
Count display lamp
Count system display lamp
Lock button
Switch
Hold switch
Release
ON
Starting the control panel
1.Release the hold switch.
2.To illuminate the control panel 1Release the lock button
2Press ![]() (Control panel is lit.)
(Control panel is lit.)
●The count display lamp and “UP” or “DOWN” are illuminated.
Setting the count functions (Screw count setting/Count system setting)
1.Press ![]()
![]() while the control panel is illuminated.
while the control panel is illuminated.
Each time ![]()
![]() is pressed, the screw count setting and count system set- ting switch flash.
is pressed, the screw count setting and count system set- ting switch flash.
●Screw count setting
→Count display lamp flashes.
●Count system setting
→“UP” or “DOWN” flashes.
2.Screw count setting
Set the number of screws with ![]() or
or
.
● The range can be set within 0 – 99. ● 0 is not counted.
- -