Preparation
Bottom of the charger
Hooks
![]()
![]() Hooks
Hooks
Fasten the AC adaptor cord to prevent it from being disconnected.
Battery installation/ replacement
1Press the notch of the handset cover firmly, and slide it in the direction of
the arrow.
LIf necessary, remove the old battery.
2Insert the battery (A), and press it down until it snaps into position (B). Then close the handset cover (C, D).
B | C |
A | D |
|
Important:
LUse only the rechargeable Panasonic battery noted on page 5.
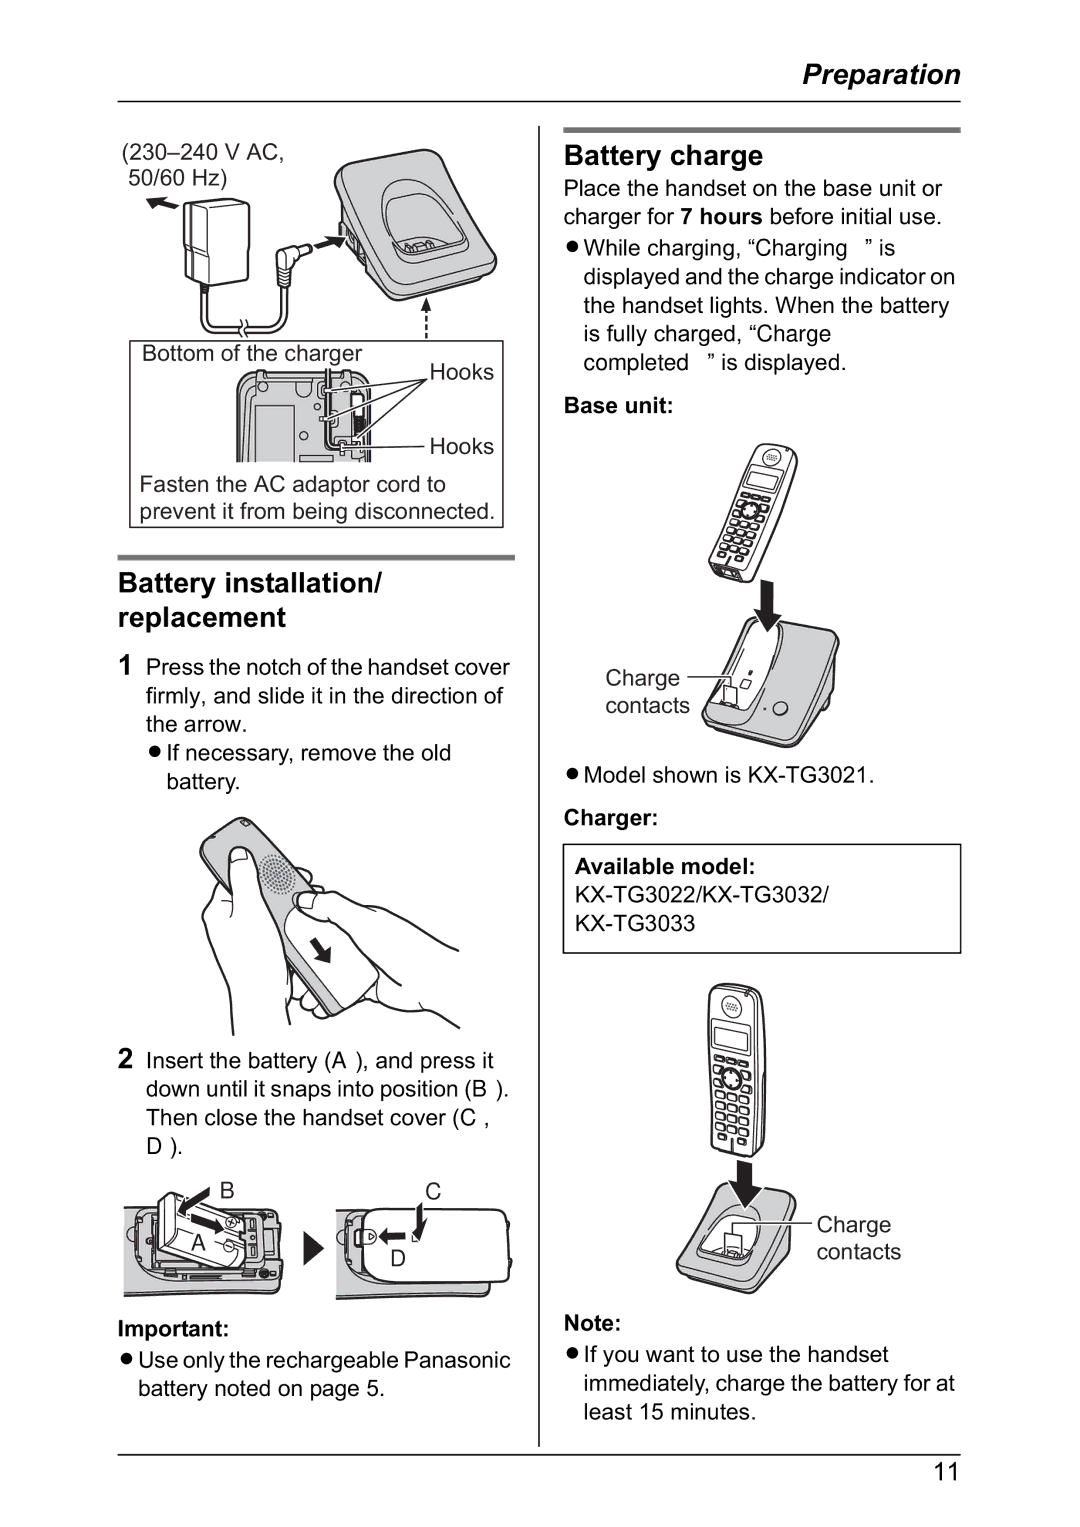
Battery charge
Place the handset on the base unit or charger for 7 hours before initial use. LWhile charging, “Charging” is
displayed and the charge indicator on the handset lights. When the battery is fully charged, “Charge completed” is displayed.
Base unit:
Charge contacts
LModel shown is
Charger:
Available model:
Charge contacts
Note:
LIf you want to use the handset immediately, charge the battery for at least 15 minutes.
11