
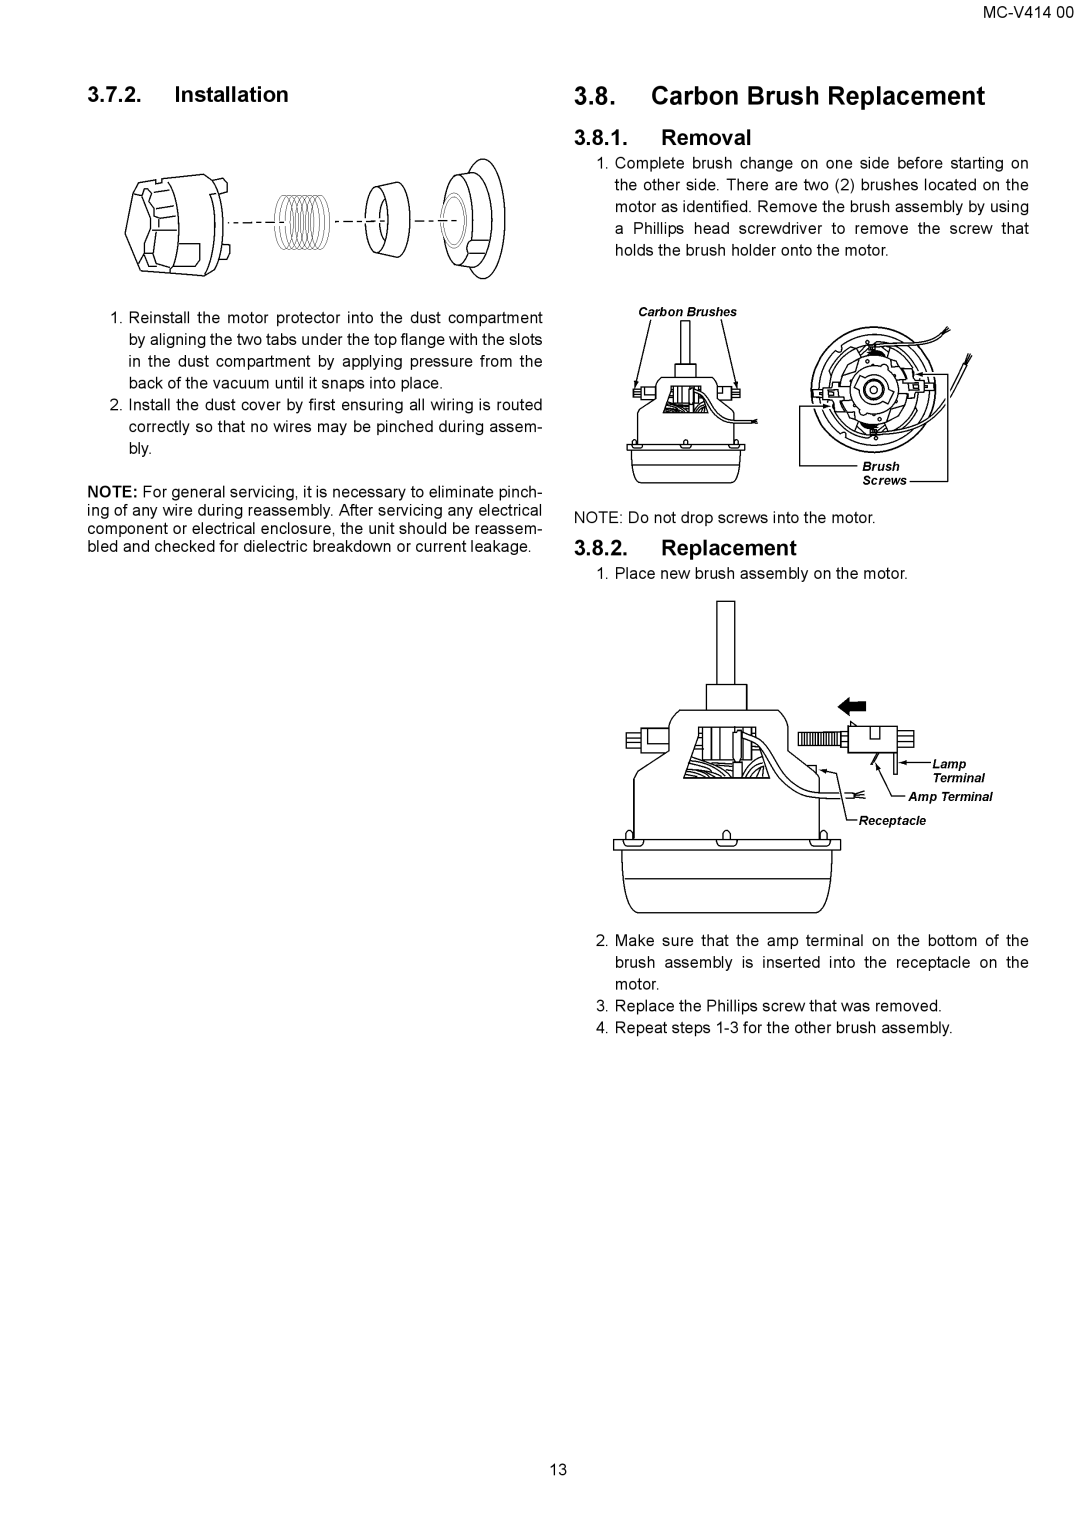
MC-V414 00 specifications
The Panasonic MC-V414 00 is a versatile and efficient vacuum cleaner designed to meet the needs of modern households. Combining powerful suction capabilities with user-friendly features, this model is perfect for tackling a variety of cleaning tasks in both carpets and hard floors.One of the standout features of the MC-V414 00 is its robust motor which delivers exceptional suction power, allowing it to easily pick up dirt, dust, and debris from various surfaces. This motor efficiency not only enhances cleaning performance but also contributes to the overall durability of the vacuum, ensuring that it remains a reliable cleaning companion for years to come.
The vacuum cleaner is equipped with a comprehensive filtration system that captures not only large particles but also fine dust and allergens. This system includes a HEPA filter that traps particles as small as 0.3 microns, making it an excellent choice for households with allergy sufferers. The filter is also washable, which adds an eco-friendly element to its design while maintaining optimal performance over time.
A notable feature of the MC-V414 00 is its lightweight construction. Weighing in at under 10 pounds, this vacuum is easy to maneuver around furniture and carry up and down stairs, reducing strain during cleaning sessions. The ergonomic handle design enhances user comfort, allowing for extended cleaning periods without fatigue.
In terms of usability, the MC-V414 00 boasts several practical features, including an automatic cord rewinder that makes storage simple and efficient. The vacuum also features an adjustable height setting, making it suitable for various floor types, ensuring a thorough clean on both high-pile carpets and delicate hard surfaces.
Another key characteristic is the variety of attachments that come standard with the vacuum, including a crevice tool and dusting brush. These attachments allow for easy navigation into tight spaces and thorough cleaning of hard-to-reach areas, increasing the overall versatility of the appliance.
In summary, the Panasonic MC-V414 00 is a reliable, powerful, and user-friendly vacuum cleaner that caters to a range of cleaning needs, making it an excellent investment for maintaining a clean and healthy home environment. With its combination of advanced technologies and practical features, it stands out as an ideal choice for everyday cleaning tasks.