Timer Recording
This function lets you programme the VCR for unattended automatic recording of desired TV programmes when you are not at home or sleeping.
You can programme timer recordings in two different ways:
≥By entering the necessary information with the remote control while viewing the On Screen Display (OSD) on the TV screen (explained below) or;
≥By entering the ShowView number published alongside the TV programme listings in newspapers and magazines
(see page 18).
This VCR lets you programme up to 8 TV programmes (including weekly and daily programmes) for unattended recording up to one month in advance.
To Programme with the On Screen Display (OSD)
This method offers easy
Preparations
≥Confirm that the VCR is on.
≥Confirm that the TV is on and the VCR viewing channel is selected.
≥Insert a video cassette with an intact erasure prevention tab.
≥Set the VCR/TV switch O to “VCR”.
Example:
Programming the timer recording of a TV programme broadcast on programme position 2 (ZDF) from 20:00 to 21:30 on 27 October.
Follow the on screen operation guide.
Operations
1 Press the PROG./CHECK button < to display the menu for programming timer recordings on the TV
| screen. |
| On Screen Display |
|
| |||
| ≥ Alternatively, you can |
|
|
| ||||
|
|
|
|
|
|
| ||
|
| Timer recording |
|
|
|
| ||
| MENU button T and then | Pos | Start Stop |
| VPS |
|
| |
| select “Timer record”. | Name DATE | ON OFF SP PDC Min | |||||
|
|
|
|
|
|
| ||
|
| jjjjj jj/jj jj jj:jj jj:jj | jj | jjj | jjj | |||
|
|
| jjjjj jj/jj jj jj:jj jj:jj | jj | jjj | jjj | ||
|
|
| jjjjj jj/jj jj jj:jj jj:jj | jj | jjj | jjj | ||
|
|
|
|
|
|
|
|
|
2 | Press the Channel buttons : to select the |
|
|
|
| |||
programme position of the desired TV station.
≥As an alternative method, after pressing the Channel button :, you can use the Cursor buttons (3421)
Q.
3 Press the DATE button ; to set the date on which the TV programme will be broadcast.
4 Press the ON button G to set the starting time.
≥When it is kept pressed, the indication changes in
5 Press the OFF button F to set the ending time.
6 Press the Cursor buttons (3421) Q to set VPS/PDC to ON or OFF (sss).
≥See page 19 for VPS/PDC recording.
7 Press the TAPE button C to select the corresponding cassette tape length.
(See page 29.)
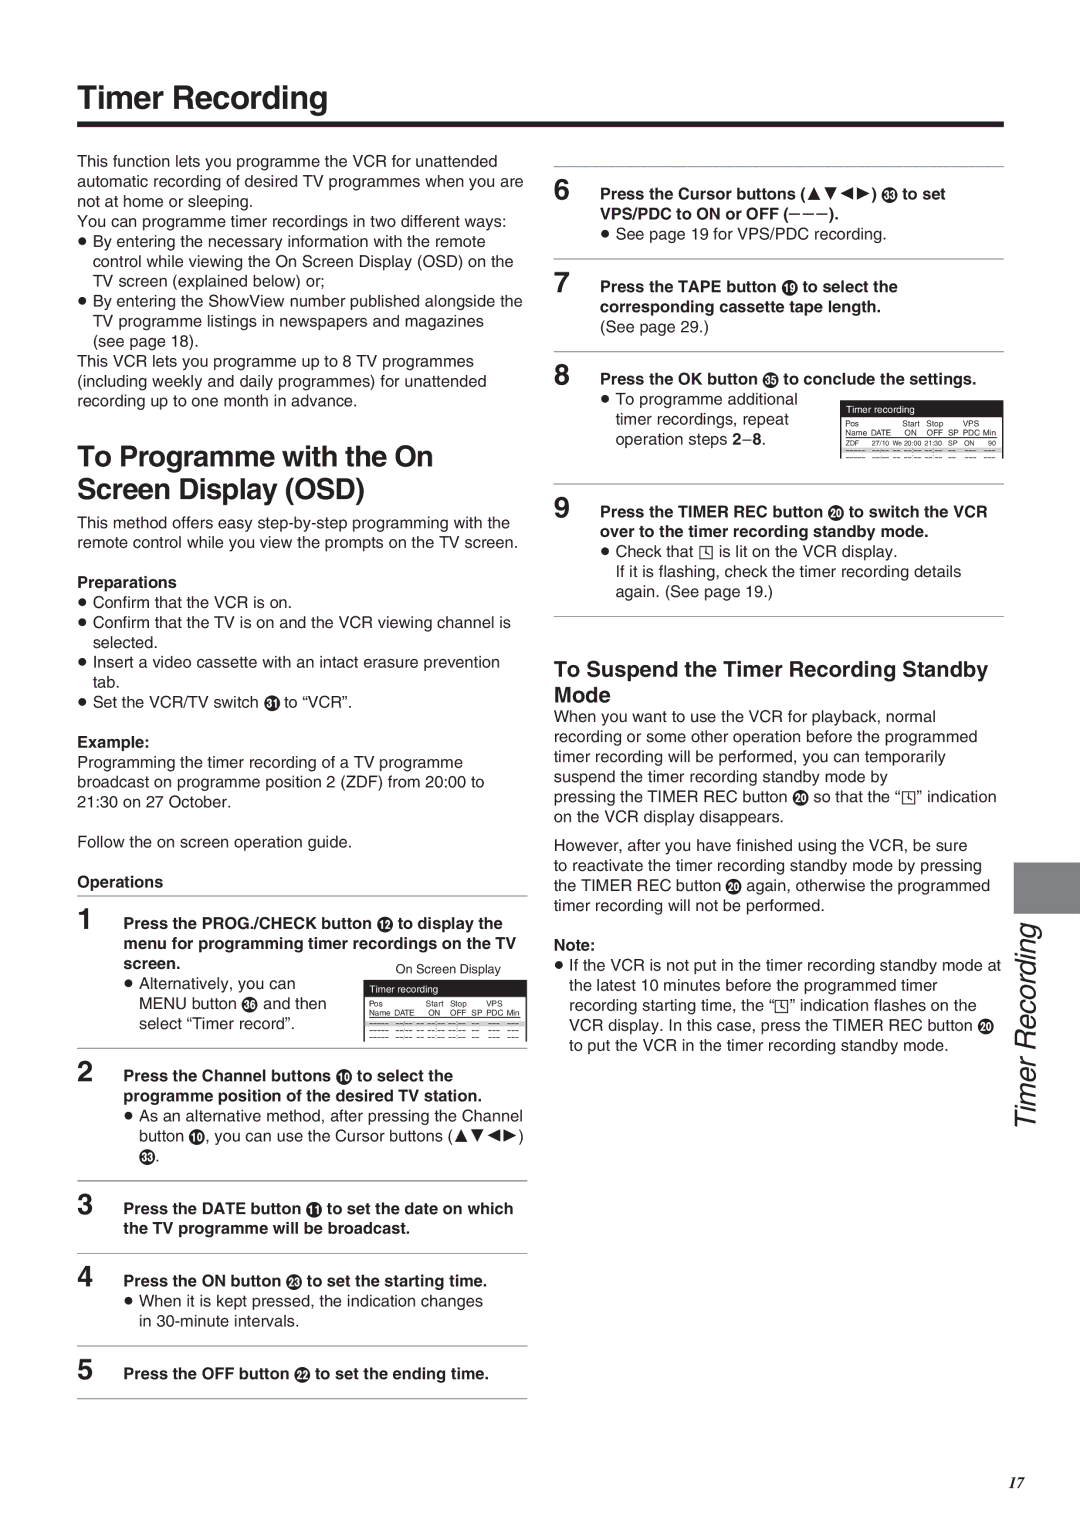
8 Press the OK button S to conclude the settings.
≥ To programme additional |
|
|
|
|
|
|
|
|
|
|
|
| Timer recording |
|
|
|
|
|
|
|
| ||
timer recordings, repeat |
|
|
|
|
|
|
|
|
| ||
Pos | Start | Stop |
| VPS |
|
|
|
|
| ||
operation steps | Name DATE | ON | OFF SP PDC Min |
|
| ||||||
| ZDF 27/10 We 20:00 21:30 | SP | ON | 90 |
|
|
|
| |||
|
| jjjjj jj/jj jj jj:jj jj:jj | jj | jjj | jjj |
|
| ||||
|
| jjjjj jj/jj jj jj:jj jj:jj | jj | jjj | jjj |
|
| ||||
|
|
|
|
|
|
| |||||
9 Press the TIMER REC button D |
| to switch the VCR |
| ||||||||
over to the timer recording standby mode. |
|
|
|
|
|
|
| ||||
≥ Check that Á is lit on the VCR display. |
|
|
|
|
|
|
|
|
| ||
If it is flashing, check the timer recording details |
|
|
|
|
|
| |||||
again. (See page 19.) |
|
|
|
|
|
|
|
|
|
|
|
|
|
|
|
|
|
| |||||
To Suspend the Timer Recording Standby |
| ||||||||||
Mode |
|
|
|
|
|
|
|
|
|
|
|
When you want to use the VCR for playback, normal |
|
|
|
|
|
|
| ||||
recording or some other operation before the programmed |
|
|
|
|
| ||||||
timer recording will be performed, you can temporarily |
|
|
|
|
|
|
| ||||
suspend the timer recording standby mode by |
|
|
|
|
|
|
|
|
| ||
pressing the TIMER REC button D so that the “Á” indication |
| ||||||||||
on the VCR display disappears. |
|
|
|
|
|
|
|
|
|
|
|
However, after you have finished using the VCR, be sure |
|
|
|
|
| ||||||
to reactivate the timer recording standby mode by pressing |
|
|
|
|
| ||||||
|
|
|
|
| |||||||
the TIMER REC button D again, otherwise the programmed |
| ||||||||||
timer recording will not be performed. |
|
|
|
|
|
|
|
|
|
|
|
to put the VCR in the timer recording standby mode. |
|
|
|
|
| Recording | |||||
Note: |
|
|
|
|
|
|
|
|
|
|
|
≥ If the VCR is not put in the timer recording standby mode at |
| ||||||||||
the latest 10 minutes before the programmed timer |
|
|
|
|
|
|
| ||||
recording starting time, the “Á” indication flashes on the |
|
|
|
|
| ||||||
VCR display. In this case, press the TIMER REC button D |
| ||||||||||
|
|
|
|
|
|
|
|
|
|
| Timer |
17