Q Link Function
This function works only if the VCR is connected via a fully- wired
Q Link offers the following functions:
(1)Download from the TV
When you connect the VCR to a TV, the station list data is automatically copied from the TV to the VCR, and the TV stations are assigned to the programme positions on the VCR in the same order as on the TV.
(2)Direct TV Recording
By simply pressing the DIRECT TV REC button 6, you can at once record the same programme that you are watching on the TV.
°(3) TV/VCR Auto Power On
Even if the TV and the VCR are off (standby mode), pressing the Play I, SHOW VIEW L or PROG./CHECK button < automatically turns on both the TV and the VCR.
≥When a cassette with a broken erasure prevention tab is in the VCR, it turns on and starts playback. The TV also turns on.
°(4) VCR Auto Power Off
When you turn the TV off, the VCR is turned off as well. However, this function only works during rewinding, in the stop mode, or when no cassette is inserted.
If the VCR receives the Auto Power Off command while it is rewinding the tape, it turns off after the rewinding has been finished.
This function does not work during the following operations:
Preset Download, Auto Setup, Auto Clock Setting and Manual Tuning.
°(5) On Screen Display Messages
When you are watching a TV programme, the following VCR messages appear on the TV screen to inform you of the VCR’s condition:
Message | Message appears when: |
This programme has | A timer recording has just started. |
already started |
|
|
|
Set VCR to timer | The VCR is not in the timer standby |
standby mode | mode 10 minutes before the |
| programmed recording start time of a |
| timer recording (message appears |
| every minute during these |
| 10 minutes). |
|
|
VCR is in timer | The |
standby mode | EJECT Z or SEARCH button M was |
| pressed, although the VCR is in the |
| timer standby mode. |
|
|
VCR is in timer | The |
recording mode | OTR _, Pause/Slow 7 or SHOW |
| VIEW L was pressed while the VCR |
| is in the timer recording mode. |
|
|
≥Depending on the type of TV used, the above messages may not appear correctly.
°The operations marked with asterisk are only available if the VCR is connected to a TV featuring the Q Link or the DATA LOGIC function.
Note:
≥If “Power save” is set to “ON”, the Q Link functions do not work when the VCR is switched off (standby mode).
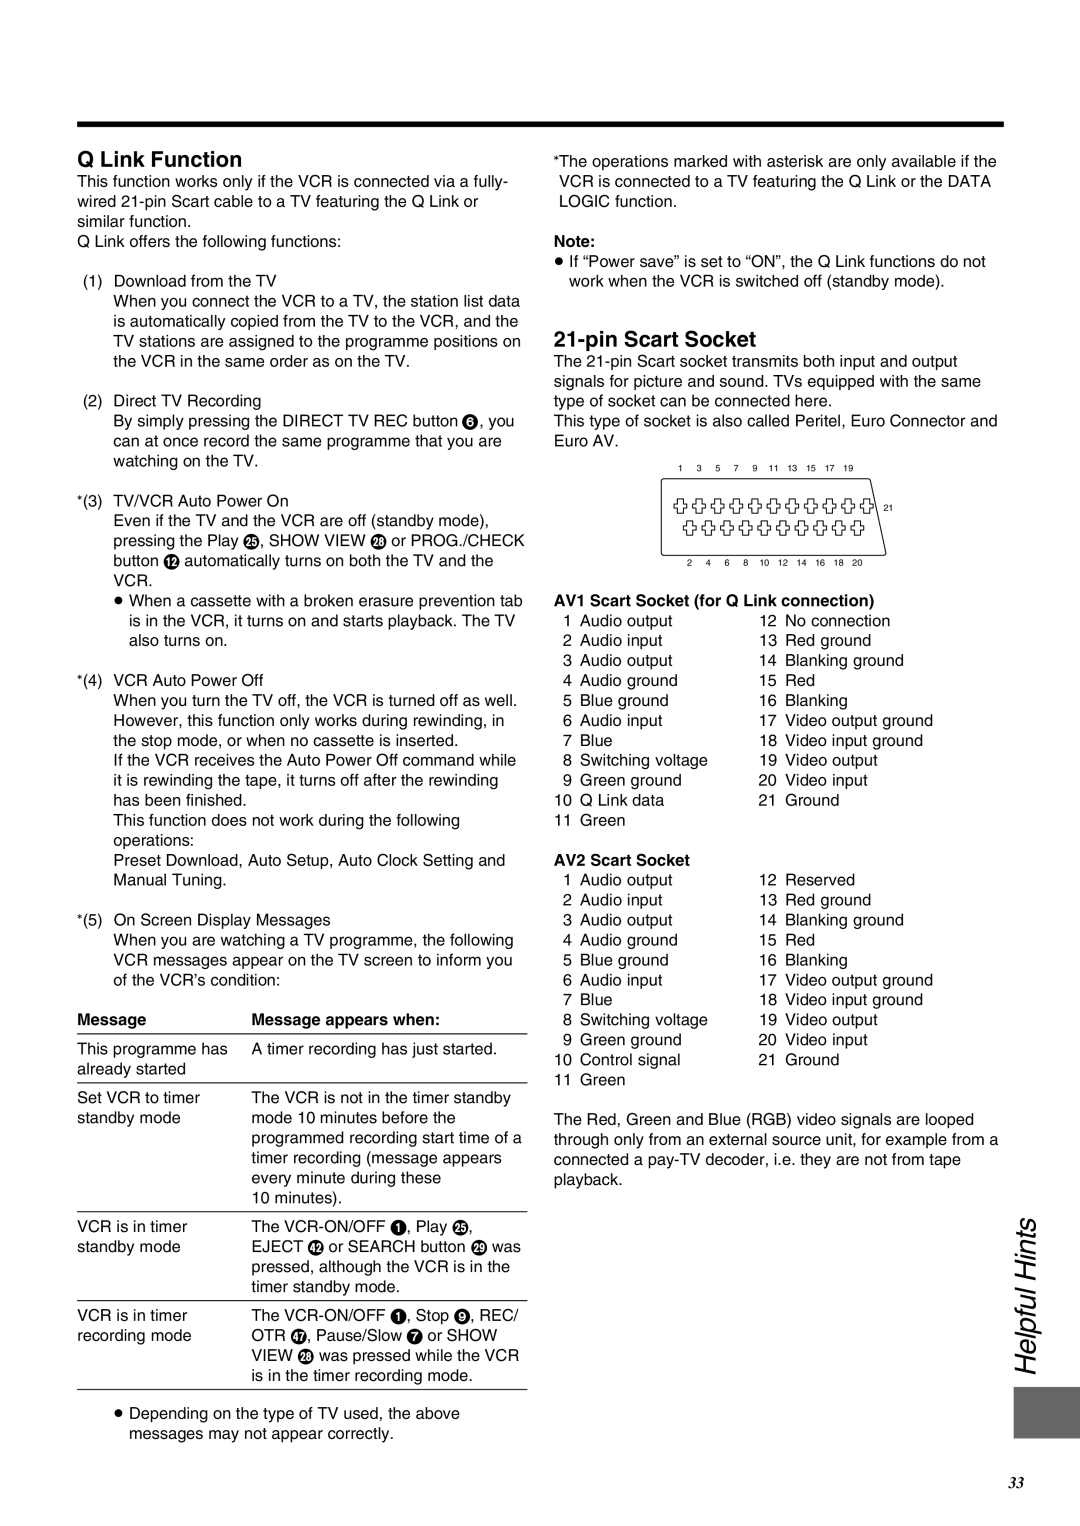
21-pin Scart Socket
The
This type of socket is also called Peritel, Euro Connector and Euro AV.
13 5 7 9 11 13 15 17 19 ![]() 21
21
2 4 6 8 10 12 14 16 18 20
AV1 Scart Socket (for Q Link connection)
1 | Audio output | 12 | No connection |
2 | Audio input | 13 | Red ground |
3 | Audio output | 14 | Blanking ground |
4 | Audio ground | 15 | Red |
5 | Blue ground | 16 | Blanking |
6 | Audio input | 17 | Video output ground |
7 | Blue | 18 | Video input ground |
8 | Switching voltage | 19 | Video output |
9 | Green ground | 20 | Video input |
10 | Q Link data | 21 | Ground |
11 | Green |
|
|
AV2 Scart Socket |
|
| |
1 | Audio output | 12 | Reserved |
2 | Audio input | 13 | Red ground |
3 | Audio output | 14 | Blanking ground |
4 | Audio ground | 15 | Red |
5 | Blue ground | 16 | Blanking |
6 | Audio input | 17 | Video output ground |
7 | Blue | 18 | Video input ground |
8 | Switching voltage | 19 | Video output |
9 | Green ground | 20 | Video input |
10 | Control signal | 21 | Ground |
11 | Green |
|
|
The Red, Green and Blue (RGB) video signals are looped through only from an external source unit, for example from a connected a
Helpful Hints
33