Location and function of each part
Projector <Top, right and front> |
| |
$ | # | 0 |
|
| / |
% |
| . |
|
| |
& |
| - |
' |
| |
| % | |
( |
| |
|
| |
) |
| , |
| * +'& |
|
Projector <Back and bottom> |
| Preparation |
# ' |
| |
|
| |
$ | & |
|
|
| |
| % |
|
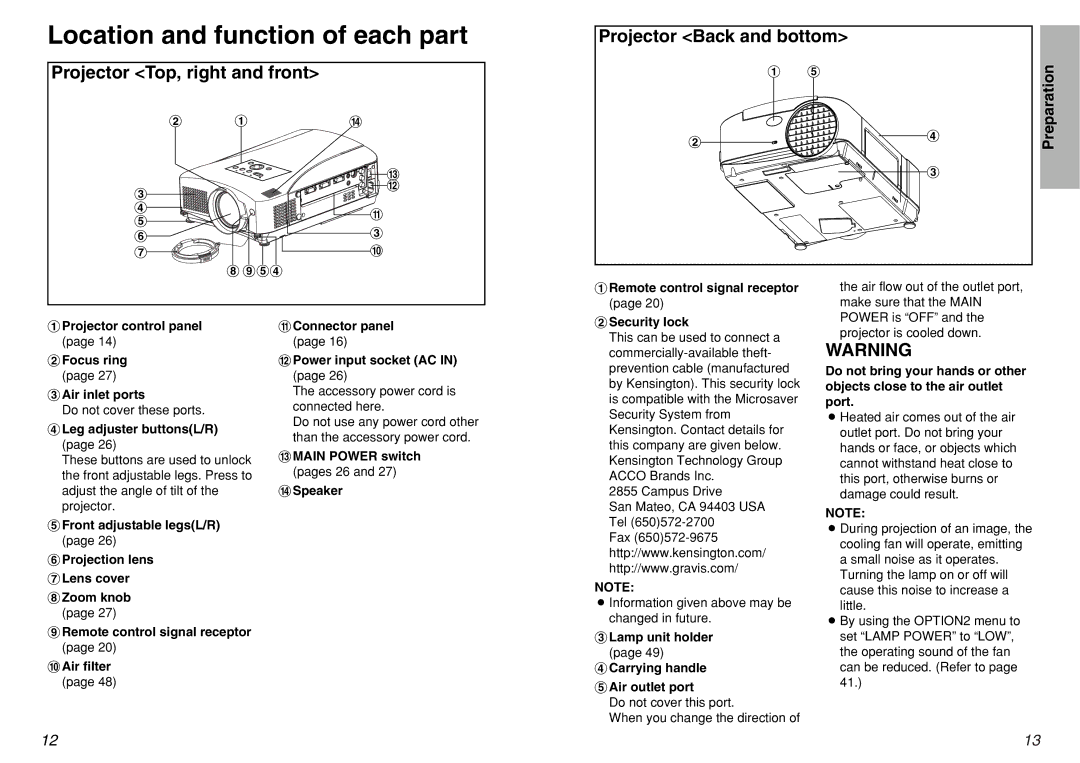
#Remote control signal receptor (page 20)
the air flow out of the outlet port, make sure that the MAIN
#Projector control panel (page 14)
$Focus ring (page 27)
%Air inlet ports
Do not cover these ports.
&Leg adjuster buttons(L/R) (page 26)
These buttons are used to unlock the front adjustable legs. Press to adjust the angle of tilt of the projector.
'Front adjustable legs(L/R) (page 26)
(Projection lens
)Lens cover
*Zoom knob (page 27)
+Remote control signal receptor (page 20)
,Air filter (page 48)
-Connector panel (page 16)
.Power input socket (AC IN) (page 26)
The accessory power cord is connected here.
Do not use any power cord other than the accessory power cord.
/MAIN POWER switch (pages 26 and 27)
0Speaker
$Security lock
This can be used to connect a
2855 Campus Drive
San Mateo, CA 94403 USA Tel
Fax
NOTE:
BInformation given above may be changed in future.
%Lamp unit holder (page 49)
&Carrying handle
'Air outlet port
Do not cover this port.
When you change the direction of
POWER is “OFF” and the projector is cooled down.
WARNING
Do not bring your hands or other objects close to the air outlet port.
BHeated air comes out of the air outlet port. Do not bring your hands or face, or objects which cannot withstand heat close to this port, otherwise burns or damage could result.
NOTE:
BDuring projection of an image, the cooling fan will operate, emitting a small noise as it operates. Turning the lamp on or off will cause this noise to increase a little.
BBy using the OPTION2 menu to set “LAMP POWER” to “LOW”, the operating sound of the fan can be reduced. (Refer to page 41.)
12 | 13 |
