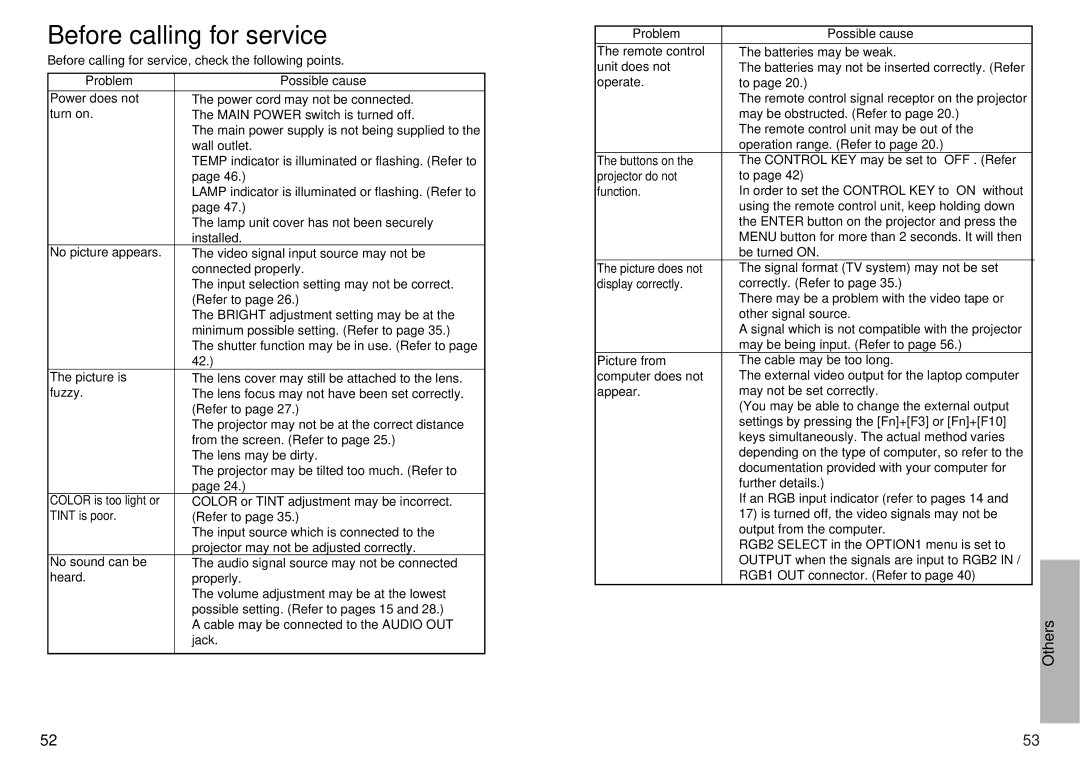
Before calling for service
Before calling for service, check the following points.
Problem | Possible cause |
|
|
Power does not | BThe power cord may not be connected. |
turn on. | BThe MAIN POWER switch is turned off. |
| BThe main power supply is not being supplied to the |
| wall outlet. |
| BTEMP indicator is illuminated or flashing. (Refer to |
| page 46.) |
| BLAMP indicator is illuminated or flashing. (Refer to |
| page 47.) |
| BThe lamp unit cover has not been securely |
| installed. |
No picture appears. | BThe video signal input source may not be |
| connected properly. |
| BThe input selection setting may not be correct. |
| (Refer to page 26.) |
| BThe BRIGHT adjustment setting may be at the |
| minimum possible setting. (Refer to page 35.) |
| BThe shutter function may be in use. (Refer to page |
| 42.) |
The picture is | BThe lens cover may still be attached to the lens. |
fuzzy. | BThe lens focus may not have been set correctly. |
| (Refer to page 27.) |
| BThe projector may not be at the correct distance |
| from the screen. (Refer to page 25.) |
| BThe lens may be dirty. |
| BThe projector may be tilted too much. (Refer to |
| page 24.) |
COLOR is too light or | BCOLOR or TINT adjustment may be incorrect. |
TINT is poor. | (Refer to page 35.) |
| BThe input source which is connected to the |
| projector may not be adjusted correctly. |
No sound can be | BThe audio signal source may not be connected |
heard. | properly. |
| BThe volume adjustment may be at the lowest |
| possible setting. (Refer to pages 15 and 28.) |
| BA cable may be connected to the AUDIO OUT |
| jack. |
|
|
Problem | Possible cause |
|
|
|
|
The remote control | BThe batteries may be weak. |
|
unit does not | BThe batteries may not be inserted correctly. (Refer |
|
operate. | to page 20.) |
|
| BThe remote control signal receptor on the projector |
|
| may be obstructed. (Refer to page 20.) |
|
| BThe remote control unit may be out of the |
|
| operation range. (Refer to page 20.) |
|
The buttons on the | BThe CONTROL KEY may be set to “OFF”. (Refer |
|
projector do not | to page 42) |
|
function. | In order to set the CONTROL KEY to “ON” without |
|
| using the remote control unit, keep holding down |
|
| the ENTER button on the projector and press the |
|
| MENU button for more than 2 seconds. It will then |
|
| be turned ON. |
|
The picture does not | BThe signal format (TV system) may not be set |
|
display correctly. | correctly. (Refer to page 35.) |
|
| BThere may be a problem with the video tape or |
|
| other signal source. |
|
| BA signal which is not compatible with the projector |
|
| may be being input. (Refer to page 56.) |
|
Picture from | BThe cable may be too long. |
|
computer does not | BThe external video output for the laptop computer |
|
appear. | may not be set correctly. |
|
| (You may be able to change the external output |
|
| settings by pressing the [Fn]+[F3] or [Fn]+[F10] |
|
| keys simultaneously. The actual method varies |
|
| depending on the type of computer, so refer to the |
|
| documentation provided with your computer for |
|
| further details.) |
|
| BIf an RGB input indicator (refer to pages 14 and |
|
| 17) is turned off, the video signals may not be |
|
| output from the computer. |
|
| BRGB2 SELECT in the OPTION1 menu is set to |
|
| OUTPUT when the signals are input to RGB2 IN / |
|
| RGB1 OUT connector. (Refer to page 40) |
|
|
|
|
Others
52 | 53 |
