Setting up
Screen size and throw distance
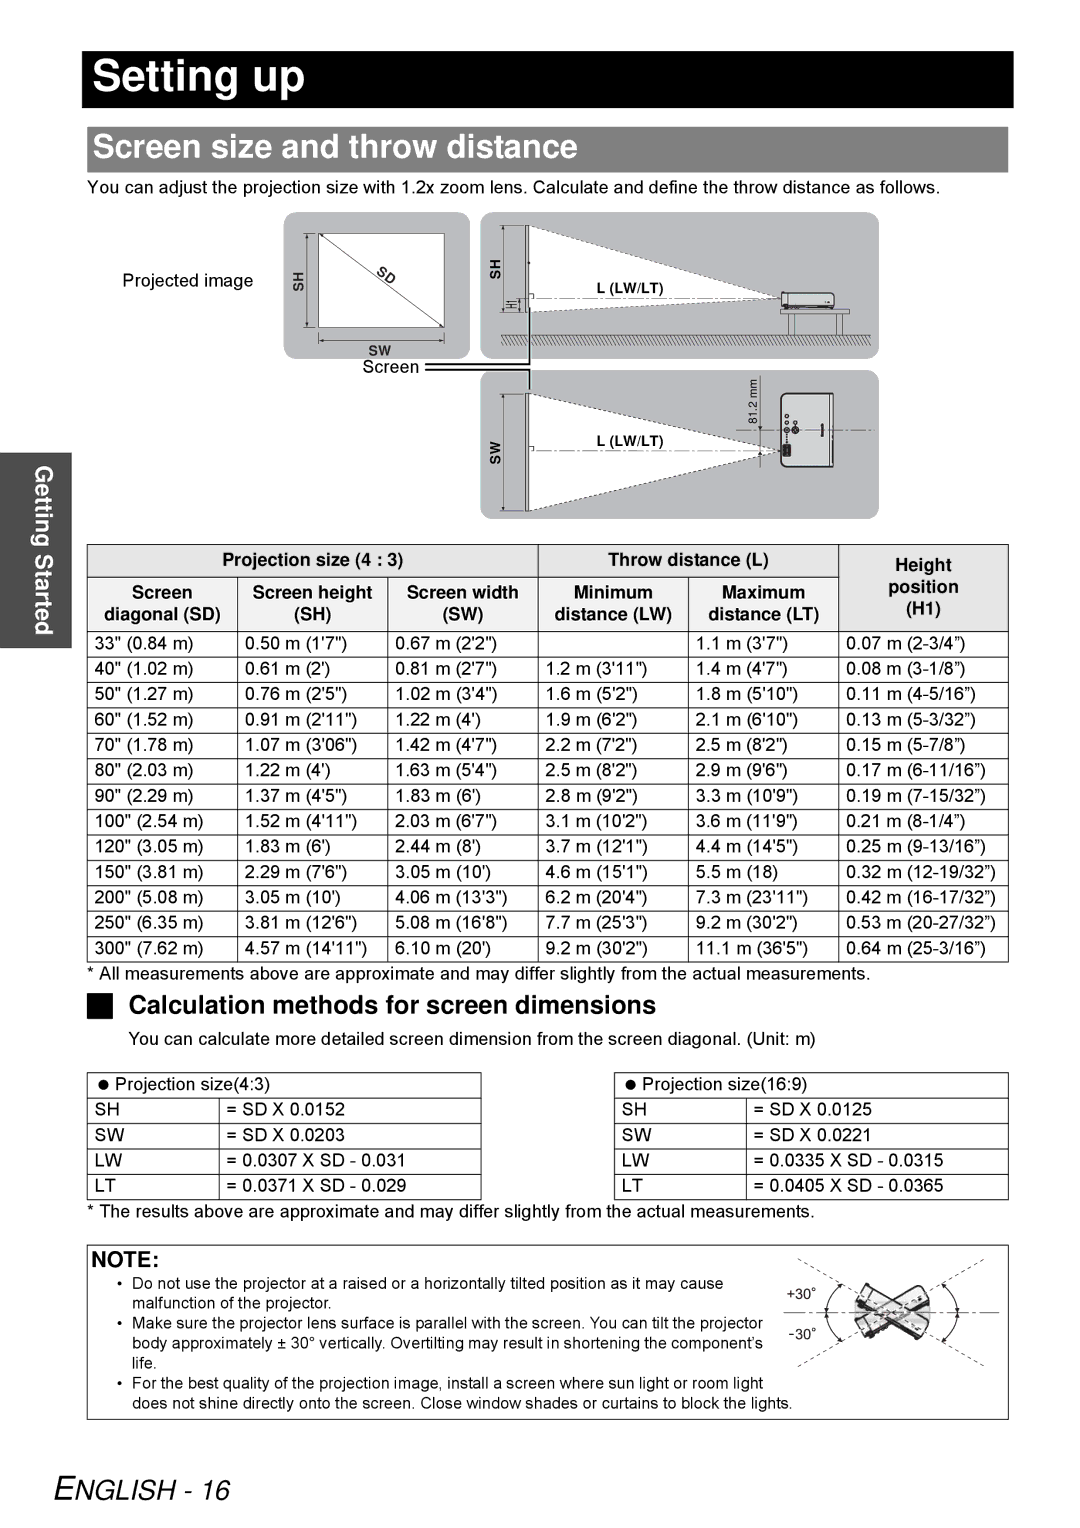
You can adjust the projection size with 1.2x zoom lens. Calculate and define the throw distance as follows.
Getting
Projected image
SH
SW
Screen
SH
H1![]()
SW
L (LW/LT)
81.2 mm
L (LW/LT)
Started
| Projection size (4 : 3) | Throw distance (L) | Height | |||
Screen |
| Screen height | Screen width | Minimum | Maximum | position |
diagonal (SD) |
| (SH) | (SW) | distance (LW) | distance (LT) | (H1) |
33" (0.84 m) |
| 0.50 m (1'7") | 0.67 m (2'2") |
| 1.1 m (3'7") | 0.07 m |
40" (1.02 m) |
| 0.61 m (2') | 0.81 m (2'7") | 1.2 m (3'11") | 1.4 m (4'7") | 0.08 m |
50" (1.27 m) |
| 0.76 m (2'5") | 1.02 m (3'4") | 1.6 m (5'2") | 1.8 m (5'10") | 0.11 m |
60" (1.52 m) |
| 0.91 m (2'11") | 1.22 m (4') | 1.9 m (6'2") | 2.1 m (6'10") | 0.13 m |
70" (1.78 m) |
| 1.07 m (3'06") | 1.42 m (4'7") | 2.2 m (7'2") | 2.5 m (8'2") | 0.15 m |
80" (2.03 m) |
| 1.22 m (4') | 1.63 m (5'4") | 2.5 m (8'2") | 2.9 m (9'6") | 0.17 m |
90" (2.29 m) |
| 1.37 m (4'5") | 1.83 m (6') | 2.8 m (9'2") | 3.3 m (10'9") | 0.19 m |
100" (2.54 m) |
| 1.52 m (4'11") | 2.03 m (6'7") | 3.1 m (10'2") | 3.6 m (11'9") | 0.21 m |
120" (3.05 m) |
| 1.83 m (6') | 2.44 m (8') | 3.7 m (12'1") | 4.4 m (14'5") | 0.25 m |
150" (3.81 m) |
| 2.29 m (7'6") | 3.05 m (10') | 4.6 m (15'1") | 5.5 m (18) | 0.32 m |
200" (5.08 m) |
| 3.05 m (10') | 4.06 m (13'3") | 6.2 m (20'4") | 7.3 m (23'11") | 0.42 m |
250" (6.35 m) |
| 3.81 m (12'6") | 5.08 m (16'8") | 7.7 m (25'3") | 9.2 m (30'2") | 0.53 m |
300" (7.62 m) |
| 4.57 m (14'11") | 6.10 m (20') | 9.2 m (30'2") | 11.1 m (36'5") | 0.64 m |
* All measurements above are approximate and may differ slightly from the actual measurements.
Calculation methods for screen dimensions
You can calculate more detailed screen dimension from the screen diagonal. (Unit: m)
Projection size(4:3) |
| Projection size(16:9) | ||
SH | = SD X 0.0152 |
| SH | = SD X 0.0125 |
SW | = SD X 0.0203 |
| SW | = SD X 0.0221 |
LW | = 0.0307 X SD - 0.031 |
| LW | = 0.0335 X SD - 0.0315 |
LT | = 0.0371 X SD - 0.029 |
| LT | = 0.0405 X SD - 0.0365 |
* The results above are approximate and may differ slightly from the actual measurements.
NOTE:
• Do not use the projector at a raised or a horizontally tilted position as it may cause malfunction of the projector.
• Make sure the projector lens surface is parallel with the screen. You can tilt the projector body approximately ± 30° vertically. Overtilting may result in shortening the component’s life.
•For the best quality of the projection image, install a screen where sun light or room light does not shine directly onto the screen. Close window shades or curtains to block the lights.