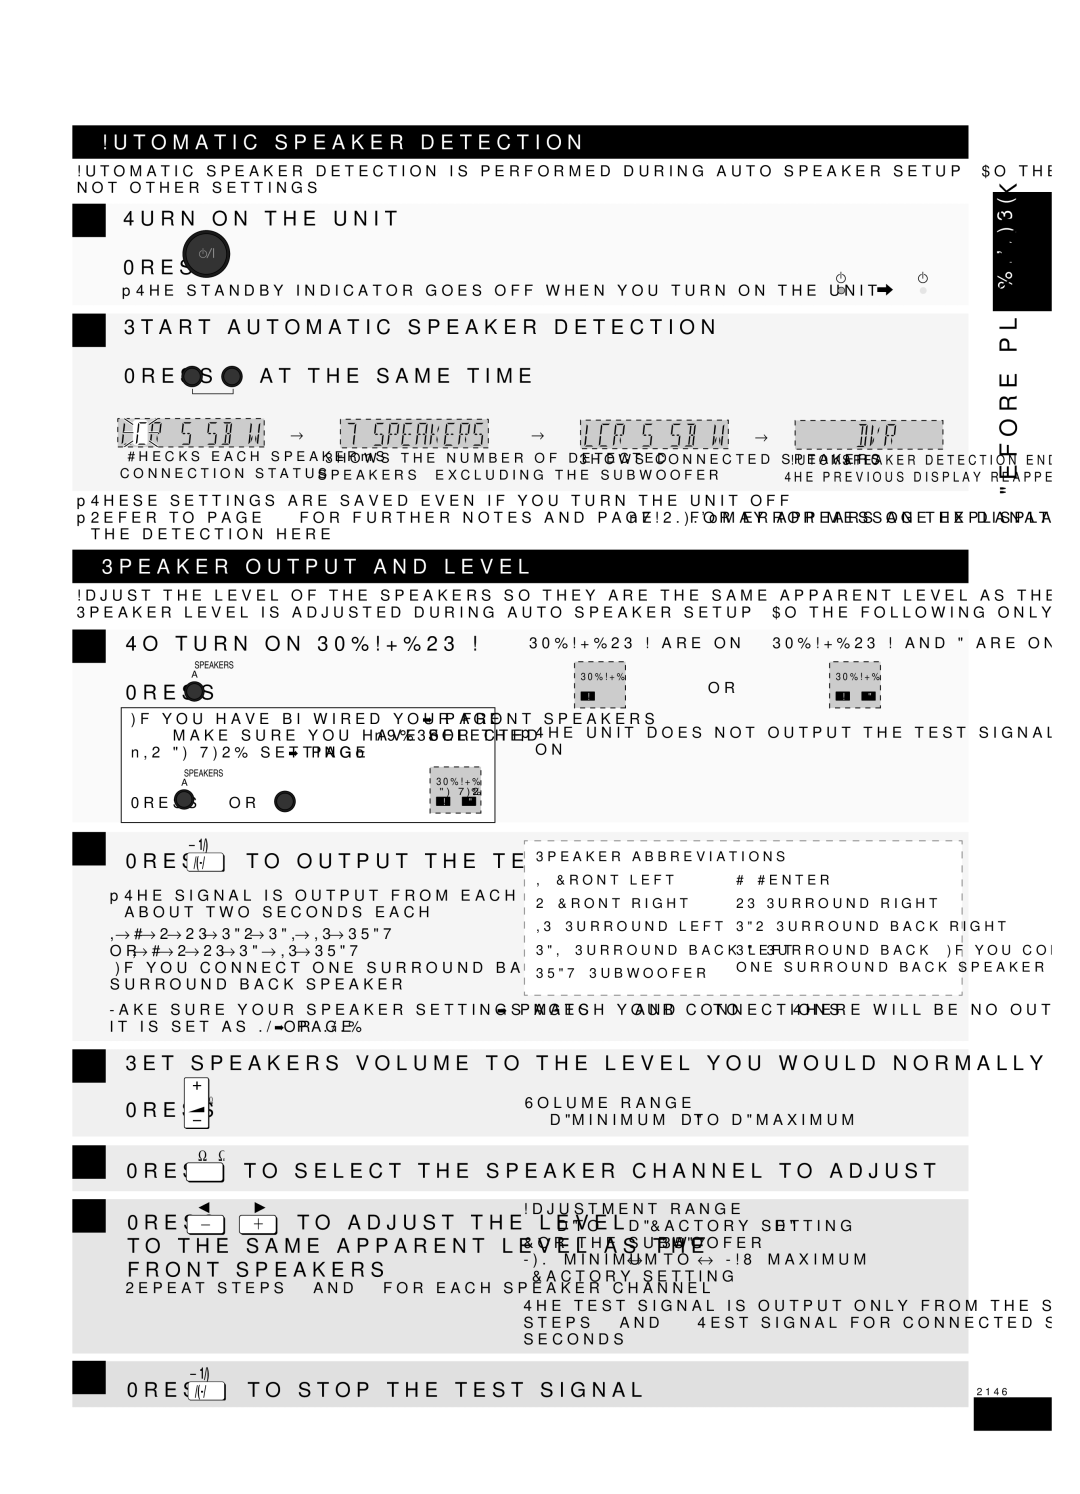
Automatic speaker detection
Automatic speaker detection is performed during auto speaker setup. Do the following only if you want to check speakers’ status, and not other settings.
1Turn on the unit.
Press ![]()
• The standby indicator goes off when you turn on the unit.
2Start automatic speaker detection.
SPEAKERS
AB
Press 
 at the same time.
AUTO DETECTOR |
|
|
|
| ↓ | ↓ | ↓ |
(Checks each speaker’s | (Shows the number of detected | (Shows connected speakers) | (Automatic speaker detection ends. |
connection status) | speakers, excluding the subwoofer) |
| The previous display reappears) |
•These settings are saved even if you turn the unit off.
•Refer to page 14 for further notes and page 16 for error message explanations. (“WARNING” may appears on the display during the detection here.)
Speaker output and level
Adjust the level of the speakers so they are the same apparent level as the front speakers from the seating area. Speaker level is adjusted during auto speaker setup. Do the following only if you find the level unsatisfactory.
Before playback ENGLISH
1To turn on SPEAKERS A.
SPEAKERS
A
Press
If you have
| SPEAKERS | SPEAKERS | SPEAKERS |
| A | B | |
Press | or |
| |
| A B |
SPEAKERS A are on |
| SPEAKERS A and B are on | |
SPEAKERS | or | SPEAKERS | |
A | A B | ||
|
•The unit does not output the test signal if only SPEAKERS B is on.
2 | Press | AUTO | to output the test signal. |
| TEST |
•The signal is output from each speaker in order for about two seconds each:
L→C→R→RS→SBR→SBL→LS→SUBW or L→C→R→RS→SB1→LS→SUBW
1If you connect one surround back speaker only (the left surround back speaker)
Speaker abbreviations |
|
L: Front left | C: Center |
R: Front right | RS: Surround right |
LS: Surround left | SBR: Surround back right |
SBL: Surround back left | SB: Surround back (If you connect |
SUBW: Subwoofer | one surround back speaker) |
|
Make sure your speaker settings match your connections (➡ pages 13, and 14 to 16). There will be no output from a speaker if it is set as NO or NONE (➡ page 27).
3Set speakers volume to the level you would normally use.
Press | VOLUME | Volume range: |
| ||
|
|
4Press LEVEL to select the speaker channel to adjust.
5 | Press |
|
| to adjust the level | Adjustment range: | |
|
| |||||
|
|
| ||||
| to the same apparent level as the | For the subwoofer (SUBW) | ||||
| front speakers. | MIN (minimum) ↔ 1 to 29 ↔ MAX (maximum) | ||||
| (Factory setting: 20 ) | |||||
| Repeat steps 4 and 5 for each speaker channel. |
|
| |||
|
|
|
|
| The test signal is output only from the speaker you are adjusting in | |
|
|
|
|
| steps 4 and 5. Test signal for connected speakers resumes after 2 | |
|
|
|
|
| seconds. | |
|
|
|
|
|
|
|
6 | Press |
| AUTO | to stop the test signal. |
|
|
|
|
|
| |||
| TEST |
| RQTV0247 | |||
17
