
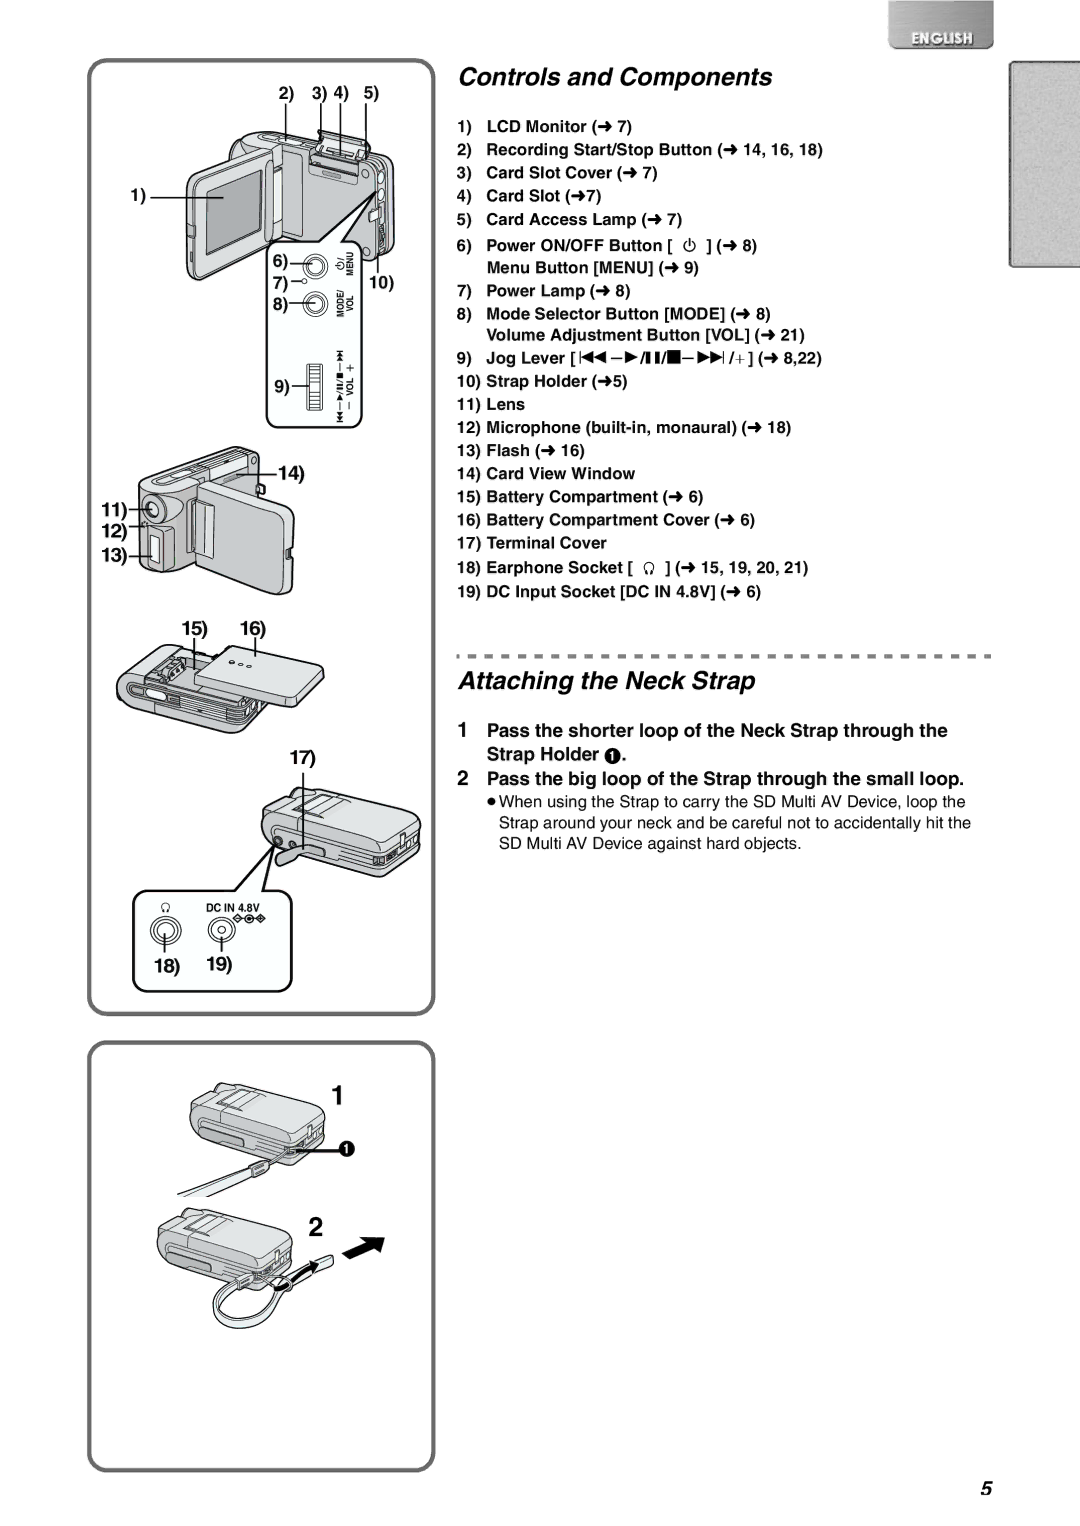
SV-AV10EN, SV-AV10B, SV-AV10E specifications
The Panasonic SV-AV10E, SV-AV10B, and SV-AV10EN are portable digital audio and video recorders designed to cater to various multimedia needs. These compact devices are well-regarded for their versatility and user-friendly features, making them suitable for amateur and professional use alike.One of the main features of the SV-AV10 series is its ability to record high-quality video and audio in a portable format. With a built-in MPEG-4 compression system, these devices allow users to capture and store video and audio without sacrificing quality. The compact design makes them easy to carry, ensuring that users can document important moments or create content wherever they may be.
Another laudable characteristic of the SV-AV10E, SV-AV10B, and SV-AV10EN is their long battery life, offering users extended recording times. This is particularly beneficial for outdoor events, lectures, or travel situations where charging facilities may not be readily available. The quick-charge technology allows for minimal downtime, ensuring that the device remains ready for use when needed.
The devices feature an intuitive LCD screen, enabling users to easily navigate menus and settings. The screen allows for playback, enabling quick reviews of footage without the need for additional equipment. Additionally, they support multiple recording formats, providing flexibility for various applications, from casual recording to more professional setups.
The SV-AV10 series also includes integrated editing features, enabling users to cut and trim their videos on-the-fly. This functionality is particularly appealing for content creators who need to produce quick edits or revisions while on the move. Moreover, the inclusion of built-in effects offers users creative options to enhance their recordings.
Connectivity options are another highlight. The SV-AV10 series supports USB connectivity, allowing users to easily transfer files to computers or other devices for editing and sharing. This seamless transfer makes it simple to archive important memories or create multimedia presentations.
The compact design of the SV-AV10 series, available in multiple colors such as silver and black, also makes them aesthetically pleasing. Their lightweight construction ensures that they won’t be a burden when traveling, appealing to users who value portability.
In conclusion, the Panasonic SV-AV10E, SV-AV10B, and SV-AV10EN are versatile, user-friendly multimedia devices. With their high-quality recording capabilities, long battery life, and integrated editing features, they are ideal for anyone looking to capture and produce high-quality audio and video content while on the go.