Set up for Portrait
5 | Viewing Area / Location |
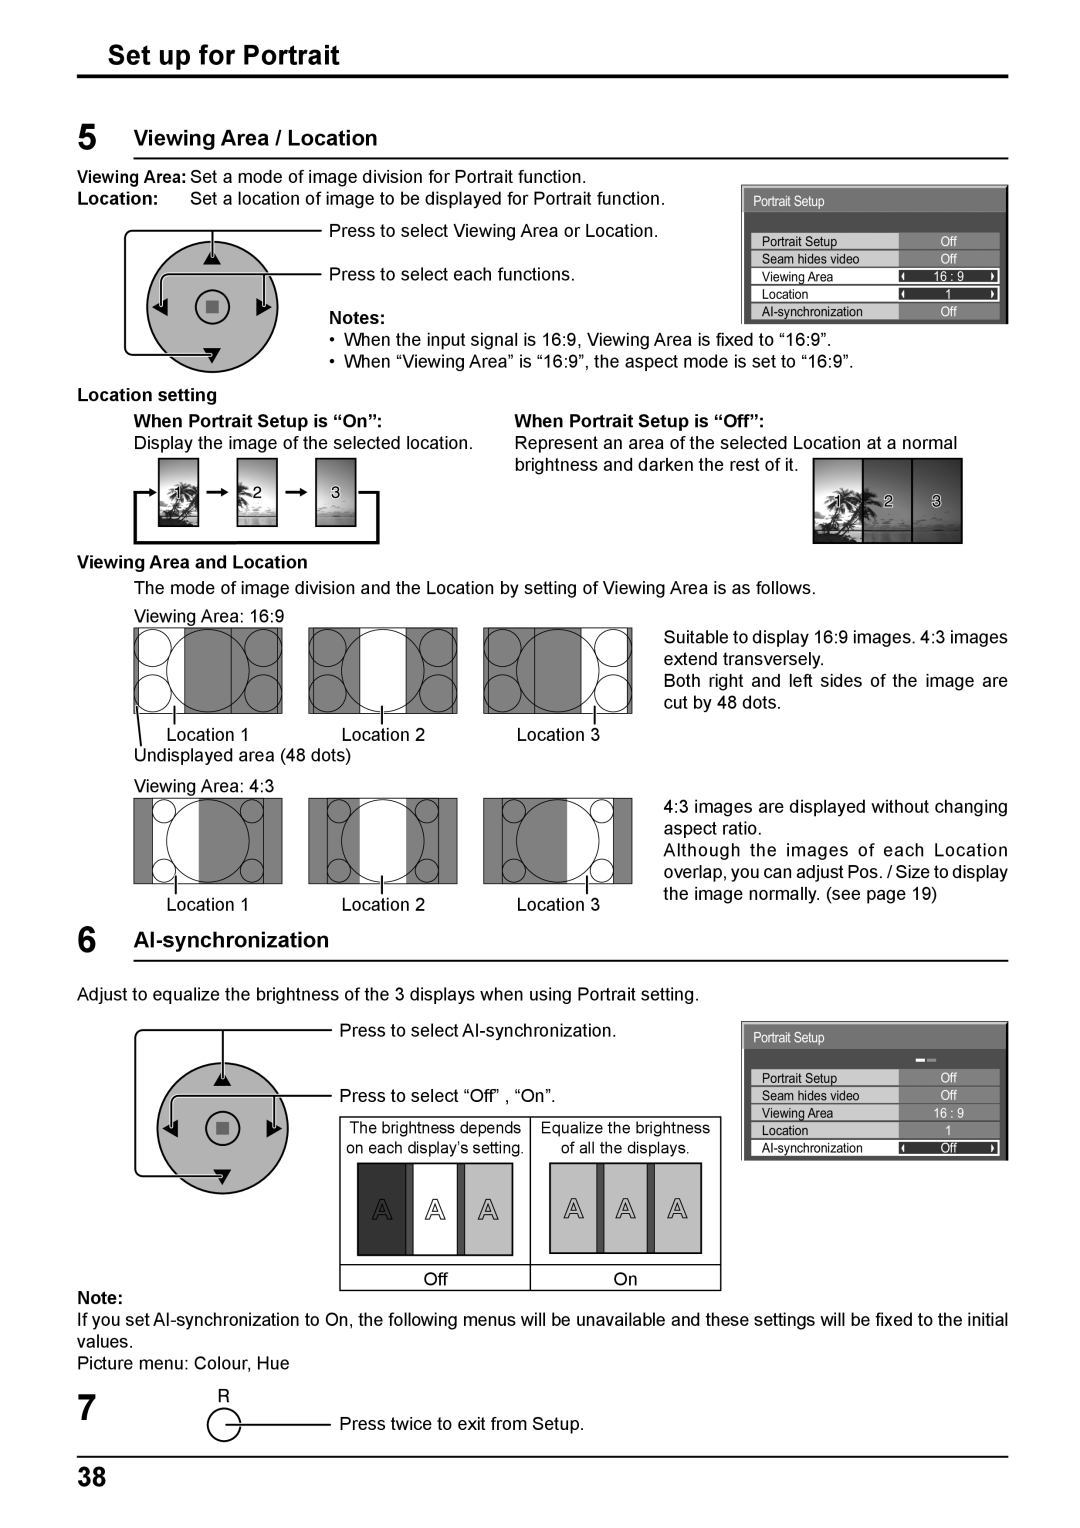
Viewing Area: Set a mode of image division for Portrait function. |
|
|
|
|
| |
Location: | Set a location of image to be displayed for Portrait function. |
| Portrait Setup |
|
|
|
| Press to select Viewing Area or Location. |
|
|
|
|
|
|
| Portrait Setup | Off |
|
| |
|
|
|
| |||
|
|
|
|
|
|
|
| Press to select each functions. |
| Seam hides video | Off |
|
|
|
| Viewing Area | 16 : 9 |
|
| |
|
|
| Location | 1 |
|
|
|
|
|
|
|
|
|
|
|
| Off |
|
| |
|
|
|
|
|
|
|
When Portrait Setup is “On”:
Display the image of the selected location.
When Portrait Setup is “Off”:
Represent an area of the selected Location at a normal brightness and darken the rest of it.
Viewing Area and Location
The mode of image division and the Location by setting of Viewing Area is as follows.
Viewing Area: 16:9
Location 1 | Location 2 | Location 3 |
Undisplayed area (48 dots)
Viewing Area: 4:3
Location 1 | Location 2 | Location 3 |
Suitable to display 16:9 images. 4:3 images extend transversely.
Both right and left sides of the image are cut by 48 dots.
4:3 images are displayed without changing aspect ratio.
Although the images of each Location overlap, you can adjust Pos. / Size to display the image normally. (see page 19)
6 AI-synchronization
Adjust to equalize the brightness of the 3 displays when using Portrait setting.
Press to select
Press to select “Off” , “On”.
The brightness depends | Equalize the brightness |
on each display’s setting. | of all the displays. |
Off | On |
Note:
If you set
Picture menu: Colour, Hue
Portrait Setup
Portrait Setup | Off |
|
|
Seam hides video | Off |
|
|
Viewing Area | 16 : 9 |
|
|
Location | 1 |
|
|
Off |
settings will be fixed to the initial
7 |
| Press twice to exit from Setup. |
|
38
