Picture Adjustments |
|
|
|
| ||
1 | PICTURE |
|
|
|
| |
|
|
|
|
| ||
|
| Press to display the Picture menu. |
|
|
| |
2 Select to adjust each item. |
|
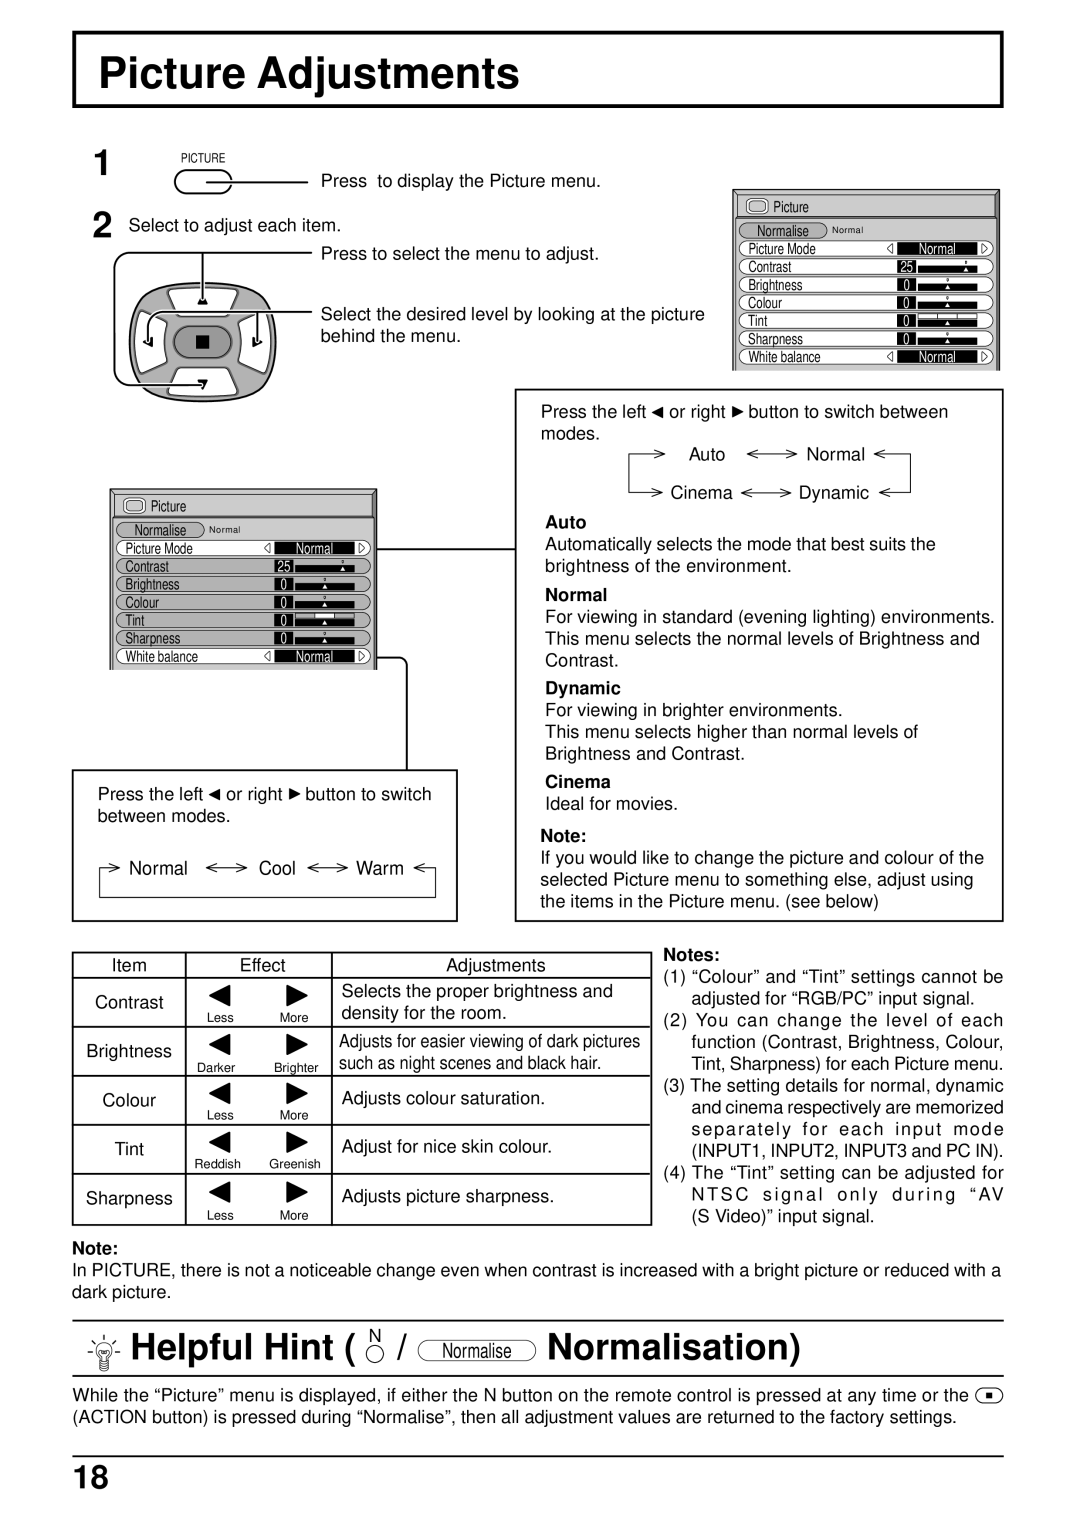
| Picture |
| ||
|
| Normalise | Normal | |||
|
| Press to select the menu to adjust. |
| Picture Mode | Normal | |
|
|
|
|
| Contrast | 25 |
|
|
|
|
| Brightness | 0 |
|
| Select the desired level by looking at the picture | Colour | 0 | ||
|
| Tint | 0 | |||
|
| behind the menu. |
|
| ||
|
|
|
| Sharpness | 0 | |
|
|
|
|
| White balance | Normal |
|
|
| Press the left | or right | button to switch between | |
|
|
| modes. | Auto | Normal | |
|
|
|
| |||
| Picture |
|
| Cinema | Dynamic | |
|
| Auto |
|
|
| |
| Normalise | Normal |
|
|
| |
| Automatically selects the mode that best suits the | |||||
| Picture Mode | Normal | ||||
| Contrast | 25 | brightness of the environment. |
| ||
| Brightness | 0 | Normal |
|
|
|
| Colour | 0 |
|
|
| |
| For viewing in standard (evening lighting) environments. | |||||
| Tint | 0 | ||||
| Sharpness | 0 | This menu selects the normal levels of Brightness and | |||
| White balance | Normal | Contrast. |
|
|
|
|
|
| Dynamic |
|
|
|
|
|
| For viewing in brighter environments. | |||
|
|
| This menu selects higher than normal levels of | |||
|
|
| Brightness and Contrast. |
|
| |
Press the left | or right | button to switch | Cinema | |
Ideal for movies. | ||||
between modes. |
| |||
| Note: | |||
|
|
| ||
Normal | Cool | Warm | If you would like to change the picture and colour of the | |
selected Picture menu to something else, adjust using | ||||
|
|
| ||
|
|
| the items in the Picture menu. (see below) | |
|
|
|
| |
Item | Effect | Adjustments | ||
Contrast |
|
| Selects the proper brightness and | |
Less | More | density for the room. | ||
| ||||
Brightness |
|
| Adjusts for easier viewing of dark pictures | |
Darker | Brighter | such as night scenes and black hair. | ||
| ||||
Colour | Less | More | Adjusts colour saturation. | |
|
| |||
Tint | Reddish | Greenish | Adjust for nice skin colour. | |
|
| |||
Sharpness | Less | More | Adjusts picture sharpness. | |
|
| |||
|
|
|
| |
Notes:
(1)“Colour” and “Tint” settings cannot be adjusted for “RGB/PC” input signal.
(2)You can change the level of each function (Contrast, Brightness, Colour, Tint, Sharpness) for each Picture menu.
(3)The setting details for normal, dynamic and cinema respectively are memorized separately for each input mode (INPUT1, INPUT2, INPUT3 and PC IN).
(4)The “Tint” setting can be adjusted for
N T S C s i g n a l o n l y d u r i n g “ AV (S Video)” input signal.
Note:
In PICTURE, there is not a noticeable change even when contrast is increased with a bright picture or reduced with a dark picture.
 Helpful Hint ( N / Normalise Normalisation)
While the “Picture” menu is displayed, if either the N button on the remote control is pressed at any time or the ![]() (ACTION button) is pressed during “Normalise”, then all adjustment values are returned to the factory settings.
(ACTION button) is pressed during “Normalise”, then all adjustment values are returned to the factory settings.
18