
TH-65PX600U specifications
The Panasonic TH-65PX600U is a standout plasma television that has made waves since its introduction in the market. Designed for those who seek an exceptional home theater experience, this model offers a stunning 65-inch display that promises vibrant colors, deep blacks, and sharp images.One of the key features of the TH-65PX600U is its high-definition resolution of 1080p, capable of delivering crisp and lifelike visuals that pull viewers into the action. The plasma technology employed in this television allows for superior color accuracy and a wide viewing angle, ensuring that whether you are sitting directly in front or off to the side, the picture quality remains impressive.
The display boasts a contrast ratio that reaches optimal levels, resulting in images that feature stunning detail, especially in darker scenes. This characteristic is attributed to the self-illuminating pixels in plasma technology, which enable complete control over individual pixels, providing rich dark tones and bright highlights.
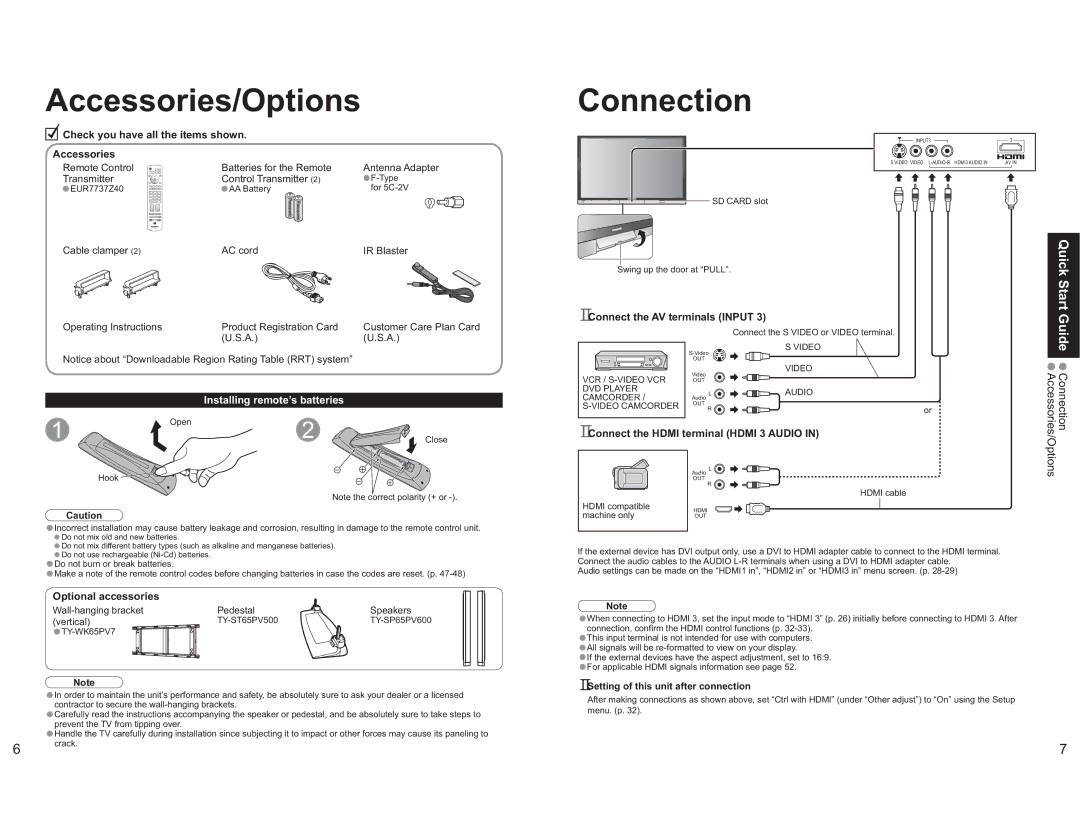
In addition to its impressive display capabilities, the Panasonic TH-65PX600U is equipped with a range of connectivity options. It features HDMI inputs, making it easy to connect to various high-definition devices like Blu-ray players, gaming consoles, and streaming media devices. The TV also supports component and composite video inputs, offering flexibility for connecting older devices.
The model incorporates Panasonic’s Advanced Plasma Display Panel technology, which enhances overall image processing and reduces the effects of motion blur. This is particularly beneficial for watching fast-paced content such as sports or action movies, allowing for smooth visuals that do not detract from the viewer’s experience.
Another notable characteristic is its sleek design, which fits seamlessly into modern living spaces. It combines a stylish aesthetic with practical functionality, making it both a visual and functional centerpiece.
Sound quality is also addressed in the TH-65PX600U, featuring a built-in speaker system that provides clear audio to accompany the stunning visuals.
Overall, the Panasonic TH-65PX600U is an exemplary model that encapsulates advanced technology and user-friendly features. With its excellent display quality, robust connectivity, and elegant design, it remains a compelling choice for home entertainment enthusiasts seeking a high-quality plasma TV experience.