| 43 1/2 X |
|
6 |
|
|
32 |
| 14 |
|
| |
32 |
| 16 |
|
| |
33 |
| 21 |
| 9 | |
| 14 | |
|
| |
8 |
|
|
|
| REVERSE VIEW |
|
| FOR ASSEMBLY |
|
| 6 |
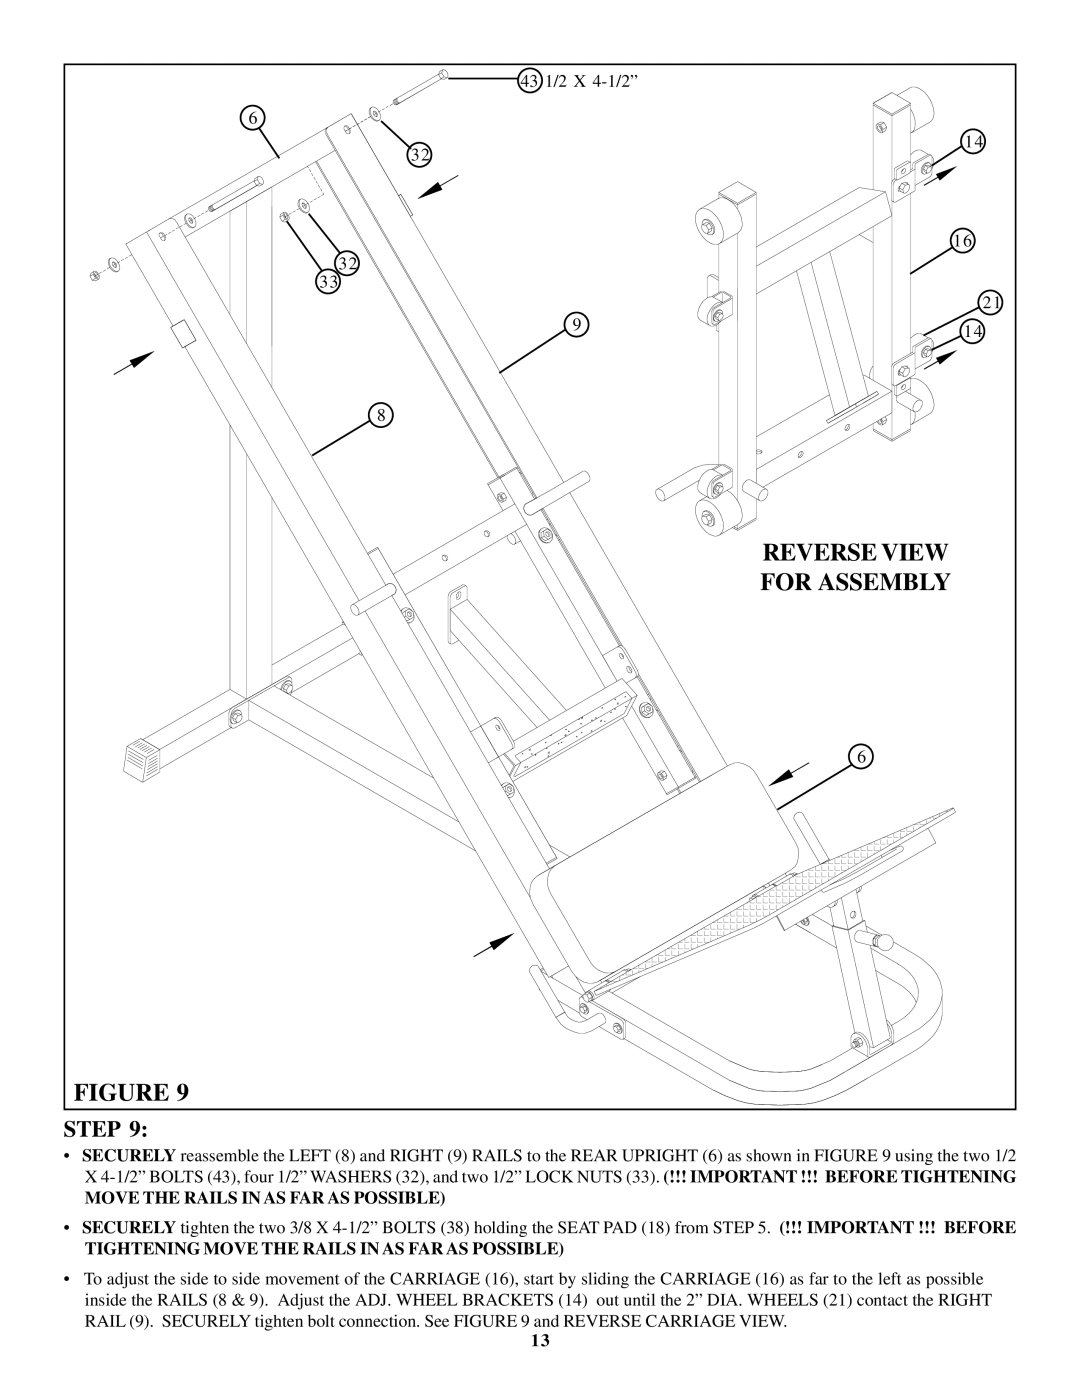
FIGURE 9 |
|
|
STEP 9:
•SECURELY reassemble the LEFT (8) and RIGHT (9) RAILS to the REAR UPRIGHT (6) as shown in FIGURE 9 using the two 1/2 X
MOVE THE RAILS IN AS FAR AS POSSIBLE)
•SECURELY tighten the two 3/8 X
TIGHTENING MOVE THE RAILS IN AS FAR AS POSSIBLE)
•To adjust the side to side movement of the CARRIAGE (16), start by sliding the CARRIAGE (16) as far to the left as possible inside the RAILS (8 & 9). Adjust the ADJ. WHEEL BRACKETS (14) out until the 2” DIA. WHEELS (21) contact the RIGHT
RAIL (9). SECURELY tighten bolt connection. See FIGURE 9 and REVERSE CARRIAGE VIEW.
13