| 44 1/2 X 5” |
1 | 46 |
| |
| 11 |
46 | 33 |
| |
44 1/2 X 5” |
|
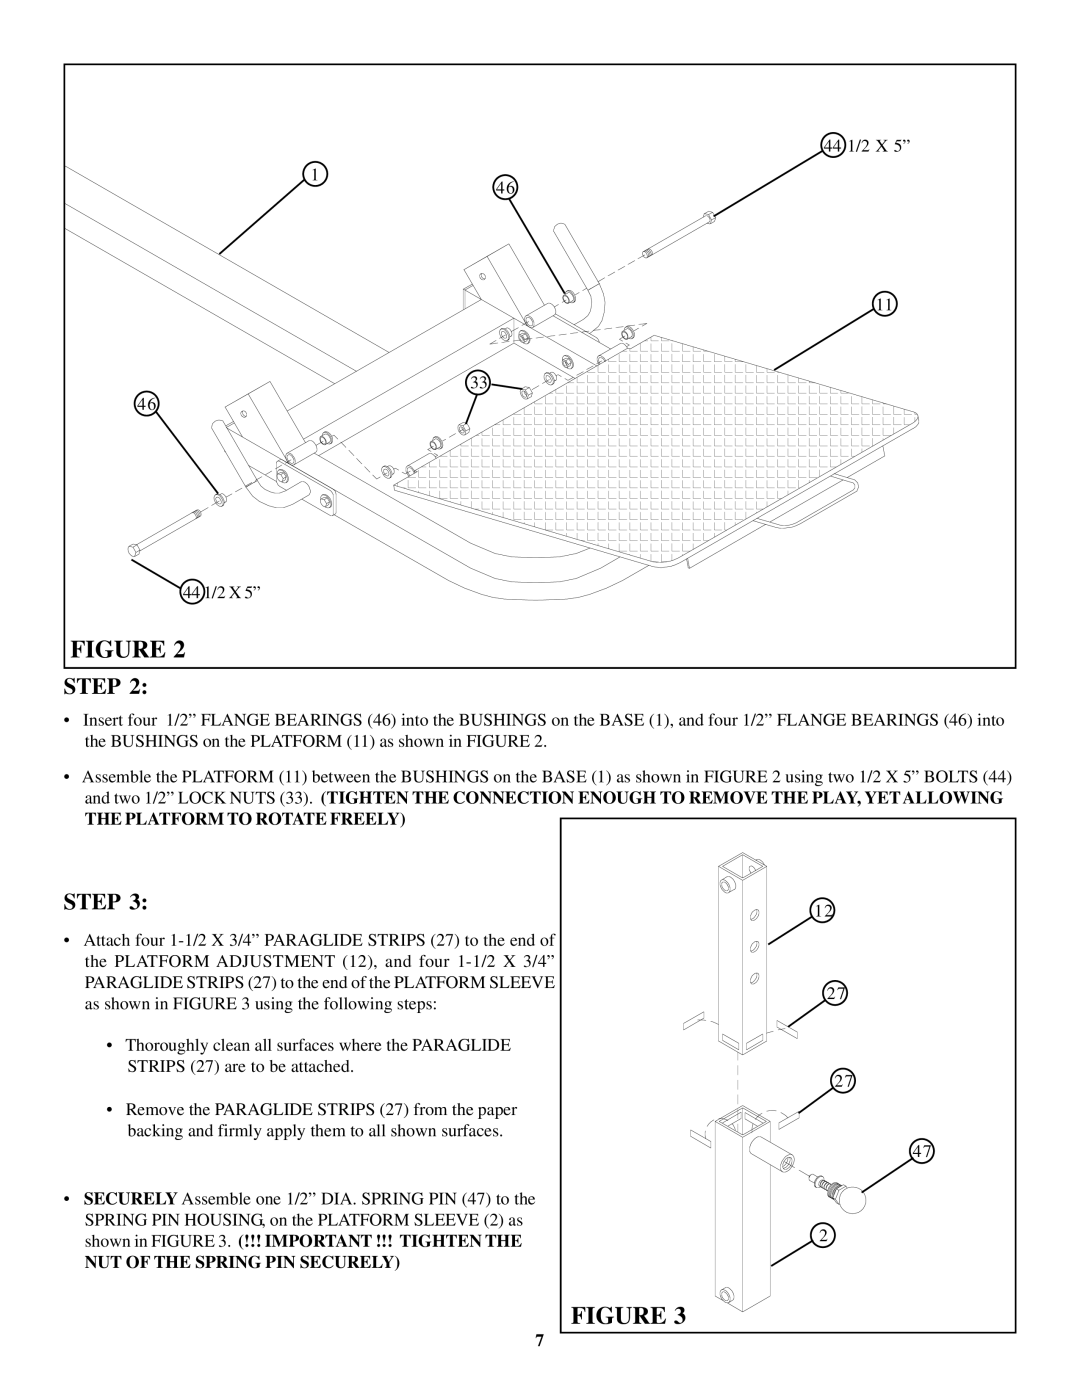
FIGURE 2 |
|
STEP 2:
•Insert four 1/2” FLANGE BEARINGS (46) into the BUSHINGS on the BASE (1), and four 1/2” FLANGE BEARINGS (46) into the BUSHINGS on the PLATFORM (11) as shown in FIGURE 2.
•Assemble the PLATFORM (11) between the BUSHINGS on the BASE (1) as shown in FIGURE 2 using two 1/2 X 5” BOLTS (44) and two 1/2” LOCK NUTS (33). (TIGHTEN THE CONNECTION ENOUGH TO REMOVE THE PLAY, YET ALLOWING
THE PLATFORM TO ROTATE FREELY)
STEP 3: | 12 | |
• Attach four |
| |
the PLATFORM ADJUSTMENT (12), and four |
| |
PARAGLIDE STRIPS (27) to the end of the PLATFORM SLEEVE | 27 | |
as shown in FIGURE 3 using the following steps: | ||
| ||
• Thoroughly clean all surfaces where the PARAGLIDE |
| |
STRIPS (27) are to be attached. | 27 | |
|
•Remove the PARAGLIDE STRIPS (27) from the paper backing and firmly apply them to all shown surfaces.
47
• SECURELY Assemble one 1/2” DIA. SPRING PIN (47) to the |
|
SPRING PIN HOUSING, on the PLATFORM SLEEVE (2) as | 2 |
shown in FIGURE 3. (!!! IMPORTANT !!! TIGHTEN THE | |
NUT OF THE SPRING PIN SECURELY) |
|
FIGURE 3
7