Connection
≥Do not place the unit on amplifiers/receiver or equipment that may become hot. The heat can damage the unit.
≥Do not connect through the video cassette recorder. Due to copy guard protection, the picture may not be displayed properly. ≥Turn off all equipment before connection and read the appropriate operating instructions.
≥Please use High Speed HDMI Cables that have the HDMI logo (as shown on the cover). It is recommended that you use Panasonic’s HDMI cable.
Recommended part number:
≥When outputting 1080p signal, please use HDMI cables 5.0 meters or less.
\For\the\United\Kingdom\and\Republic\of\Ireland\only\
BE SURE TO READ THE CAUTION FOR THE AC MAINS LEAD ON PAGE 2 BEFORE CONNECTION.

 Connecting to a television
The image quality improves in a sequence of connections C, B, A, given below.
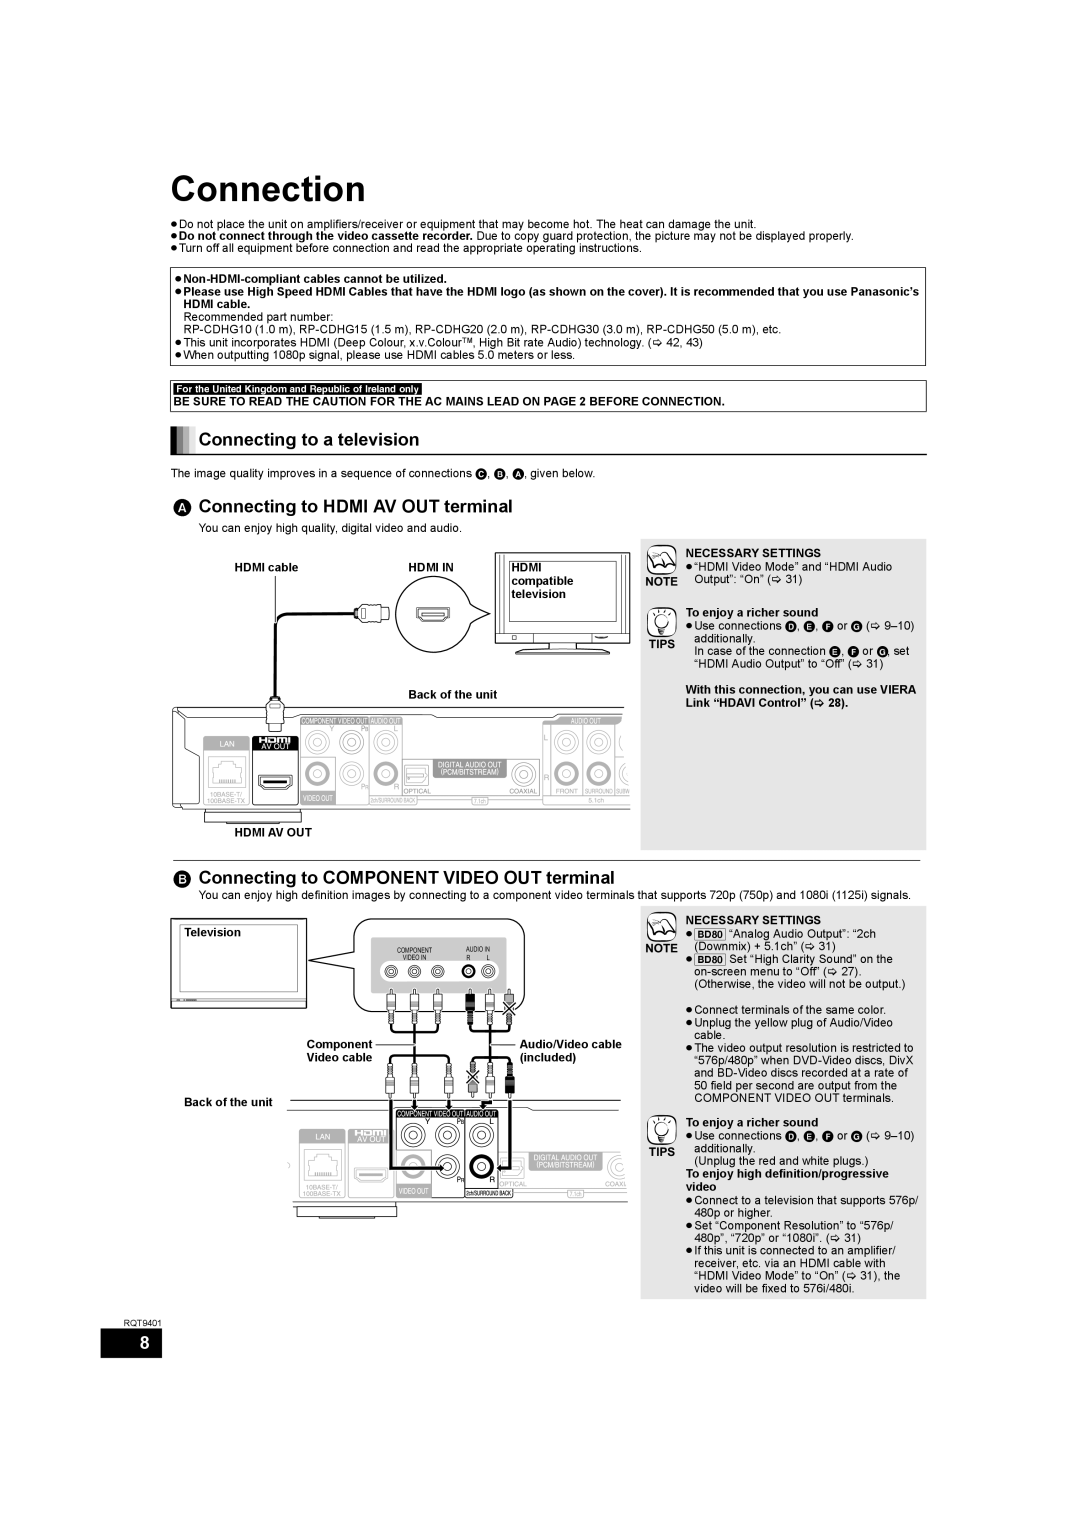
AConnecting to HDMI AV OUT terminal
You can enjoy high quality, digital video and audio.
HDMI cable |
|
|
| HDMI IN | |||
|
|
|
|
|
|
|
|
|
|
|
|
|
|
|
|
Back of the unit
HDMI compatible television
NOTE
TIPS
NECESSARY SETTINGS
≥“HDMI Video Mode” and “HDMI Audio
Output”: “On” ( 31)
To enjoy a richer sound
≥Use connections D, E, F or G (
In case of the connection E, F or G, set “HDMI Audio Output” to “Off” ( 31)
With this connection, you can use VIERA Link “HDAVI Control” ( 28).
HDMI AV OUT
BConnecting to COMPONENT VIDEO OUT terminal
You can enjoy high definition images by connecting to a component video terminals that supports 720p (750p) and 1080i (1125i) signals.
Television
Back of the unit
COMPONENT | AUDIO IN | NOTE |
VIDEO IN | R L |
|
Component | Audio/Video cable |
Video cable | (included) |
TIPS
NECESSARY SETTINGS
≥[BD80] “Analog Audio Output”: “2ch
(Downmix) + 5.1ch” ( 31)
≥[BD80] Set “High Clarity Sound” on the
≥Connect terminals of the same color. ≥Unplug the yellow plug of Audio/Video
cable.
≥The video output resolution is restricted to “576p/480p” when
To enjoy a richer sound
≥Use connections D, E, F or G (
(Unplug the red and white plugs.)
To enjoy high definition/progressive video
≥Connect to a television that supports 576p/ 480p or higher.
≥Set “Component Resolution” to “576p/
480p”, “720p” or “1080i”. ( 31)
≥If this unit is connected to an amplifier/
receiver, etc. via an HDMI cable with “HDMI Video Mode” to “On” ( 31), the video will be fixed to 576i/480i.
RQT9401
8